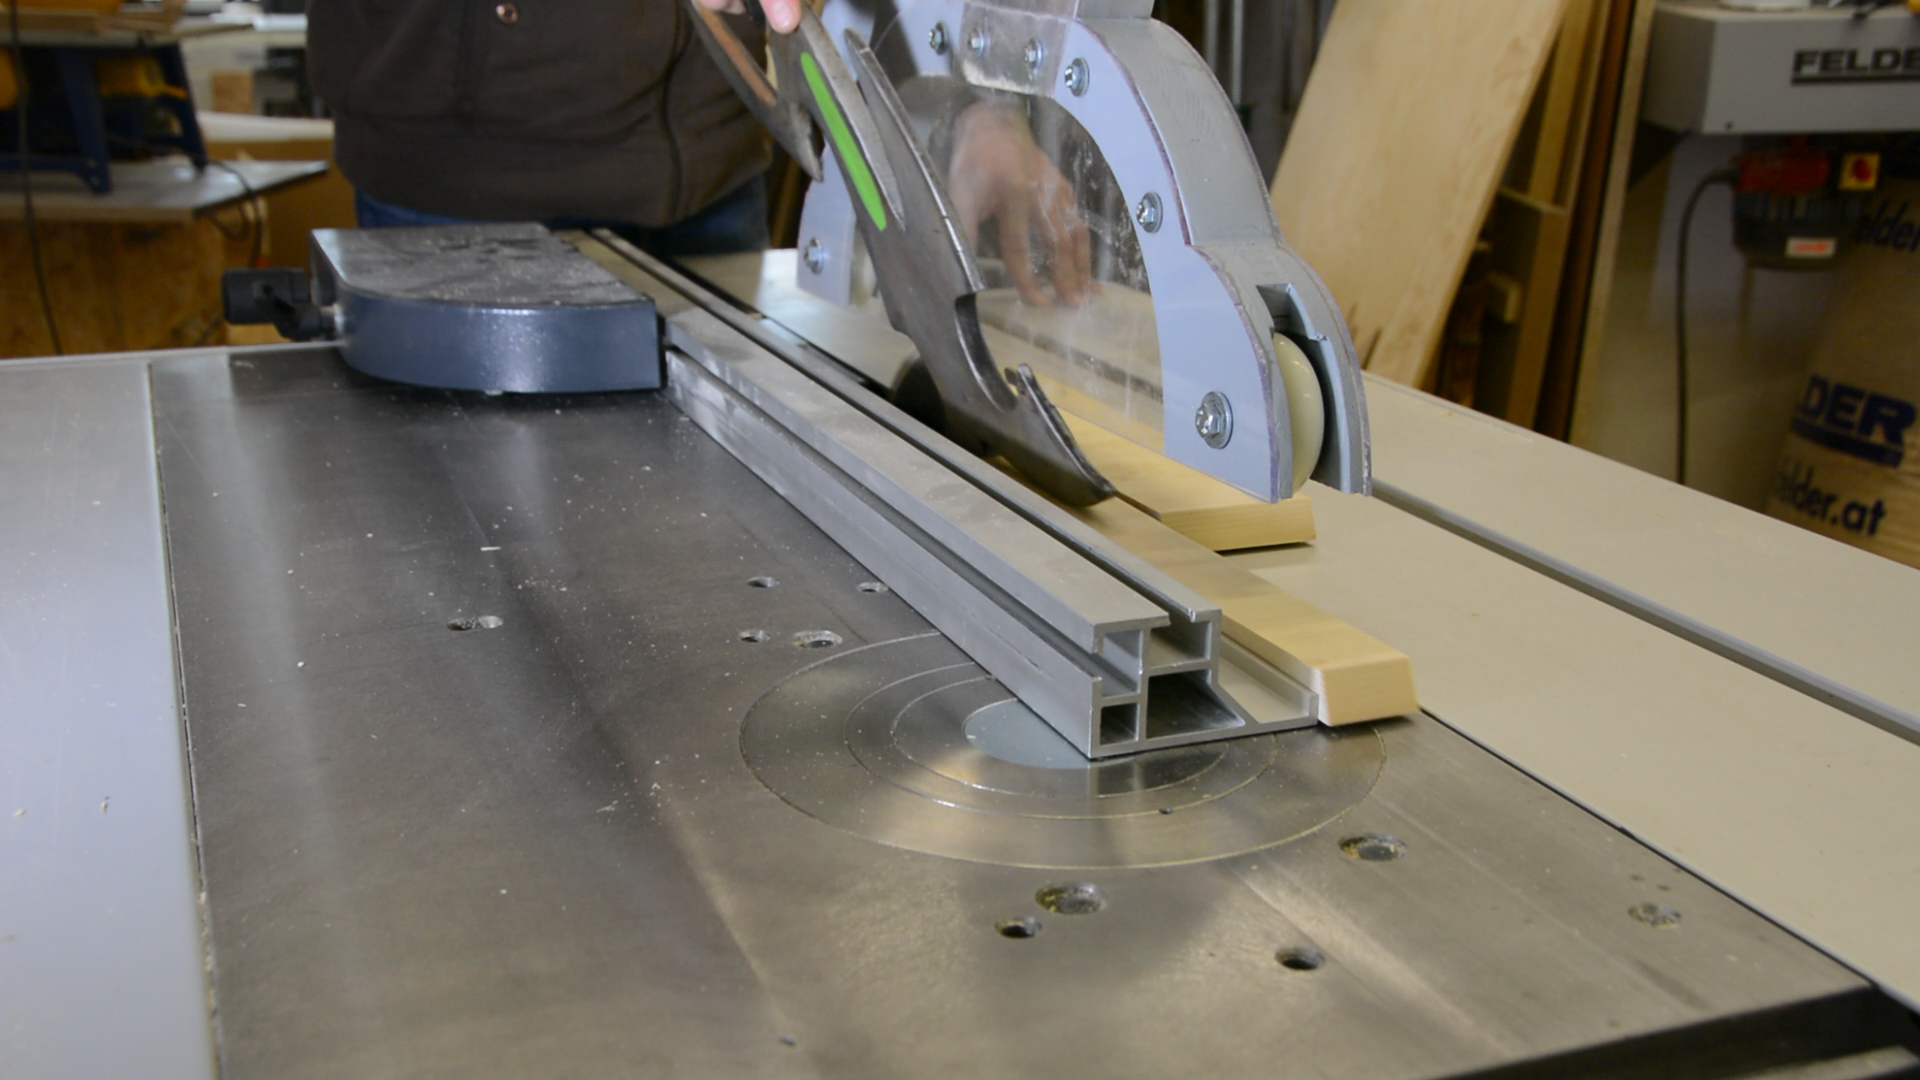
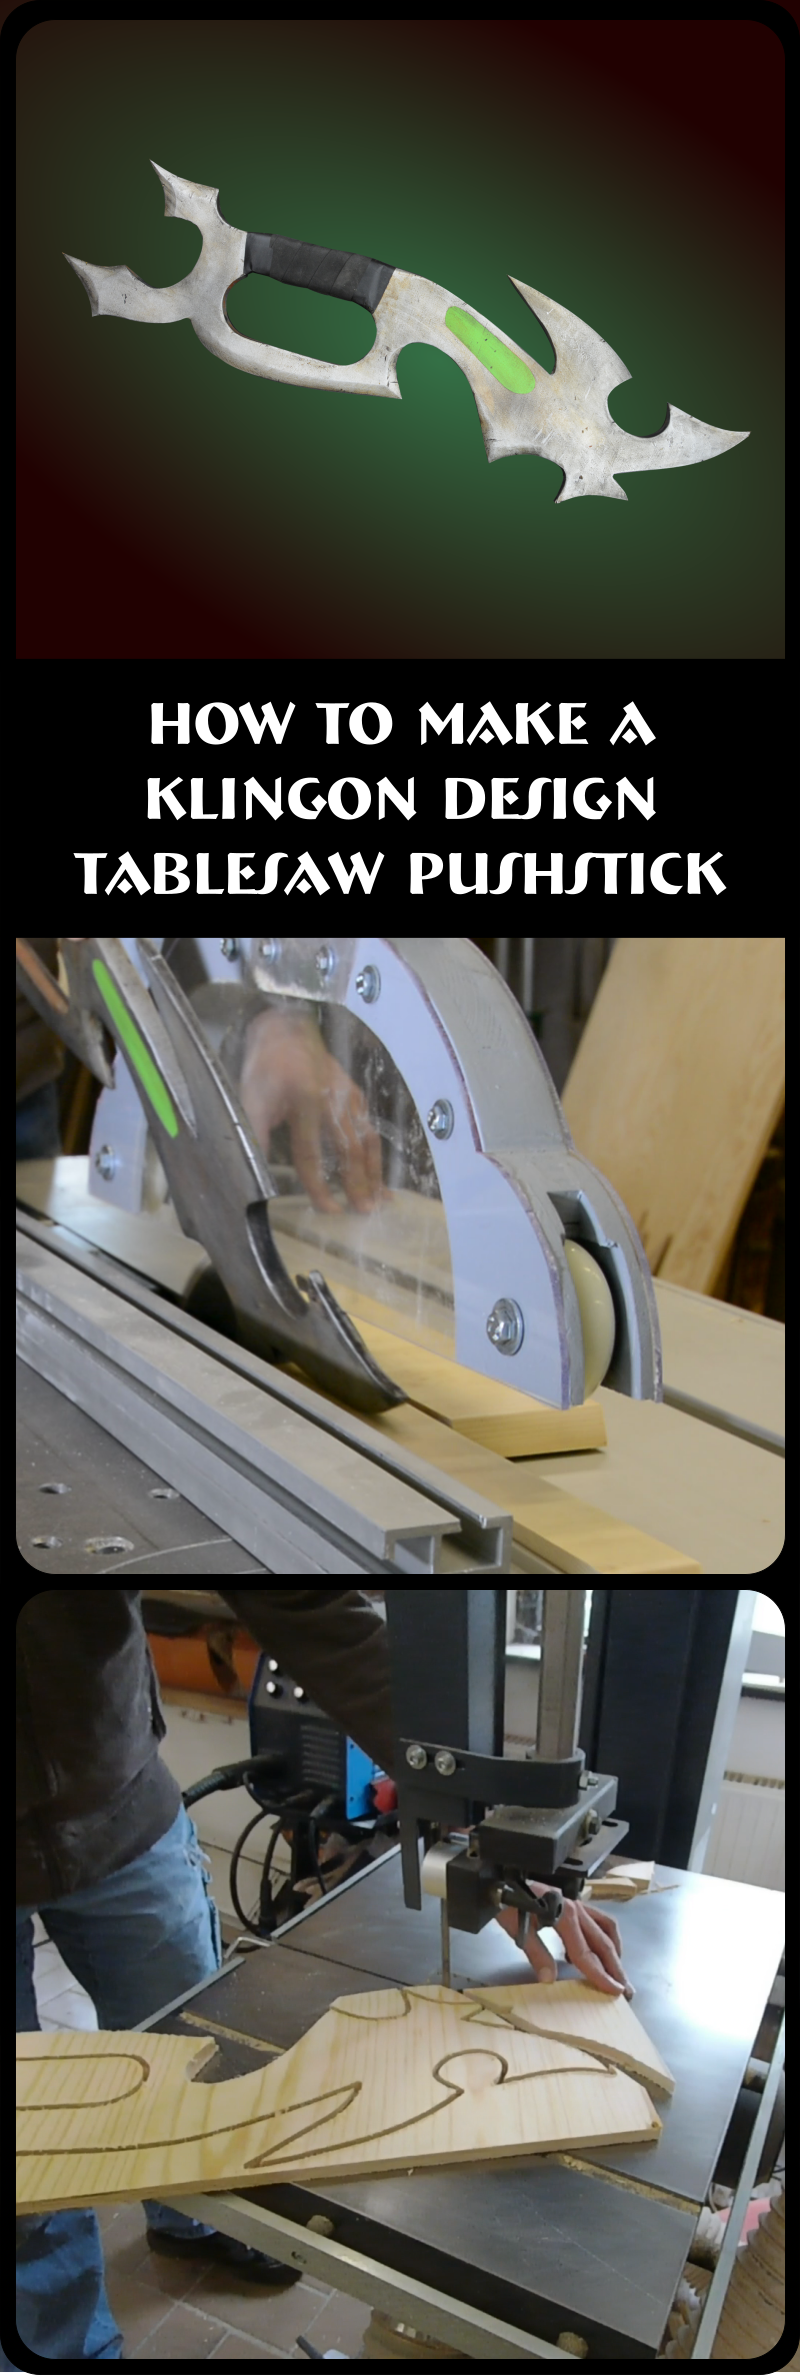
In this video I will show you how I made a push stick for the tablesaw following a klingon design. I combined the functionality of a pushstick with some of the prop making methods I picked up by watching Adam Savage, Bob Clagett and others on Youtube. It’s my first attempt to get into that space so I would welcome any suggestions on how to improve.
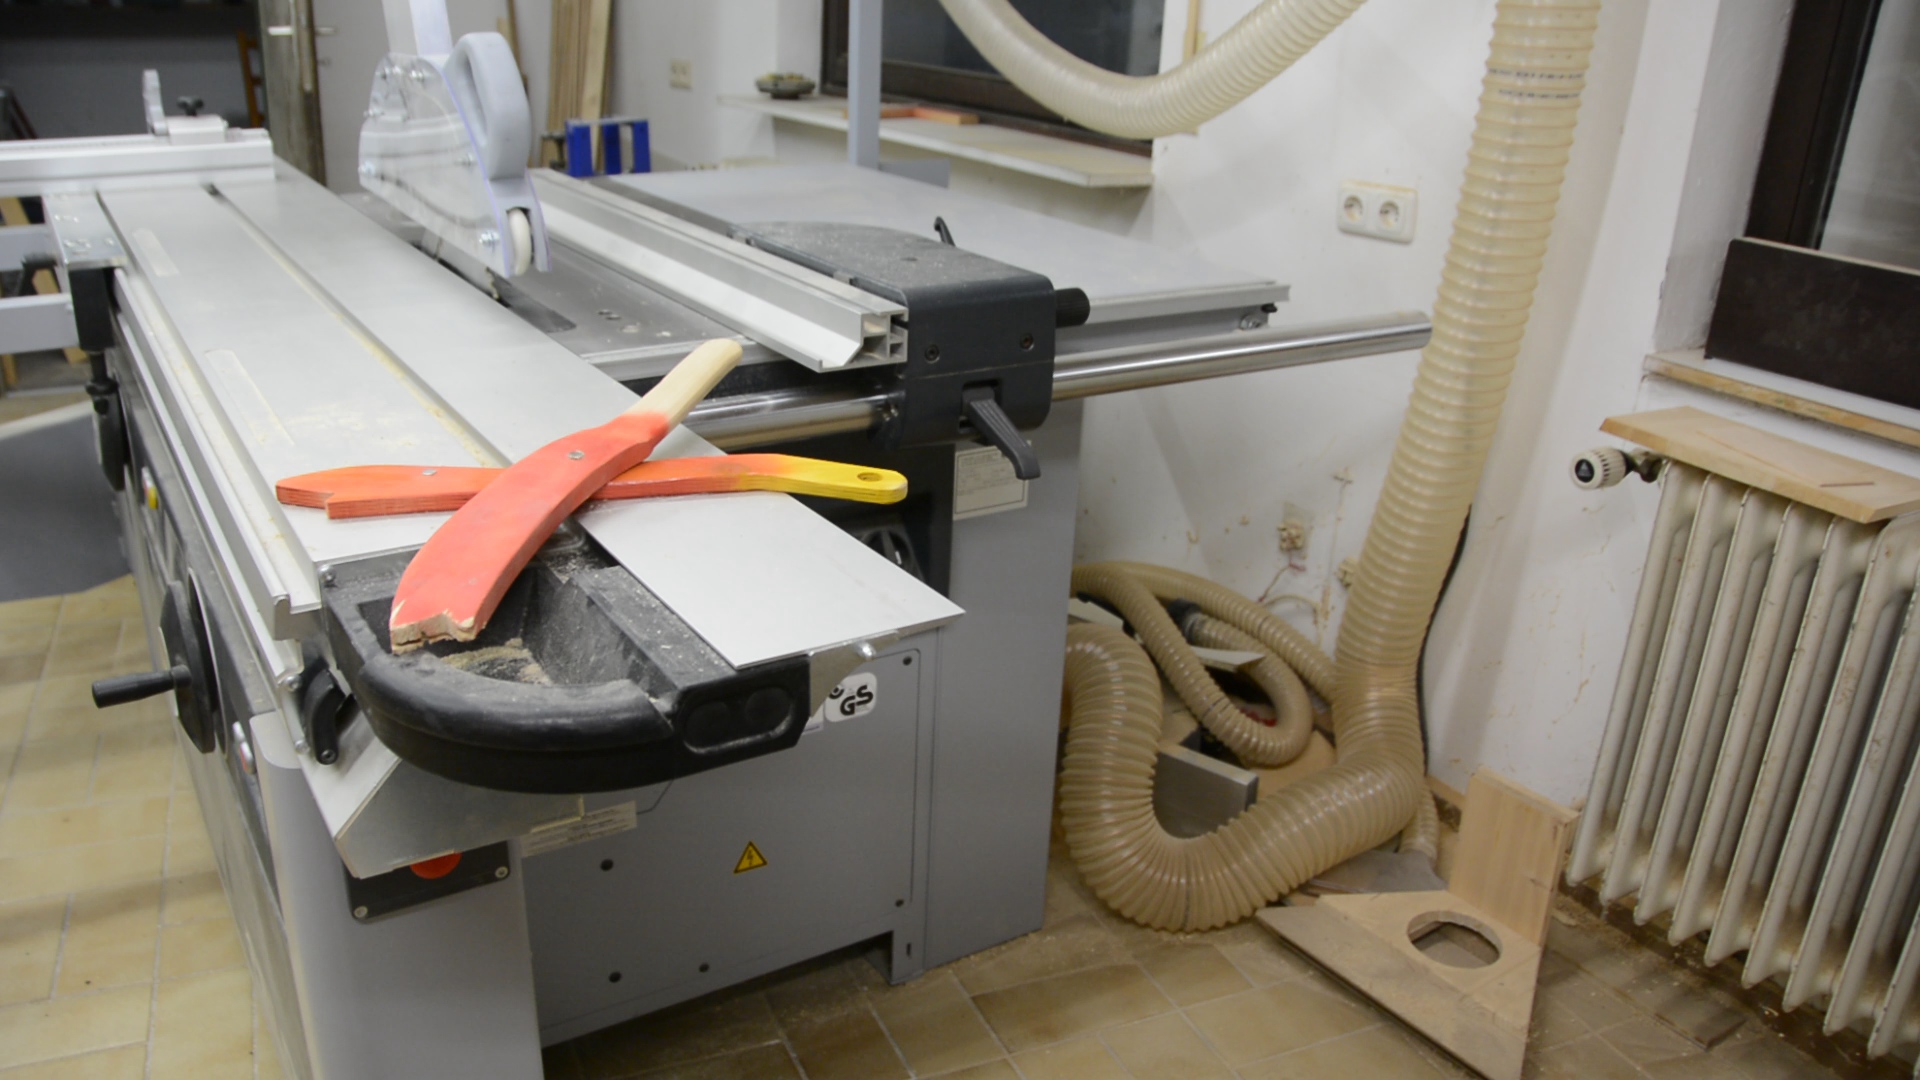
These are my standard pushsticks. When they are worn out I trace the old one on a piece of scrap, cut it on the bandsaw and after rounding over the edges I paint them red and add a small magnet to stick them to the side of my tablesaw.
They are functional but boring. So I had the idea to design a version based on the Klingon weapons in Star Trek. I collected quite a few images on a Pinterest board and tried to imagine how a Klingon pushstick could look like.

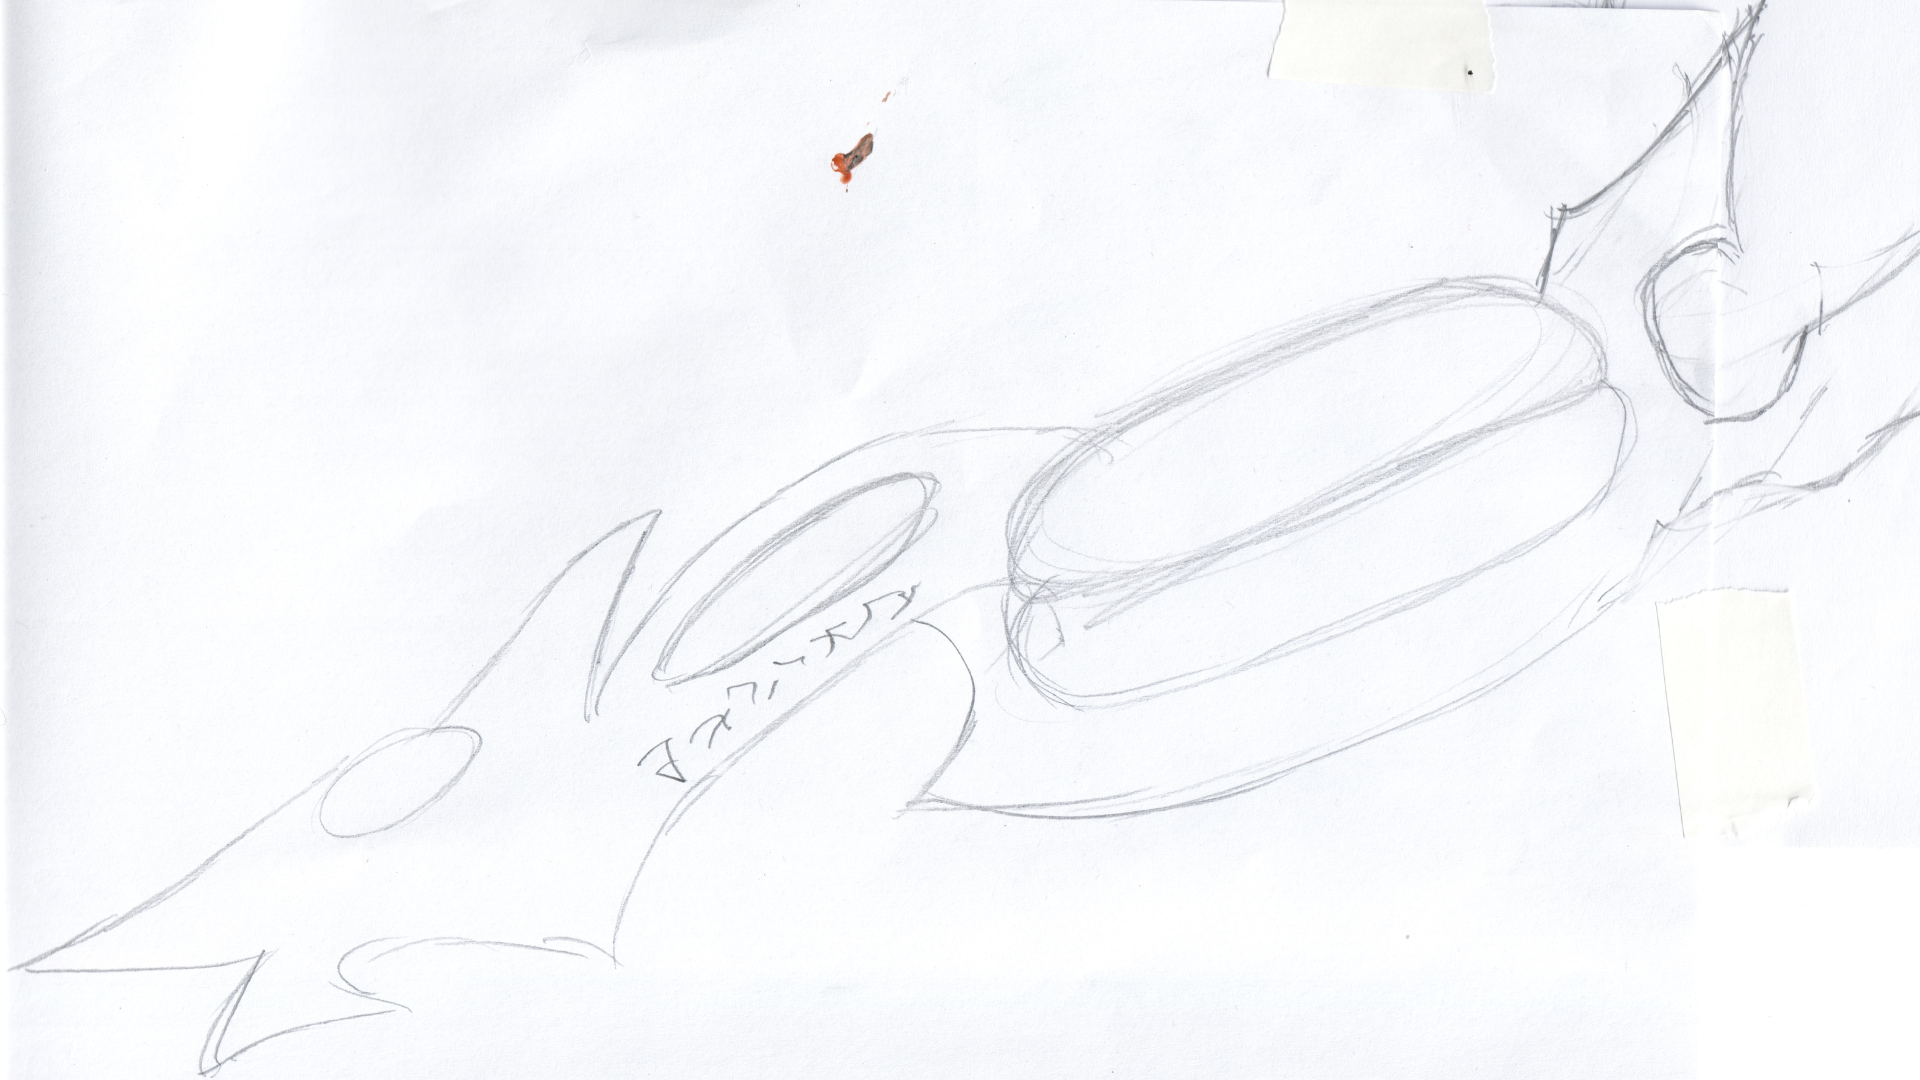
Over an evening while watching next generation I scribbled a first sketch.
In Inkscape I start with a rough outline and continuously refine it till I‘m happy with the overall look. The template will be available as a free download here
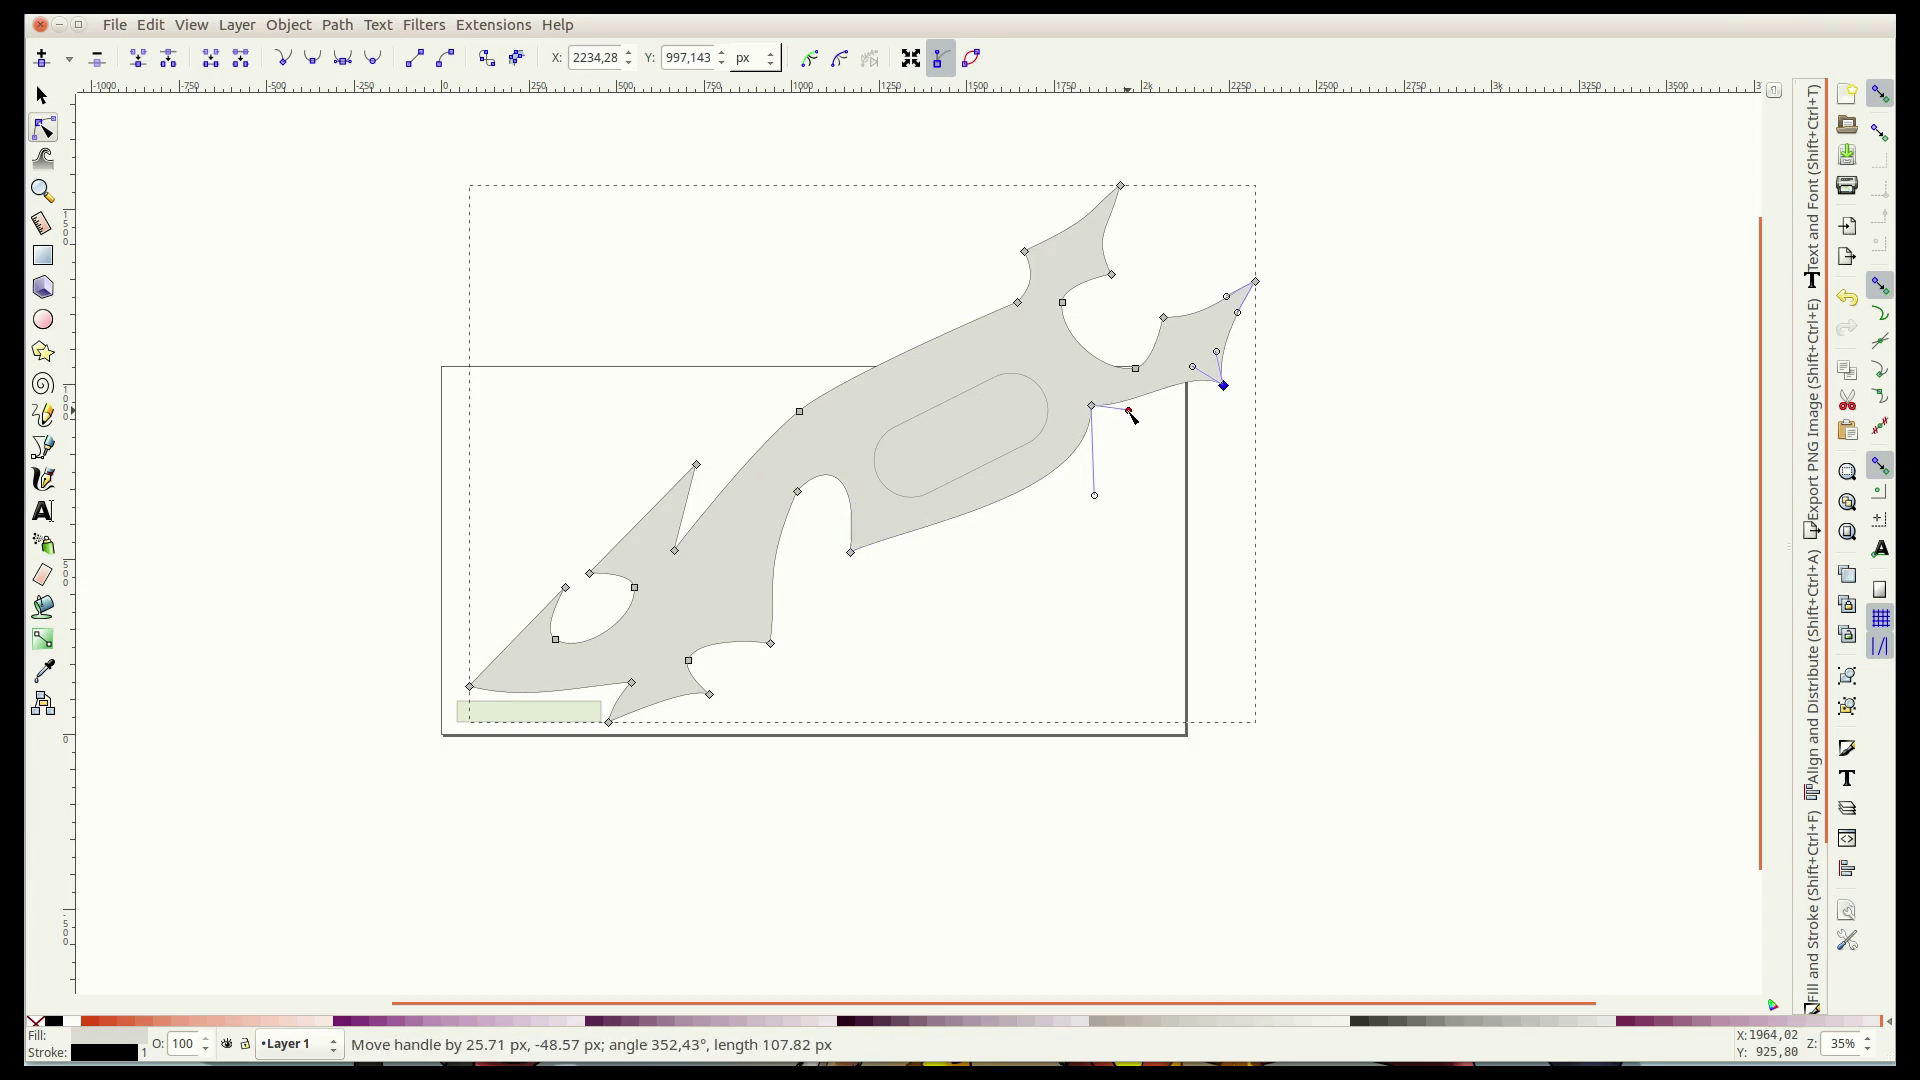
I will add a decorative element to the side and also planned for a handle.
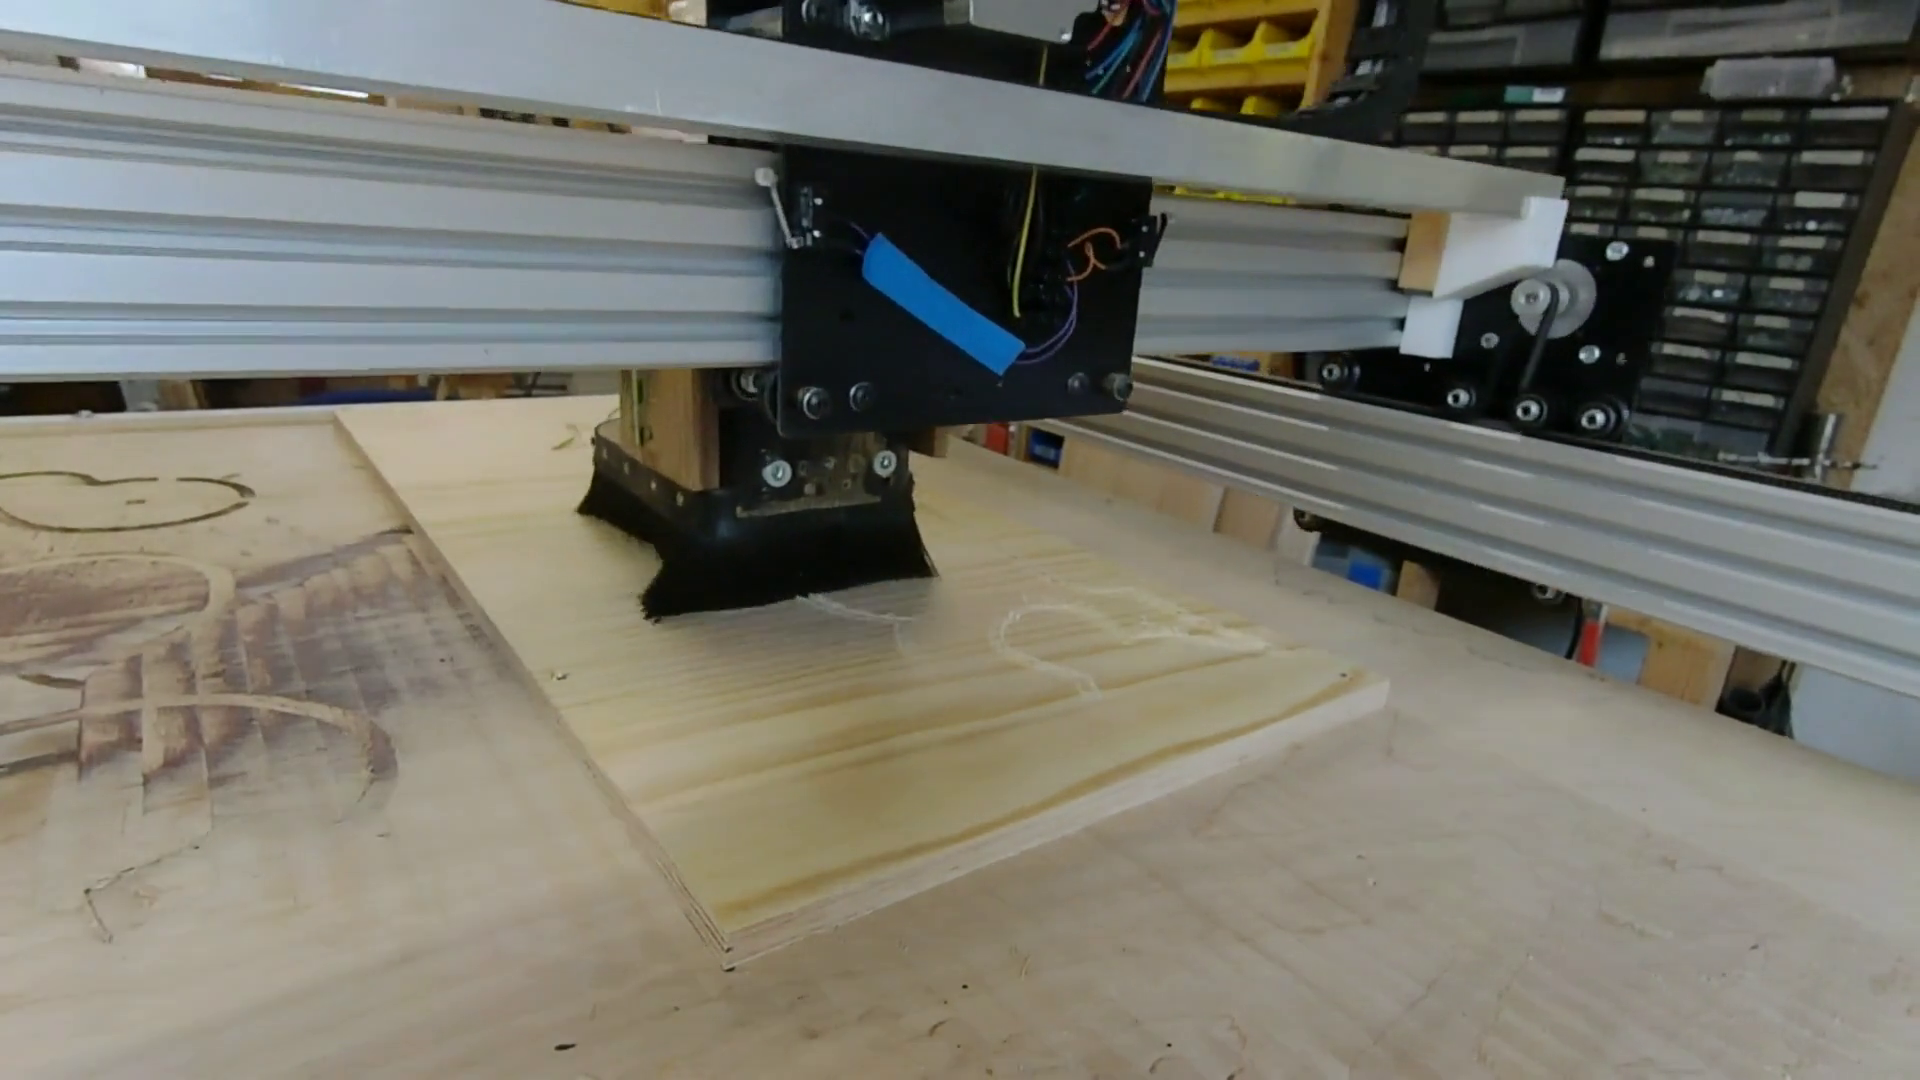
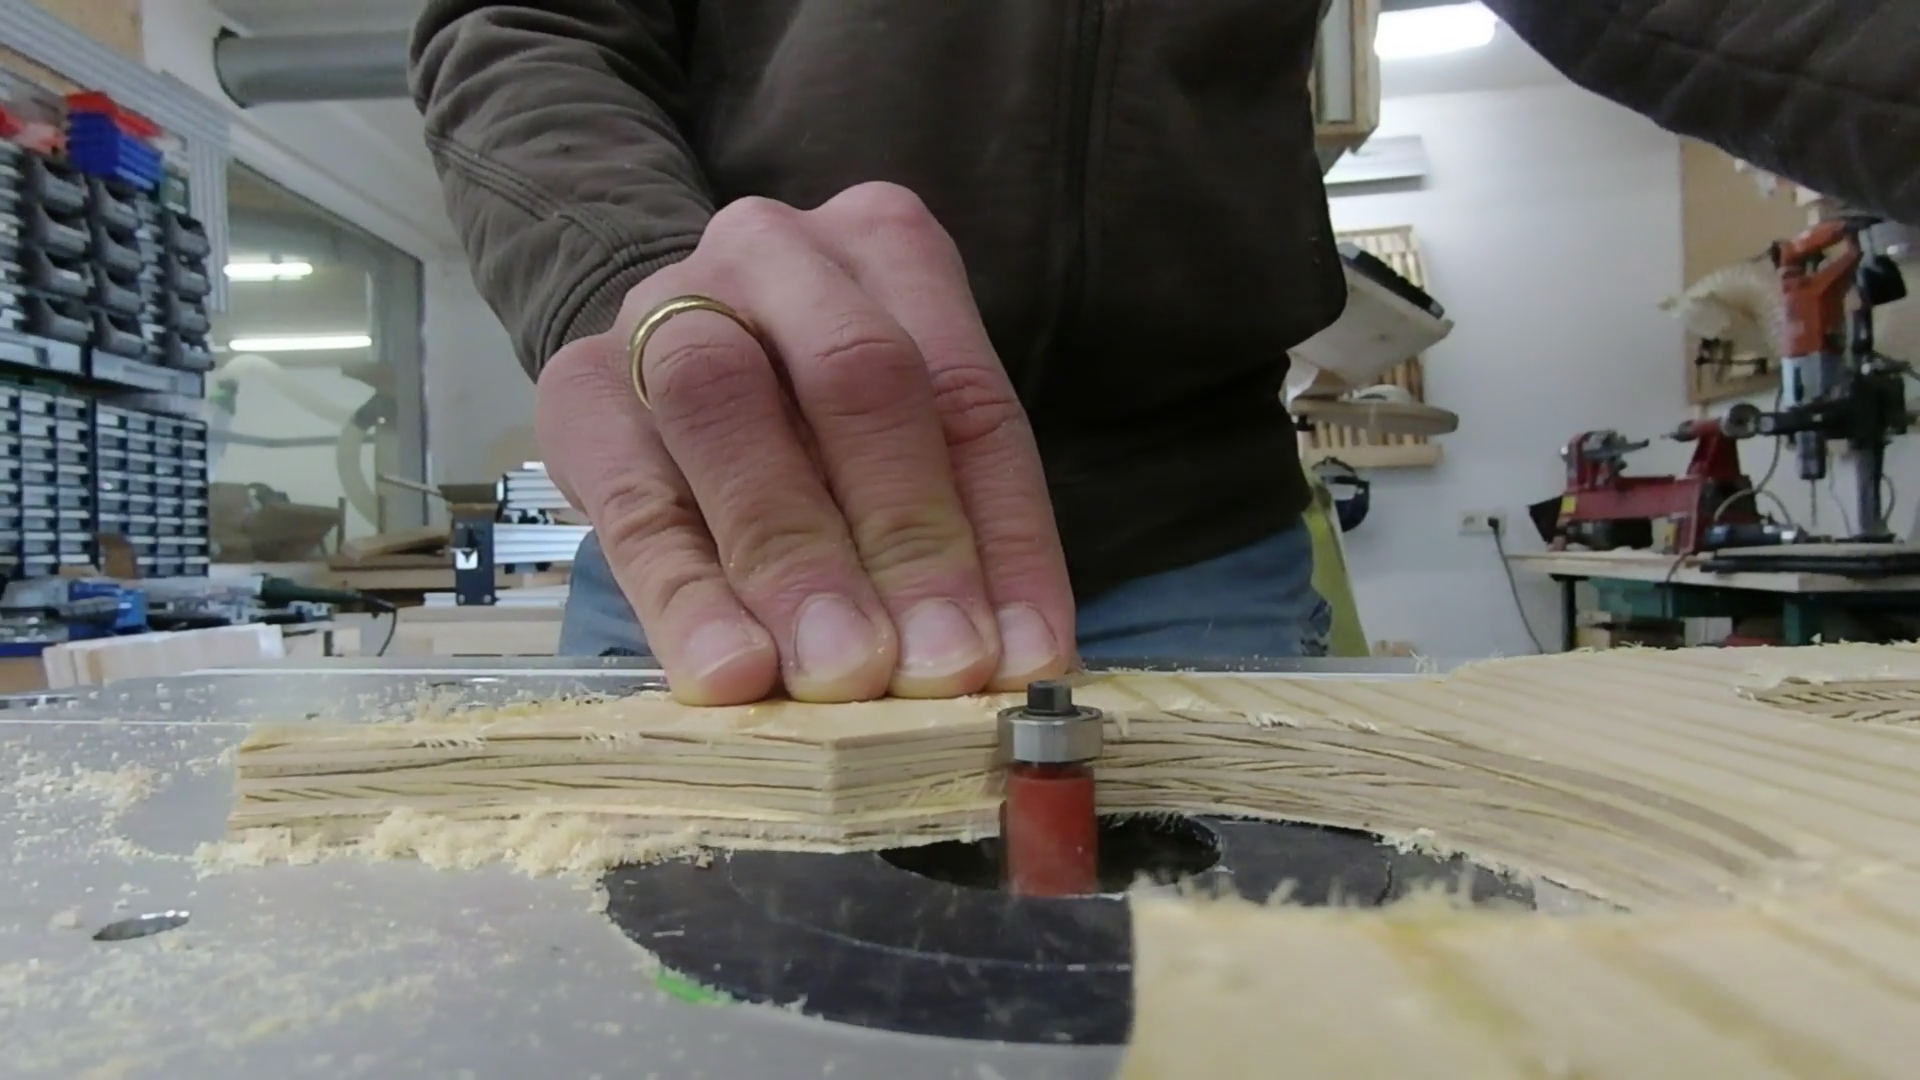
Shaping the form
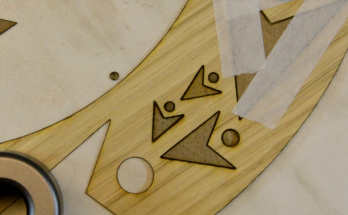
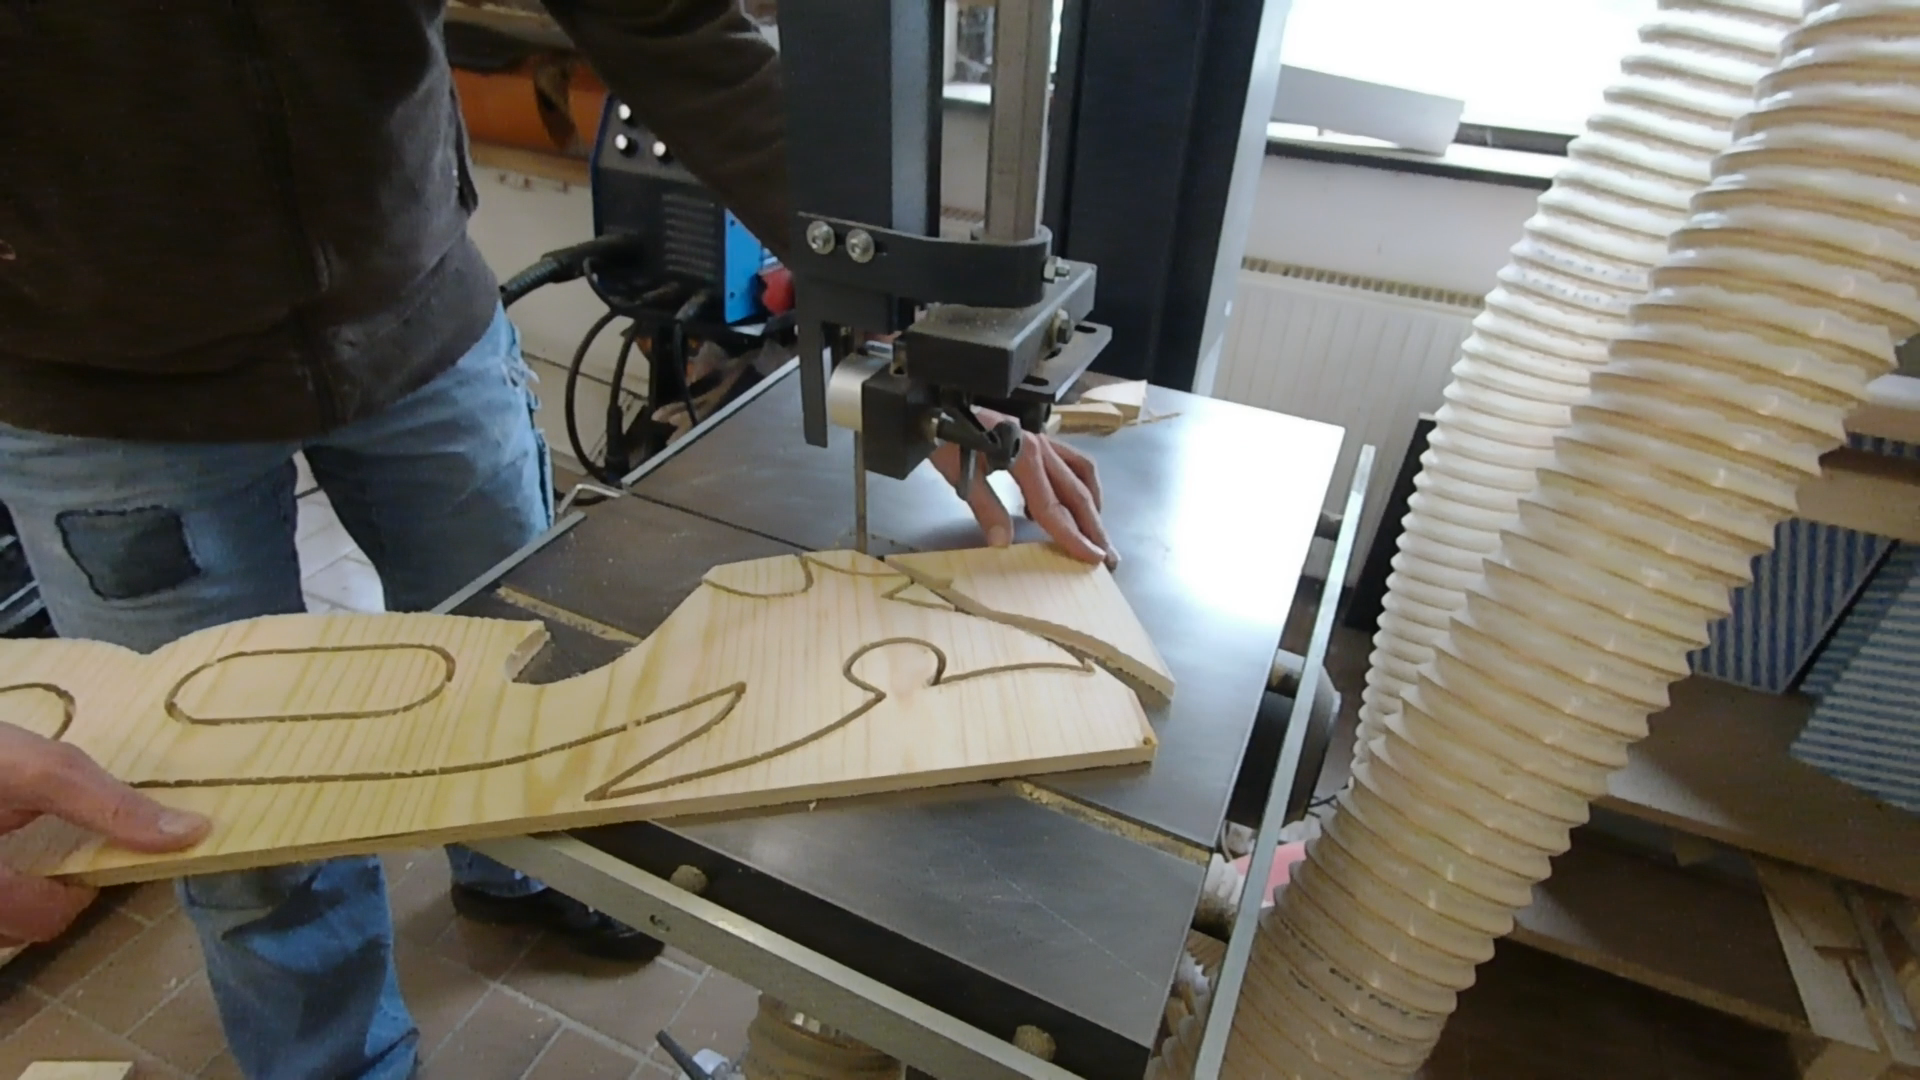
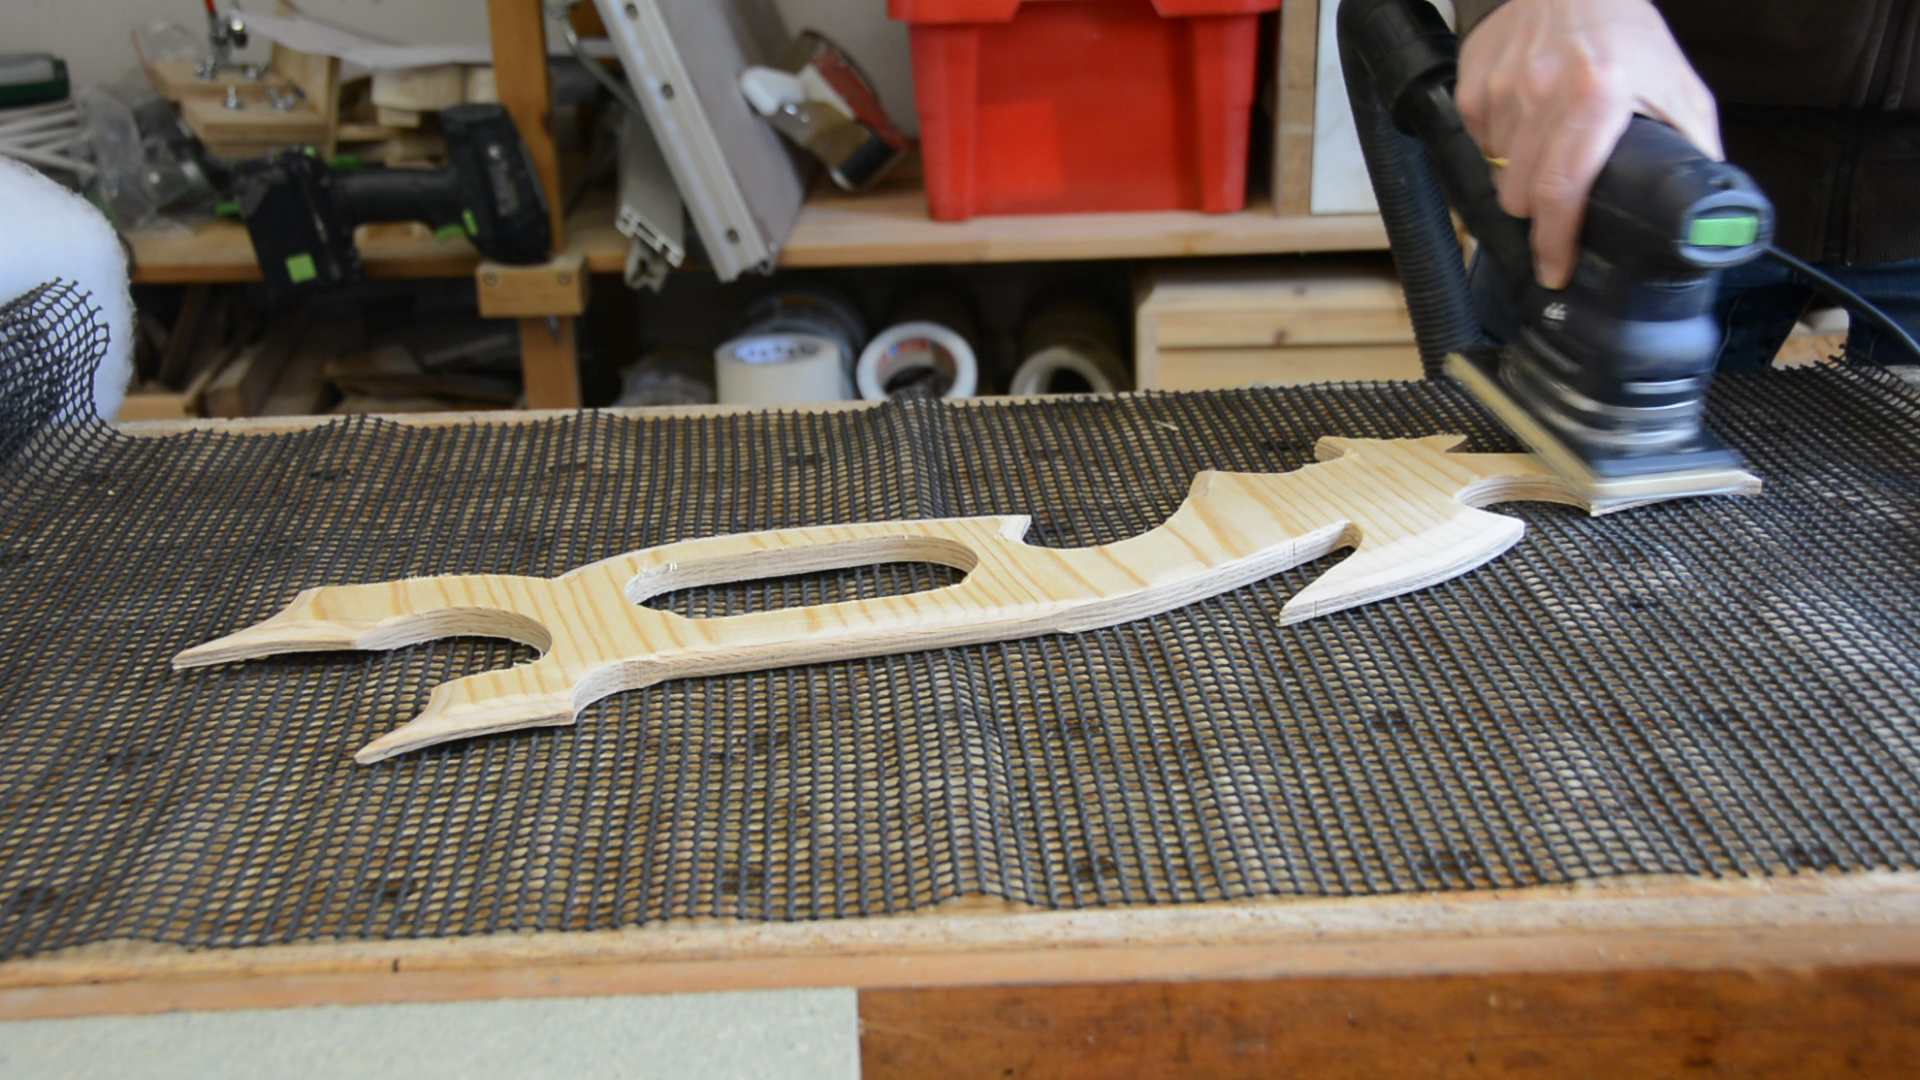
Using the build-in CNC tool I export the three shape as gcode. The shape itself is cut from 15 mm plywood. As I’ve set the depth of cut too shallow I will cut out the shape with my bandsaw and jigsaw and trim it flush with a router. If you don’t have a CNC you could also use a bandsaw or jigsaw to cut the entire shape.
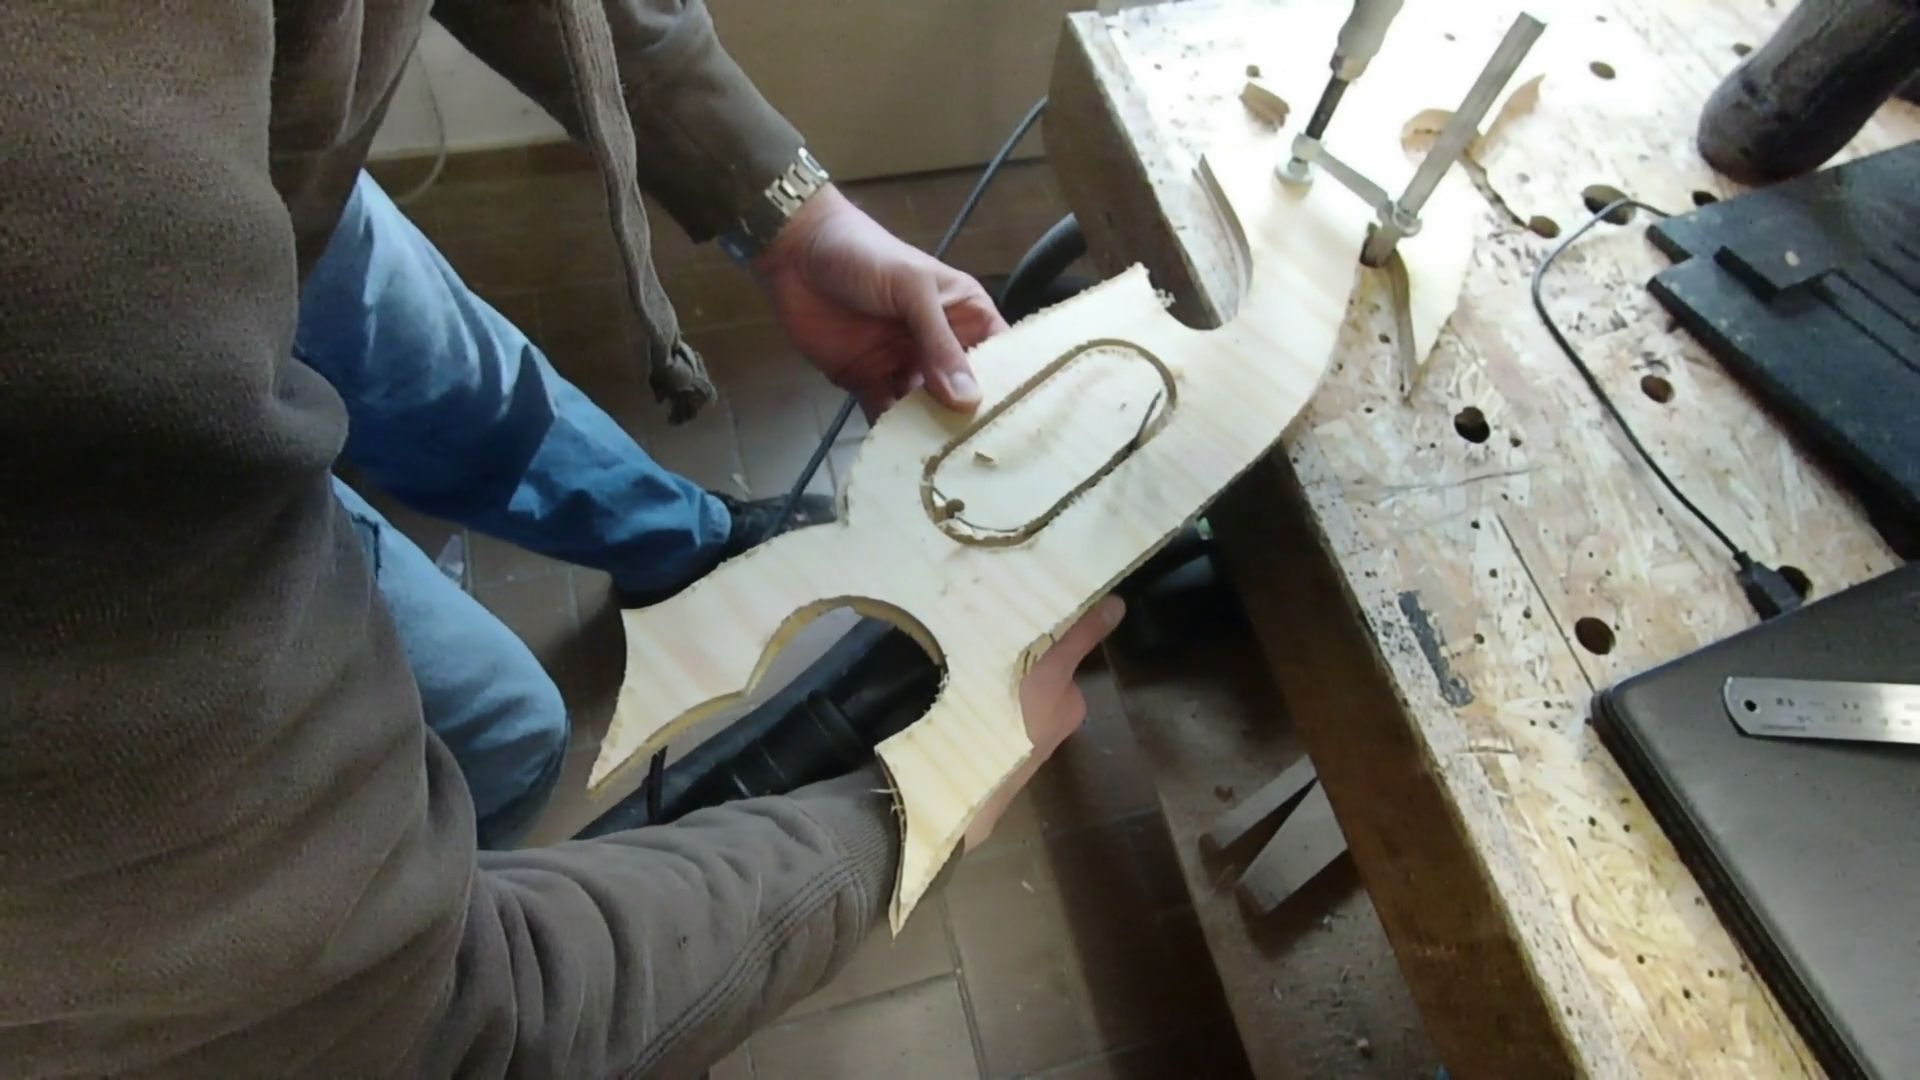
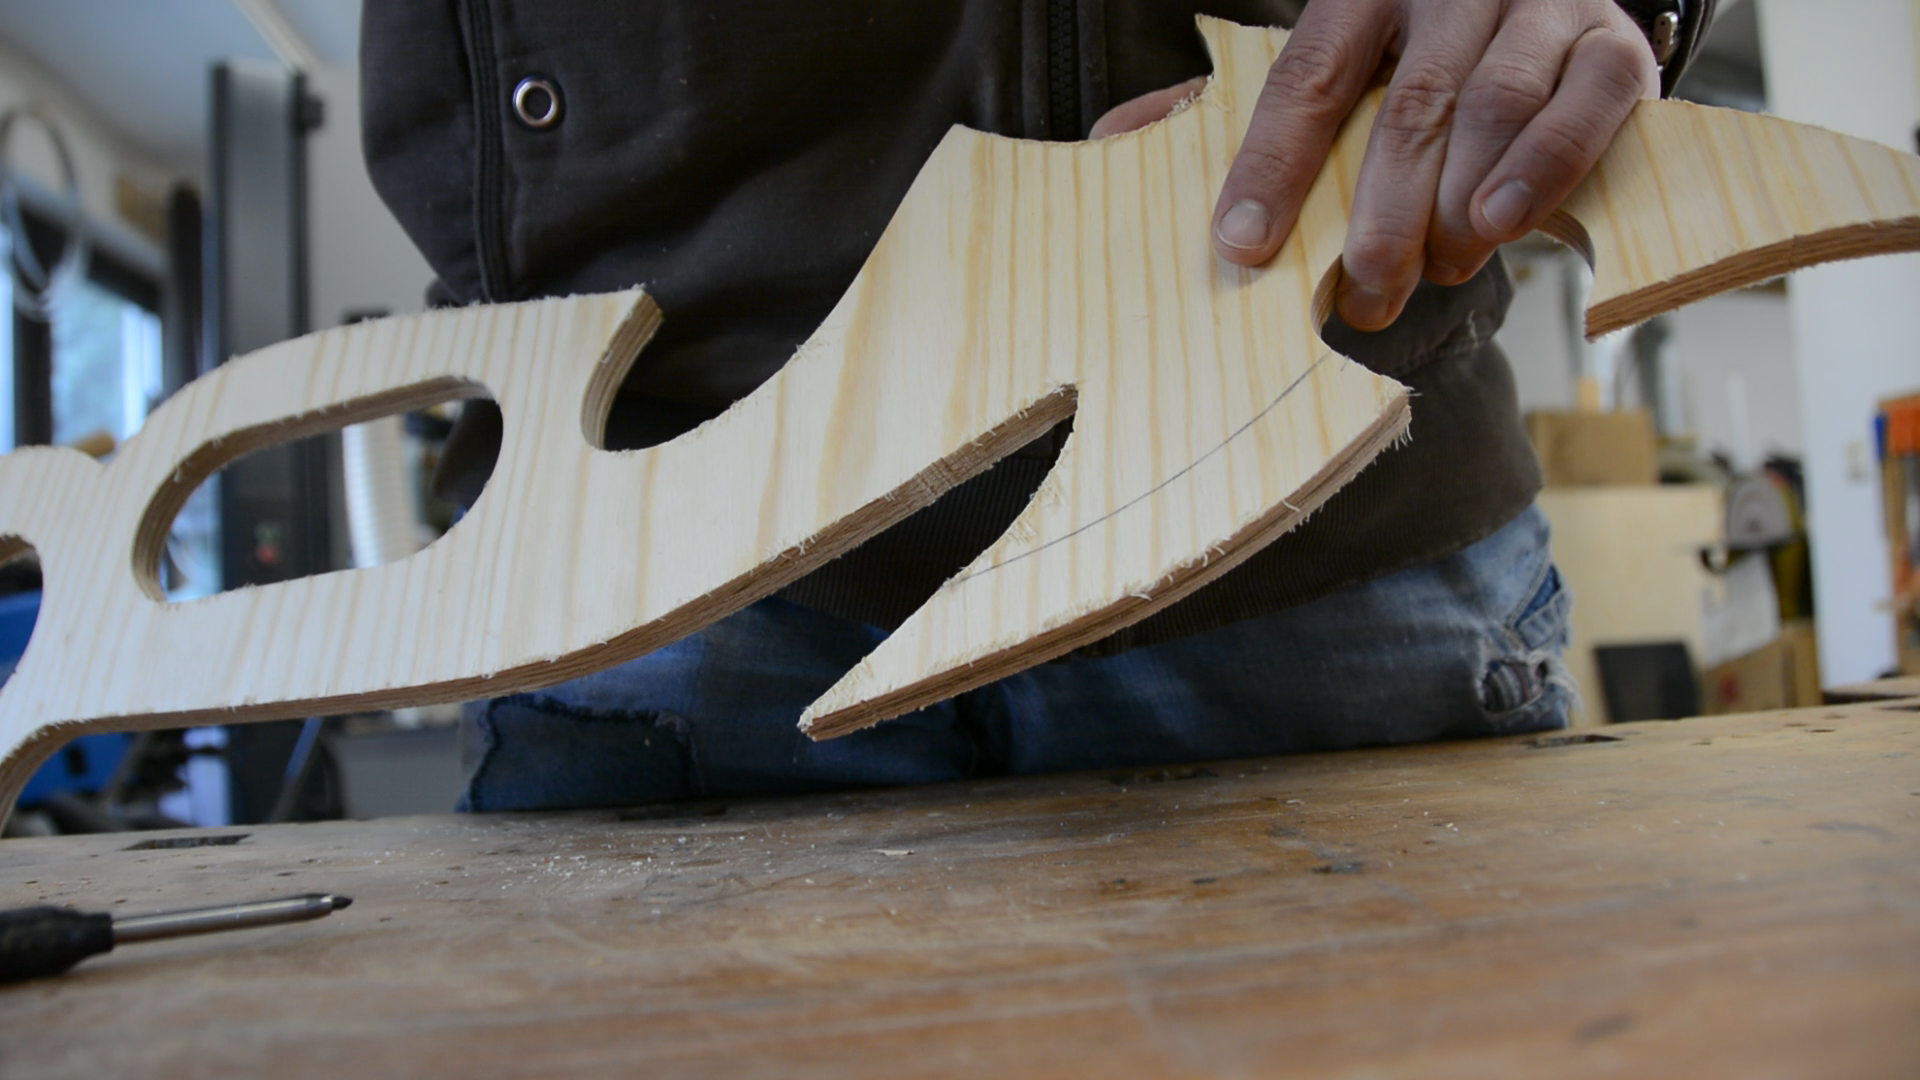
After holding it in my hand I realized that an additional handle would make the grip less comfortable and skipped this step. If you go for a thinner ply you might want to add the handle scales.
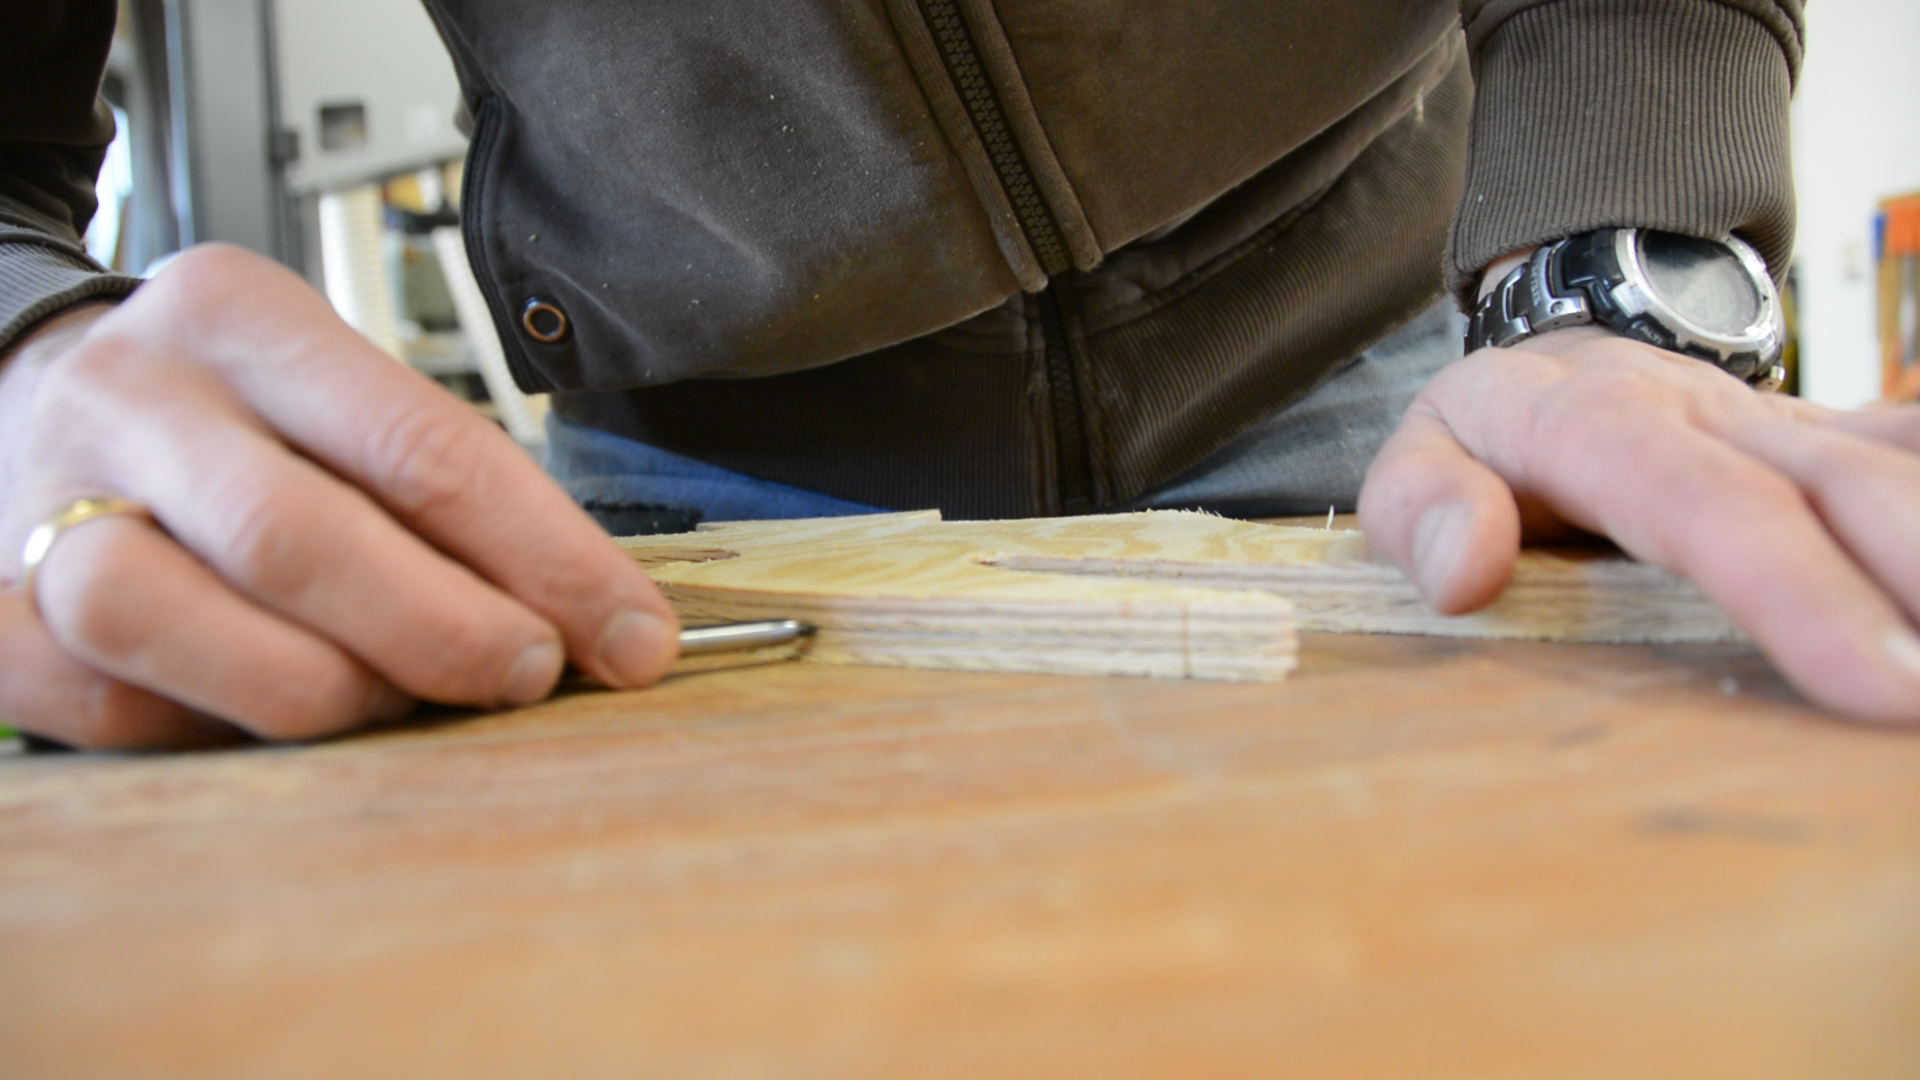
With all the pieces cut I draw some bevels so that the pushstick looks a little bit more like a blade. To do that I scribe a line at the same distance from the edge and also mark a center line by registering my pen against the workbench.
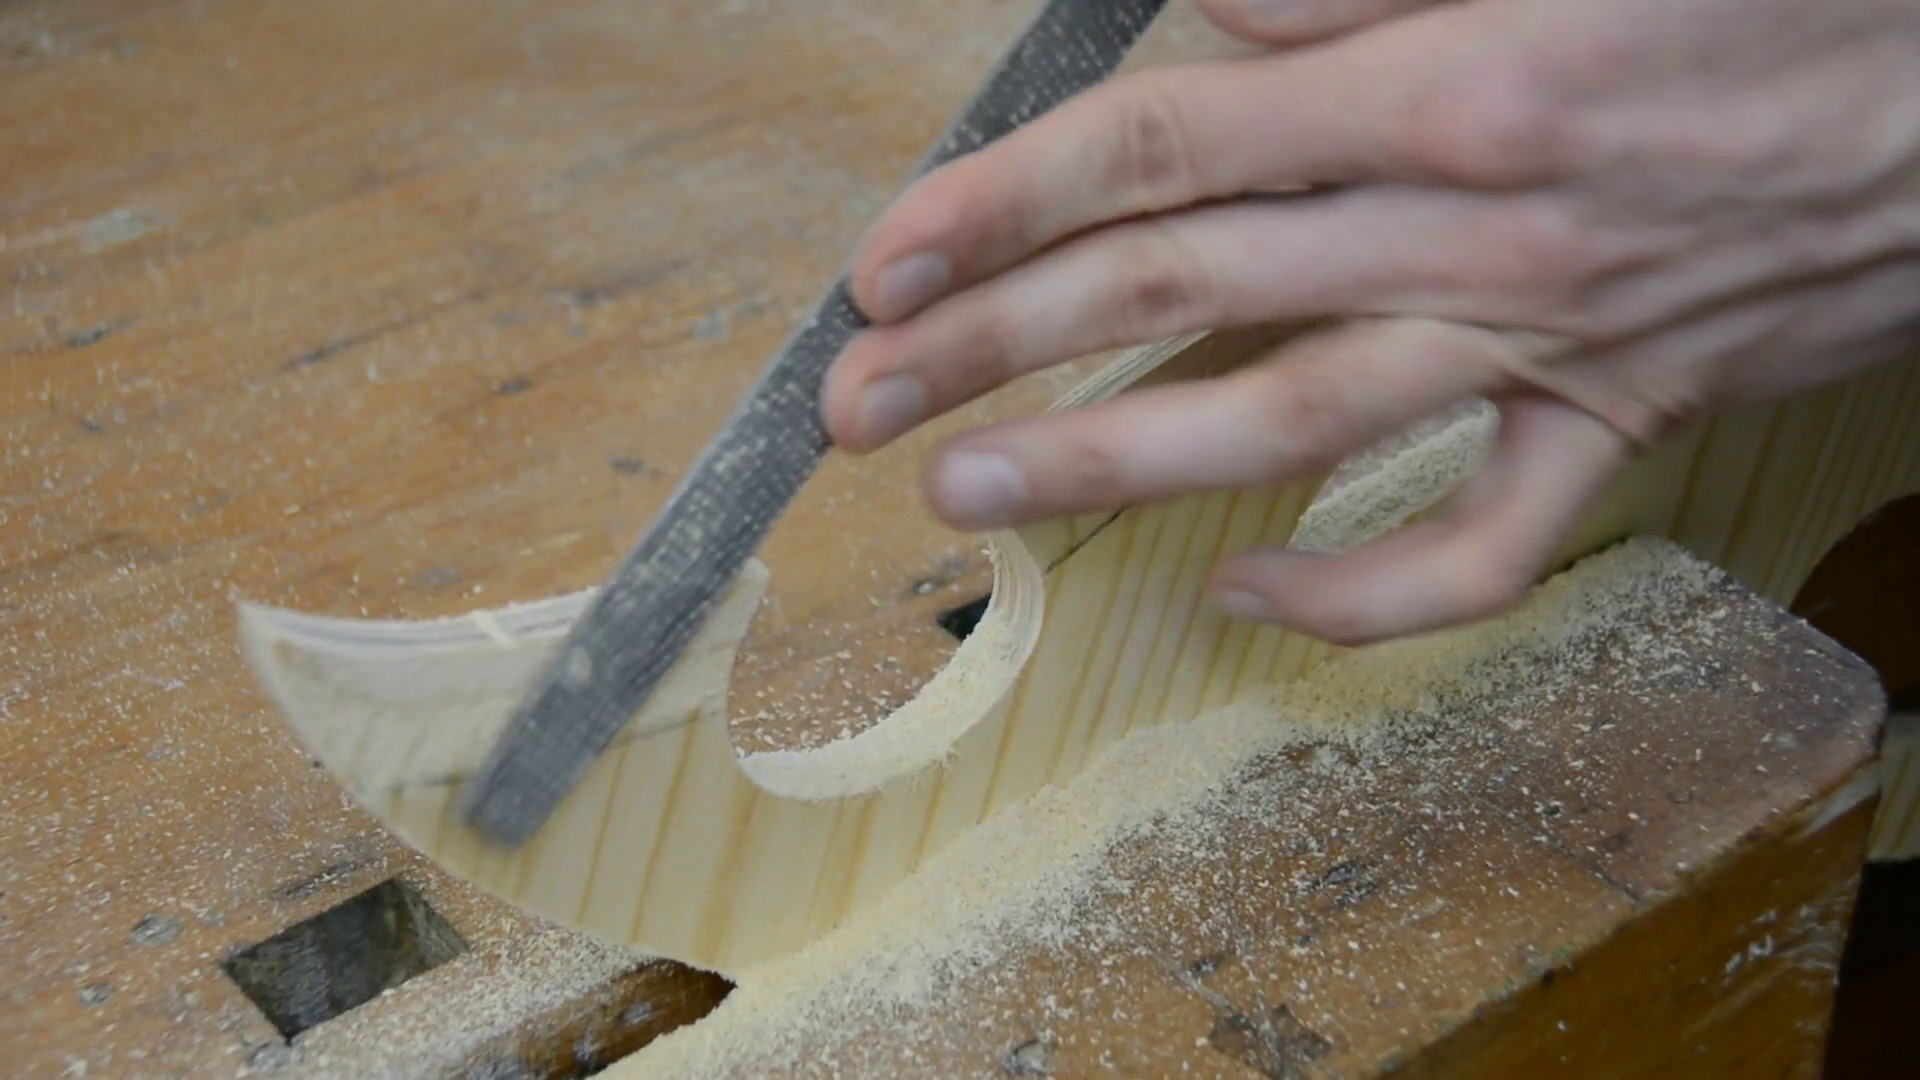
With different rasps and files I connect my lines and thereby create a bevel just as you would do for a real knife. The main difference to a real knife is that my edge is very dull to avoid chipout. All wooden parts get a thorough sanding to 320 grid.
Paint and decoration
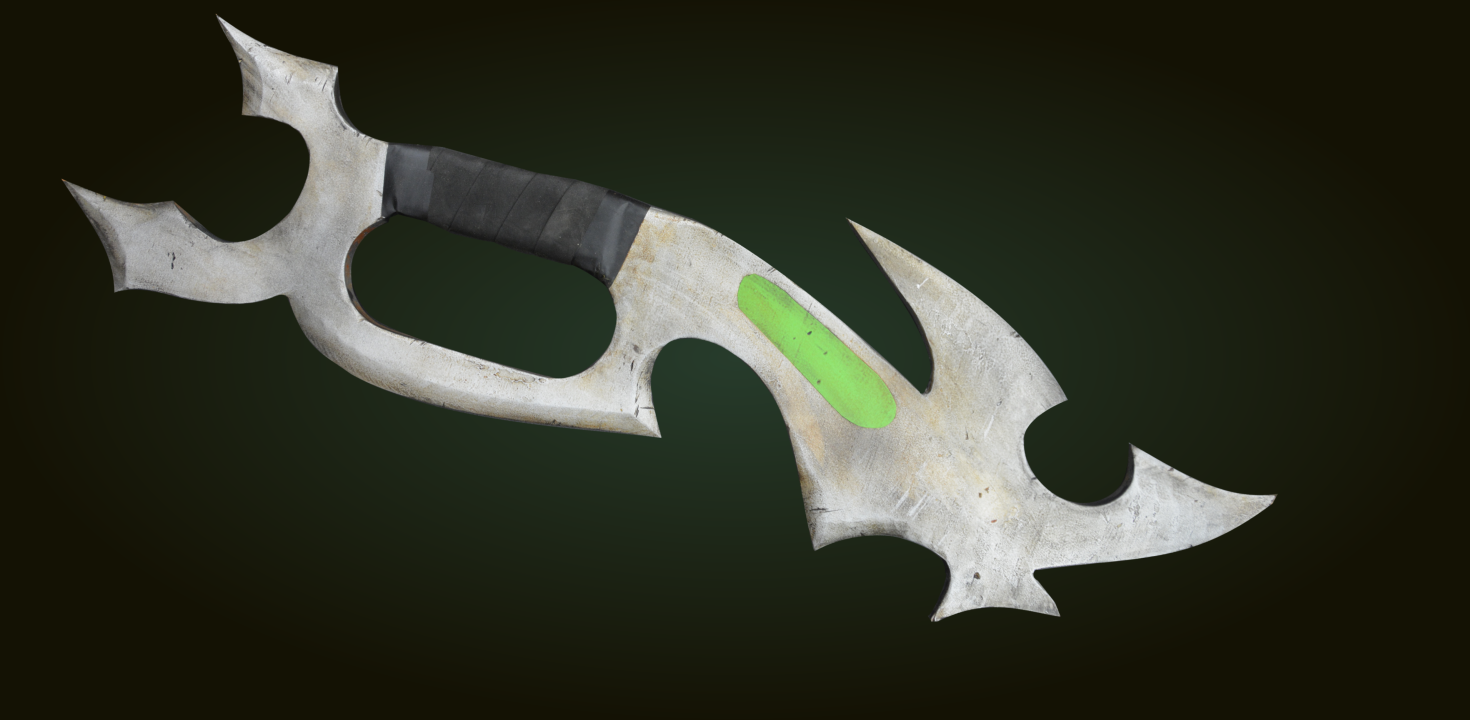
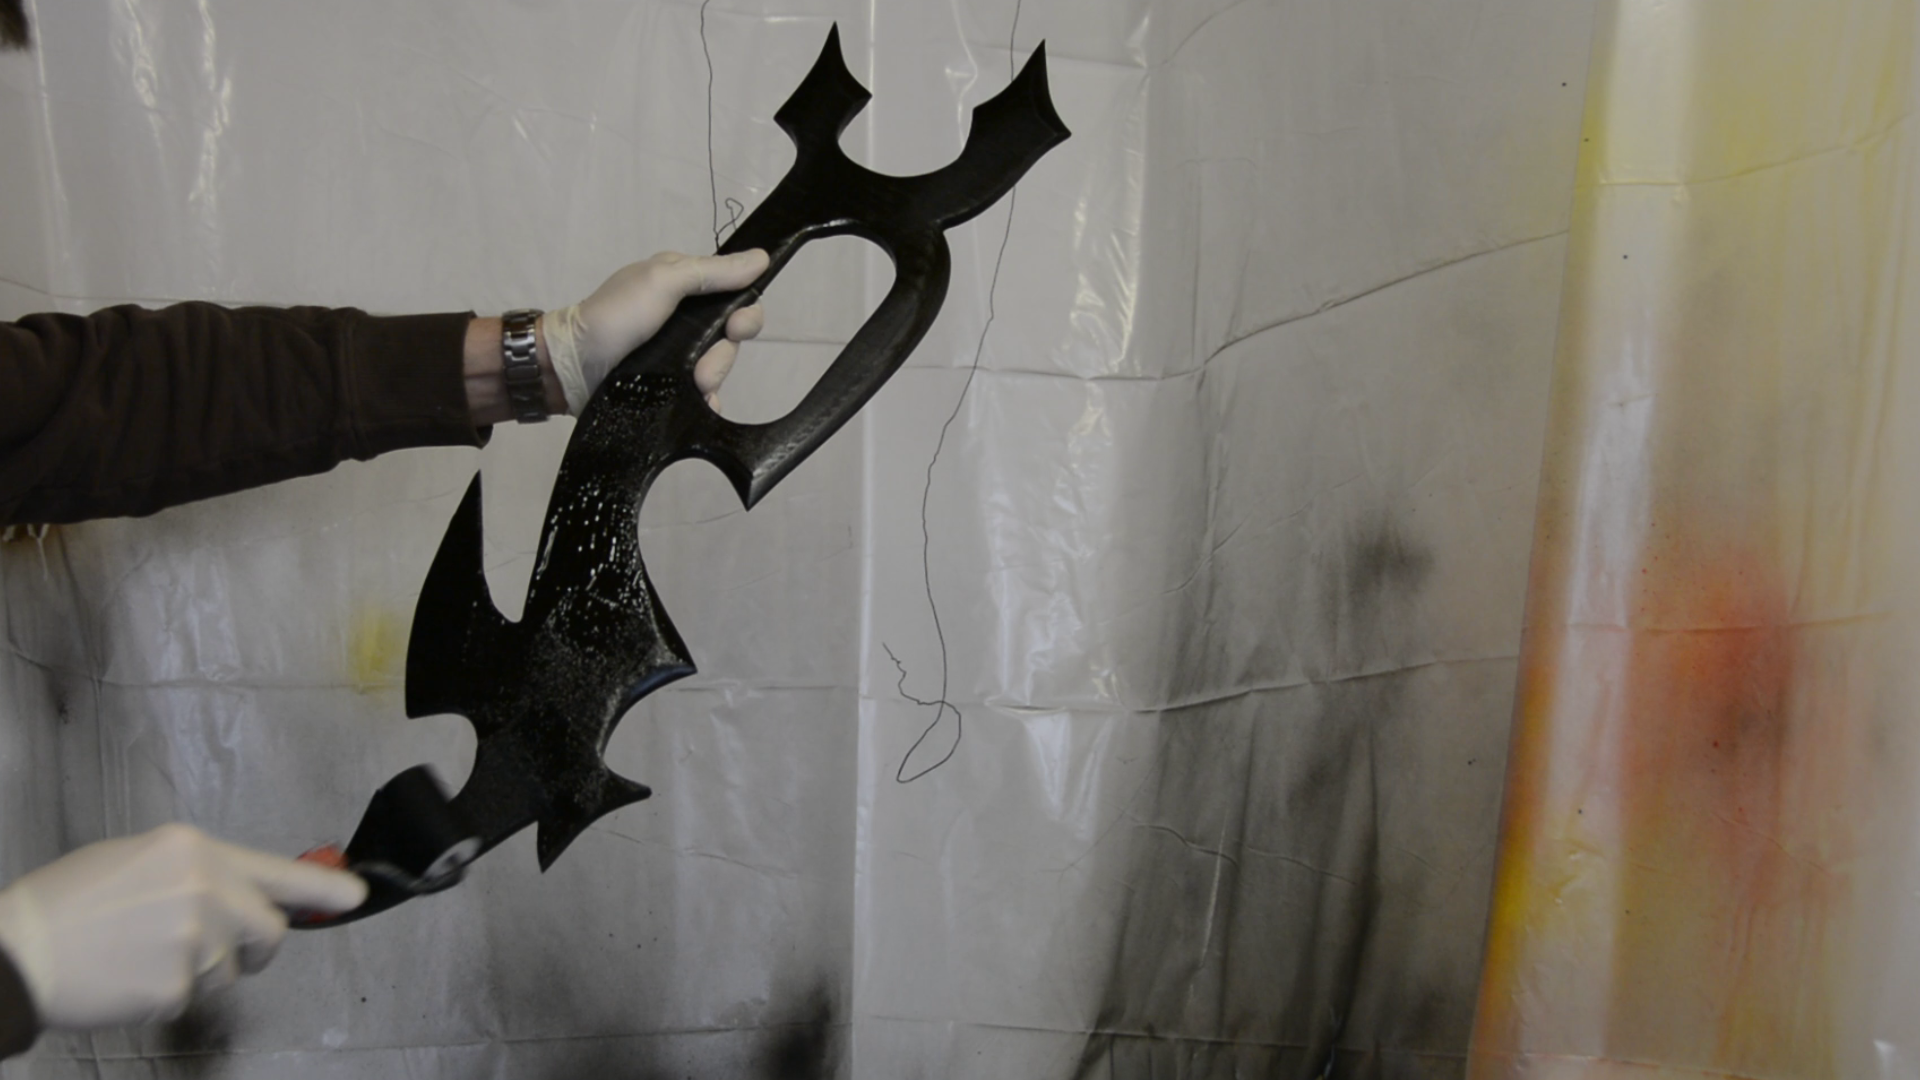
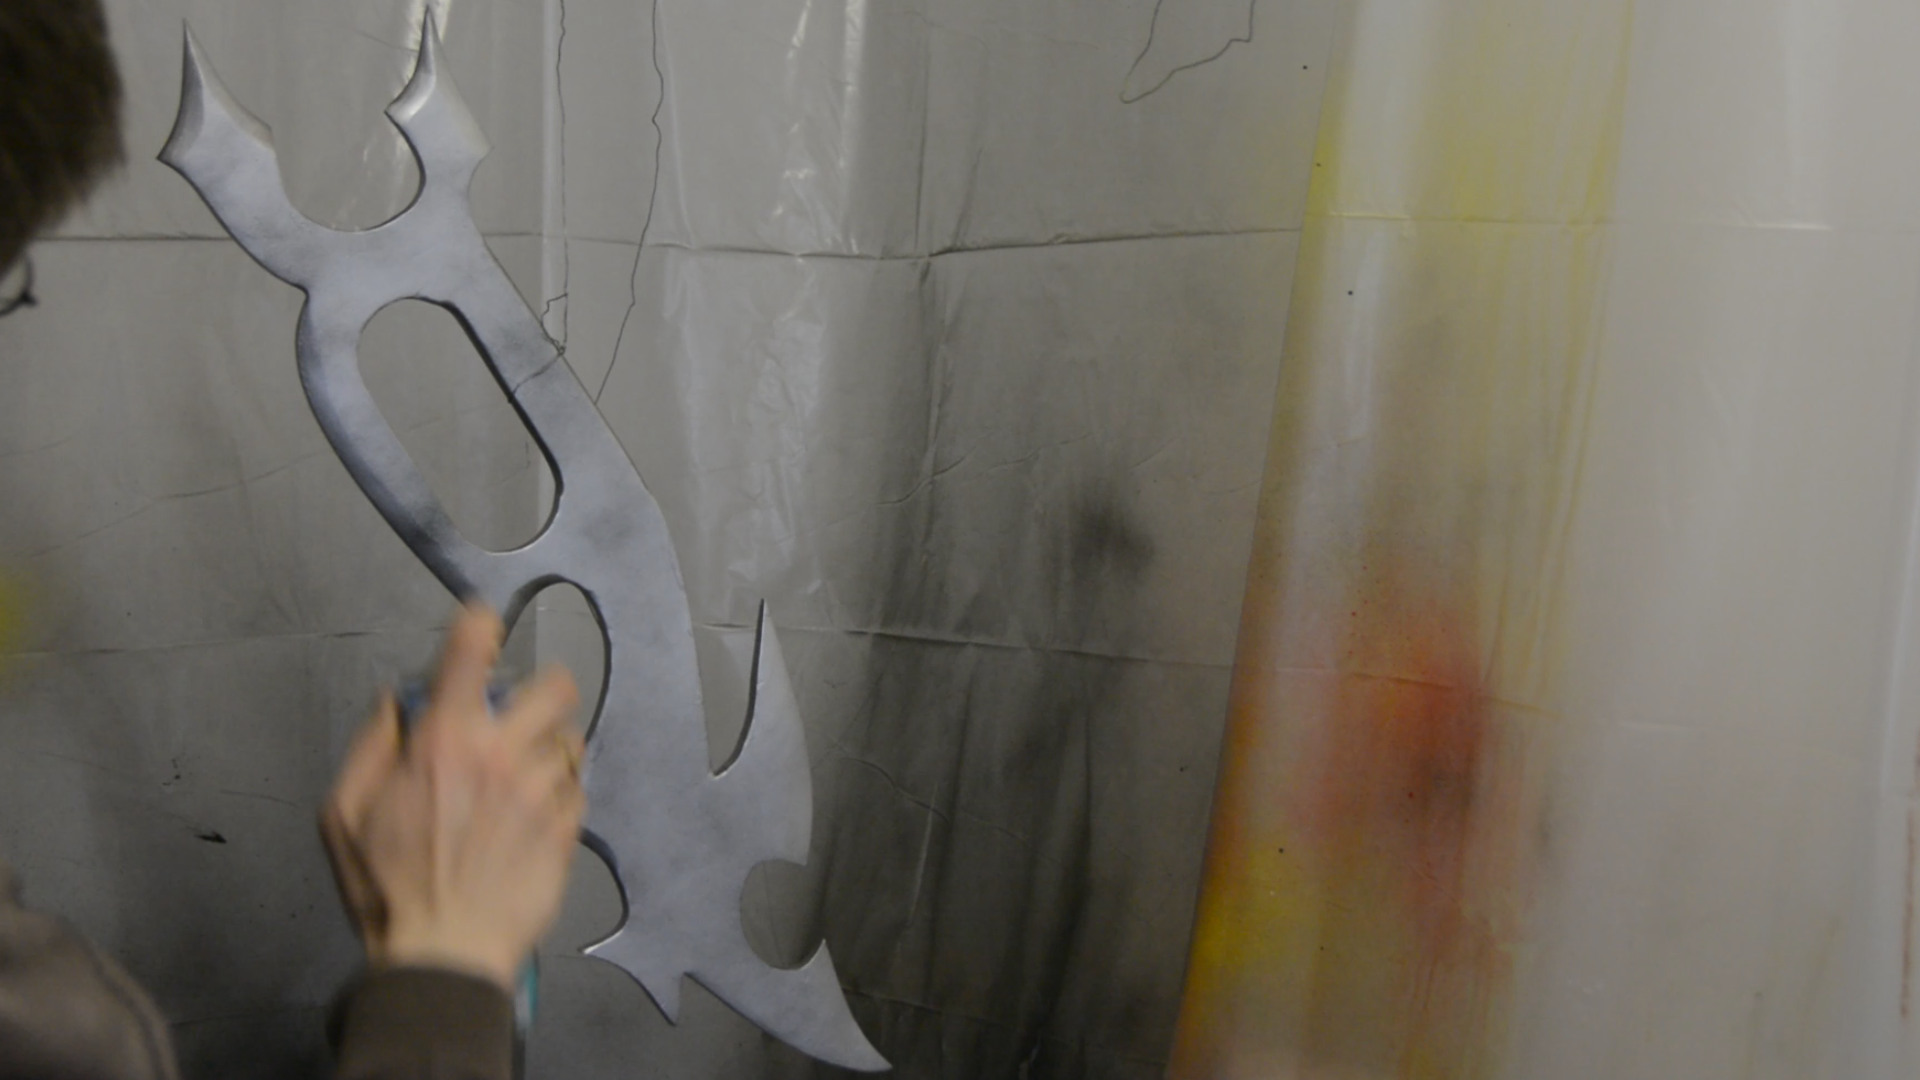
I then give the entire shape several coats of black paint with a light sanding between coats – mainly to cover up the woodgrain. I then follow up with two coats of silver spray paint that I touch up with a few sparkles of black paint so that it does not look too bright and shiny.

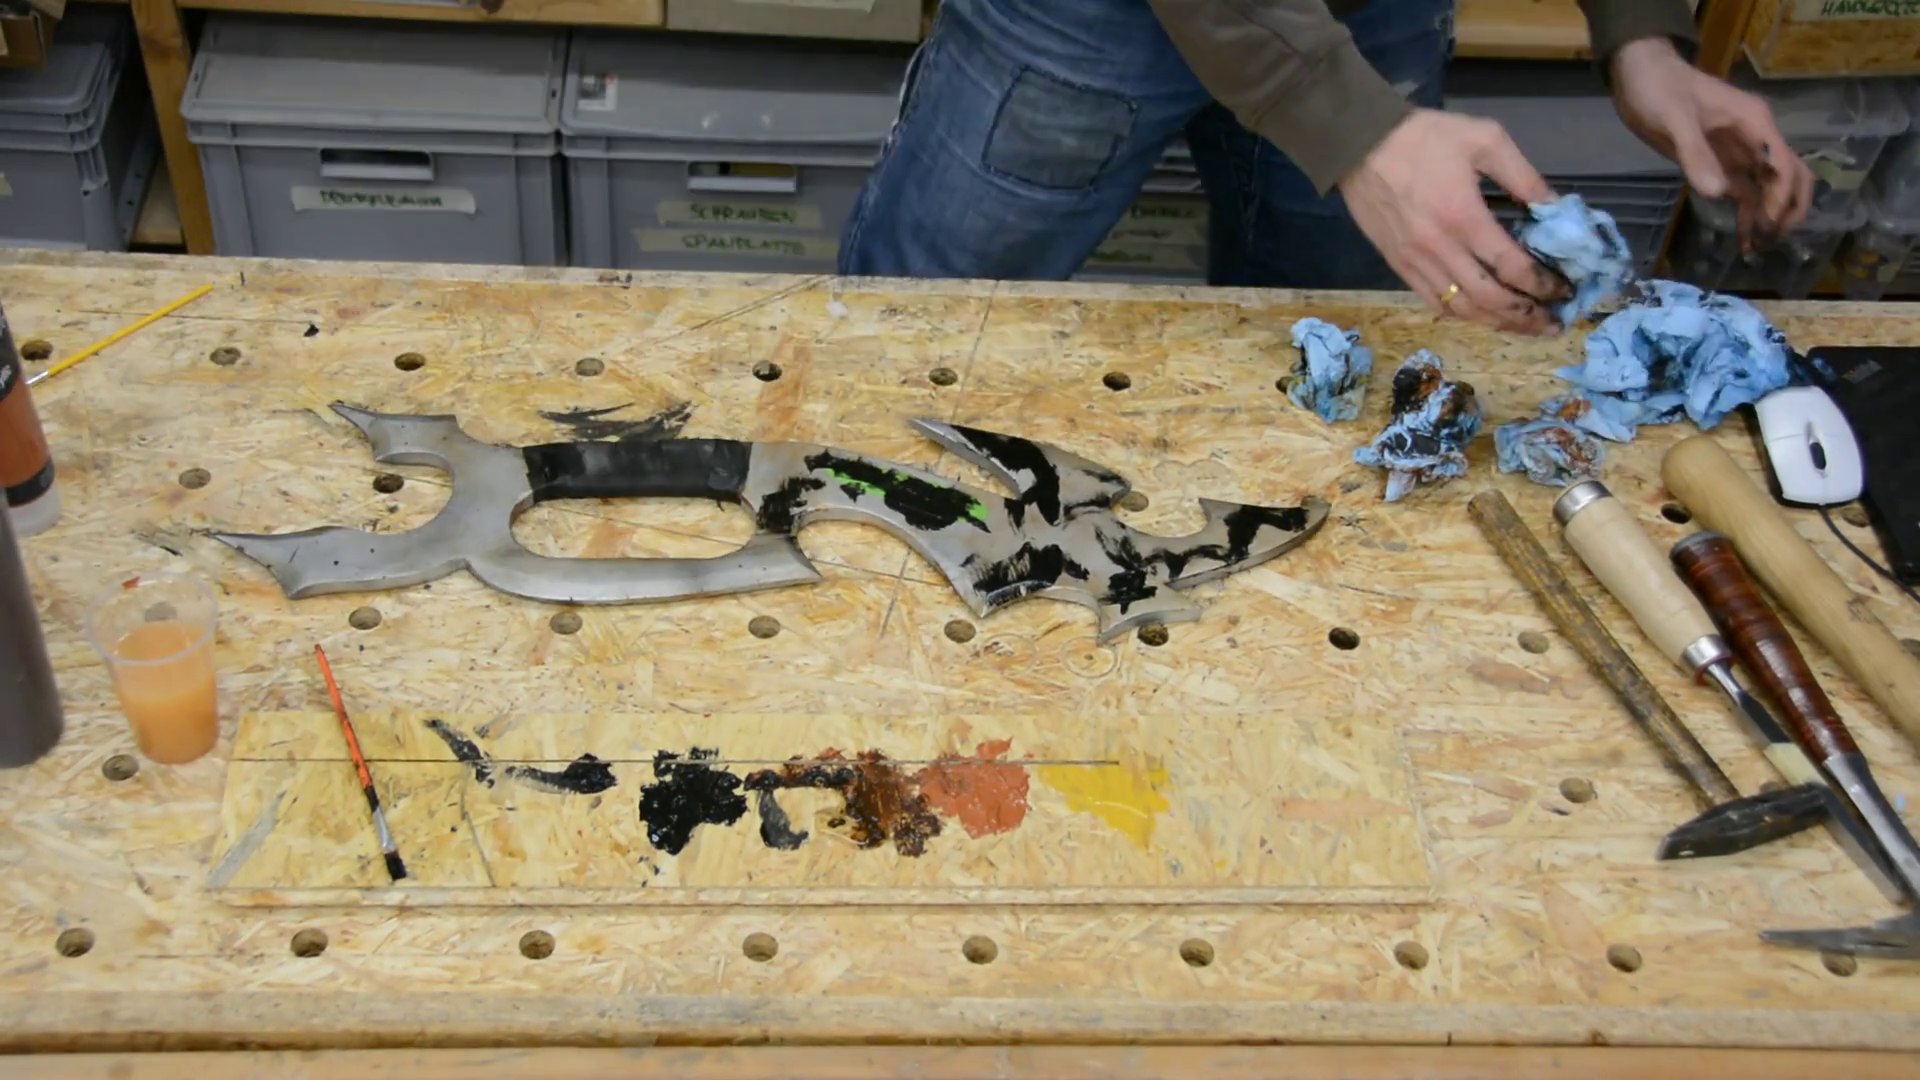
From bright green vinyl I cut the accent part and glue it to the pushstick. Afterwards the entire stick gets 2 additional coats of clear spray paint.


The handle gets wrapped in black tape is normally used on bicycle handles – which gives the stick a very comfortable grip.

Lastly I create some dents and scratches before applying a variety of brown and black colors and wipe most of it away to weather the piece, highlight all the defects and make it look used. This is the first time I’m trying my hands at weathering. If you have tips and ideas please let me know in the comments.
Although it is less functional than most of my projects this one was definitely fun to make.
Resources
Tools and material (affiliate)
- Handle wrap on amazon.de or amazon.com
- Silver spray paint on amazon.de
- Acrylic paint on amazon.de or amazon.com