
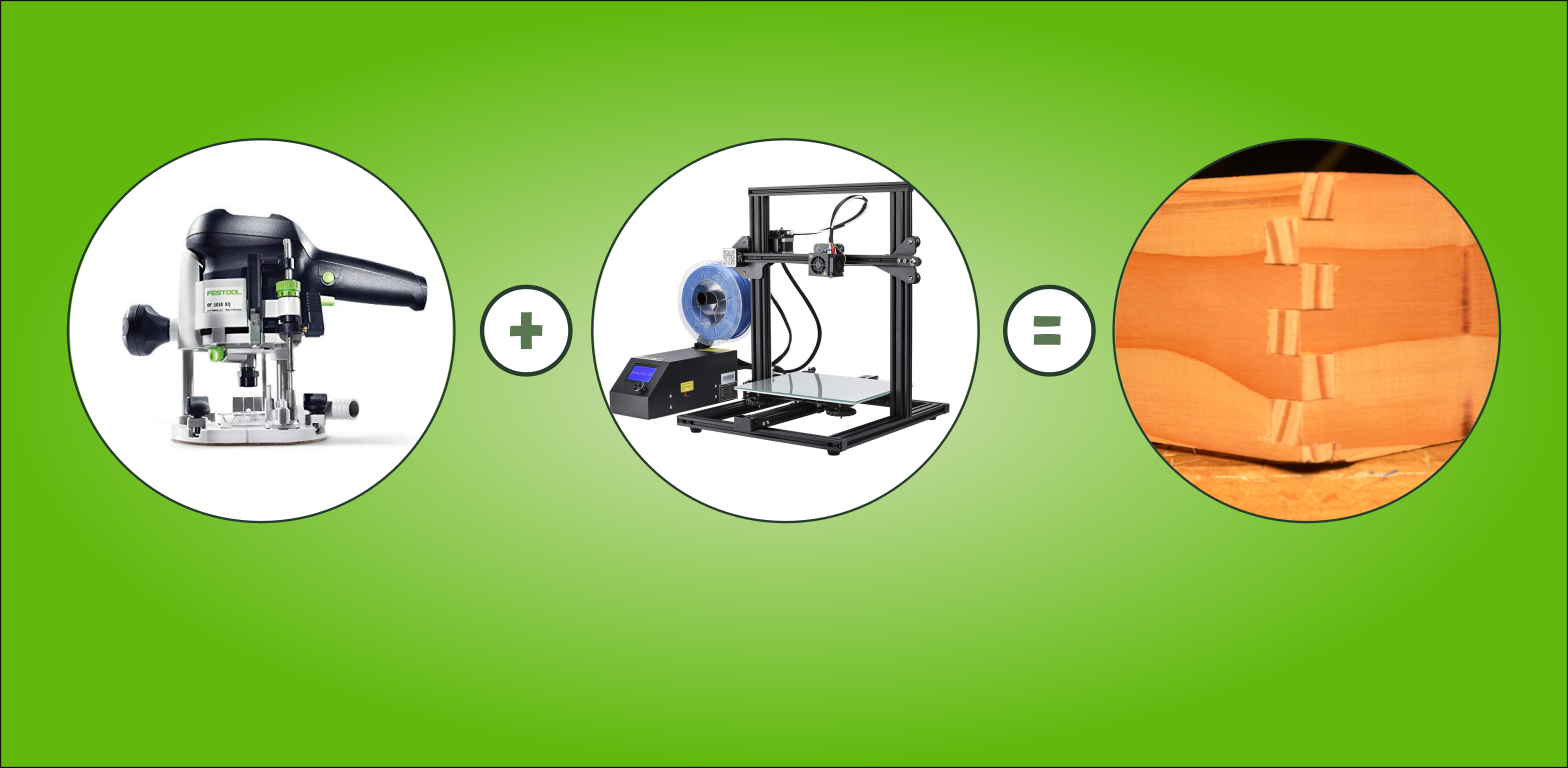
In this article we 3d print a boxjoint jig that allows us to create boxjoints with only a router. The jig is very precise and can be configured to create all kind of box or finger joints.
Boxjoints are a strong and nice looking way to create boxes. Creating box joints or finger joints on the table saw requires either a dado set or a complex jig setup. We were looking for a quick and easy way to create these joints and decided to develop a 3d printed version. We took the model of our loose tenon jig and just turn the slot 90 degrees.
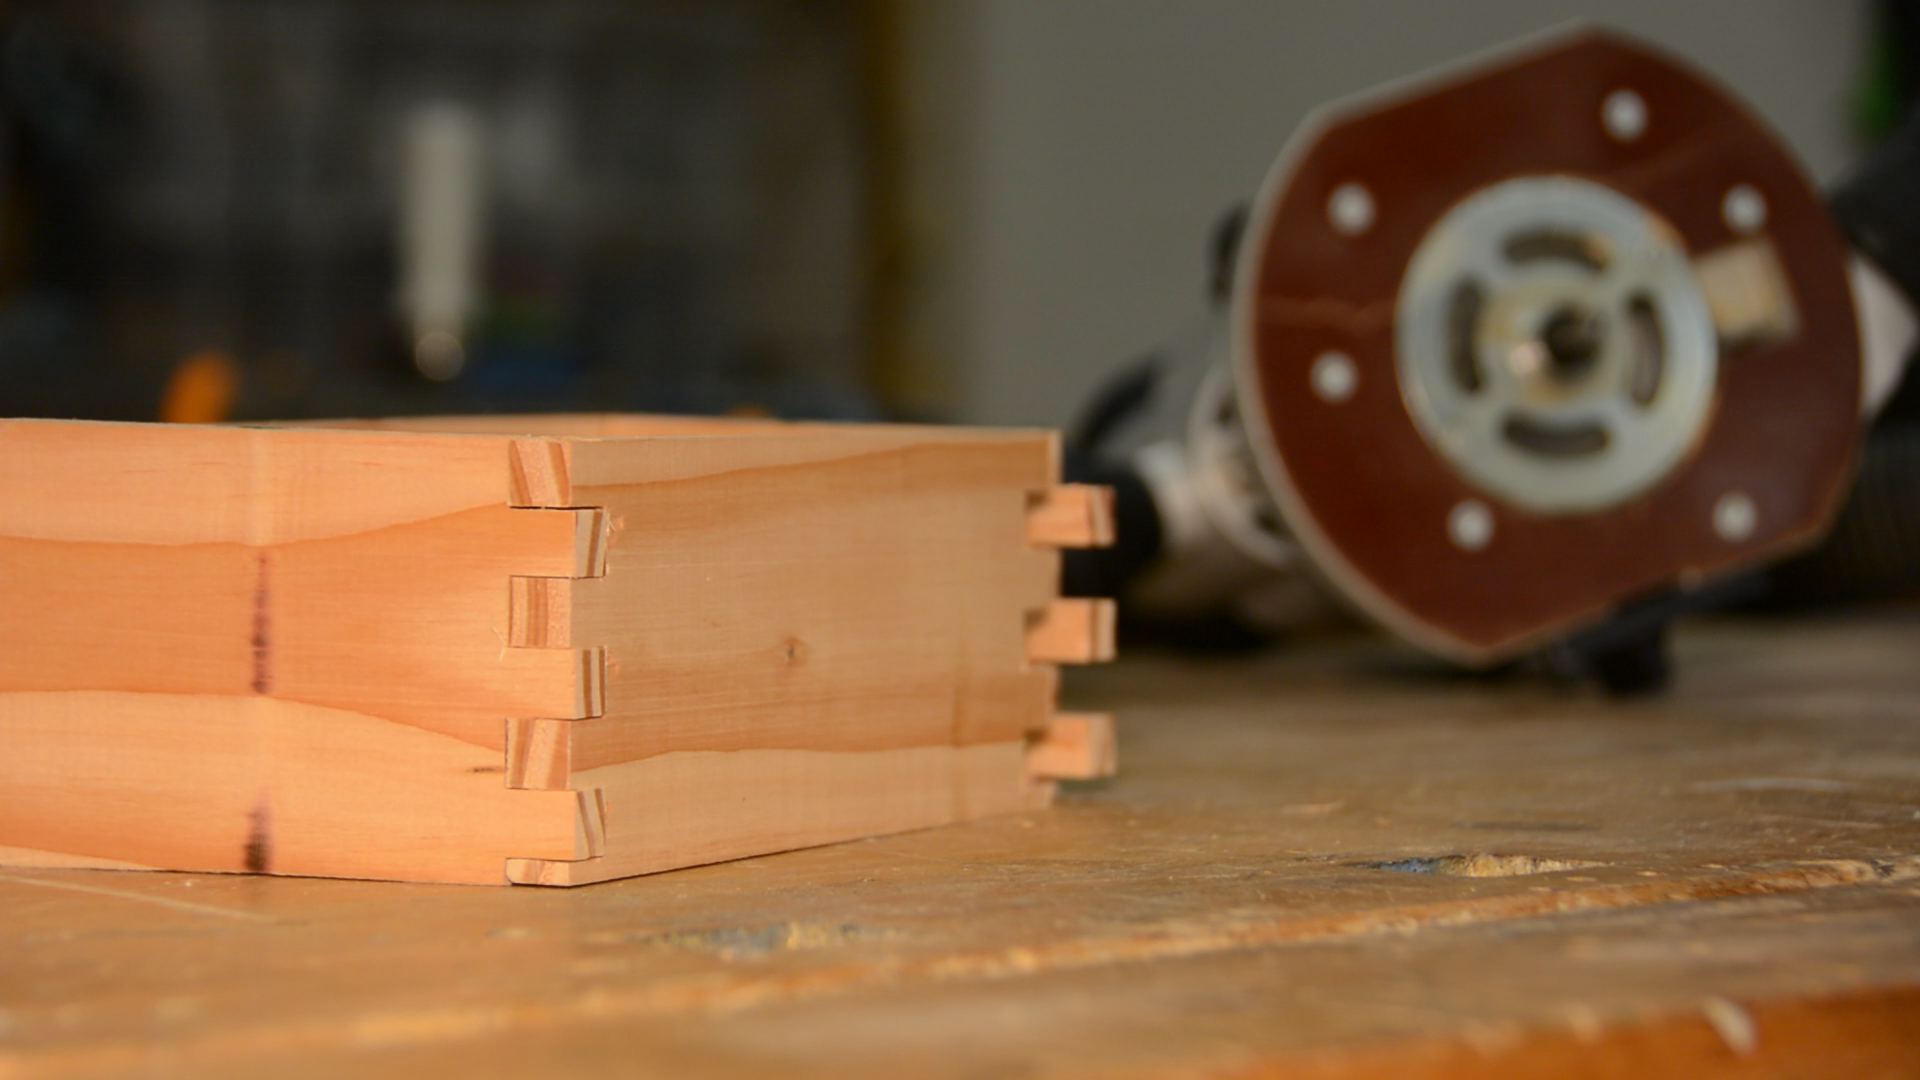
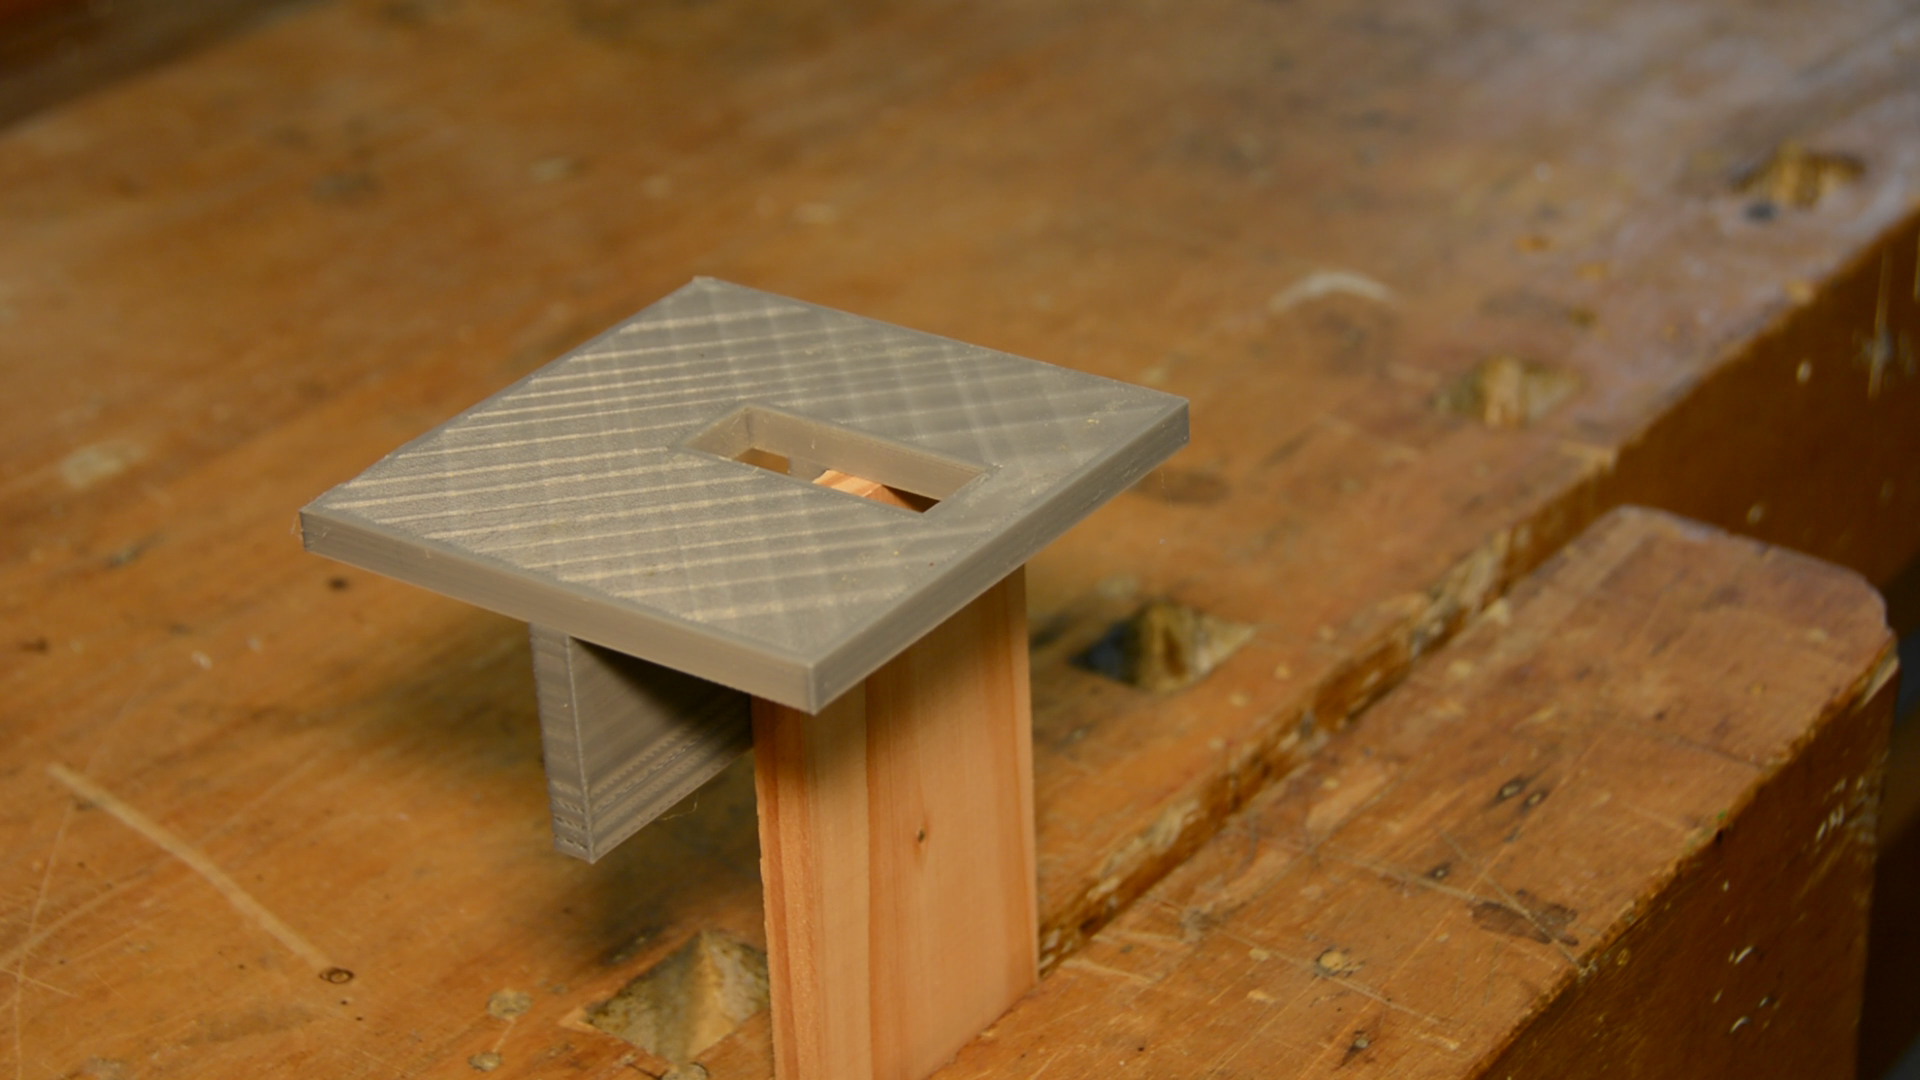
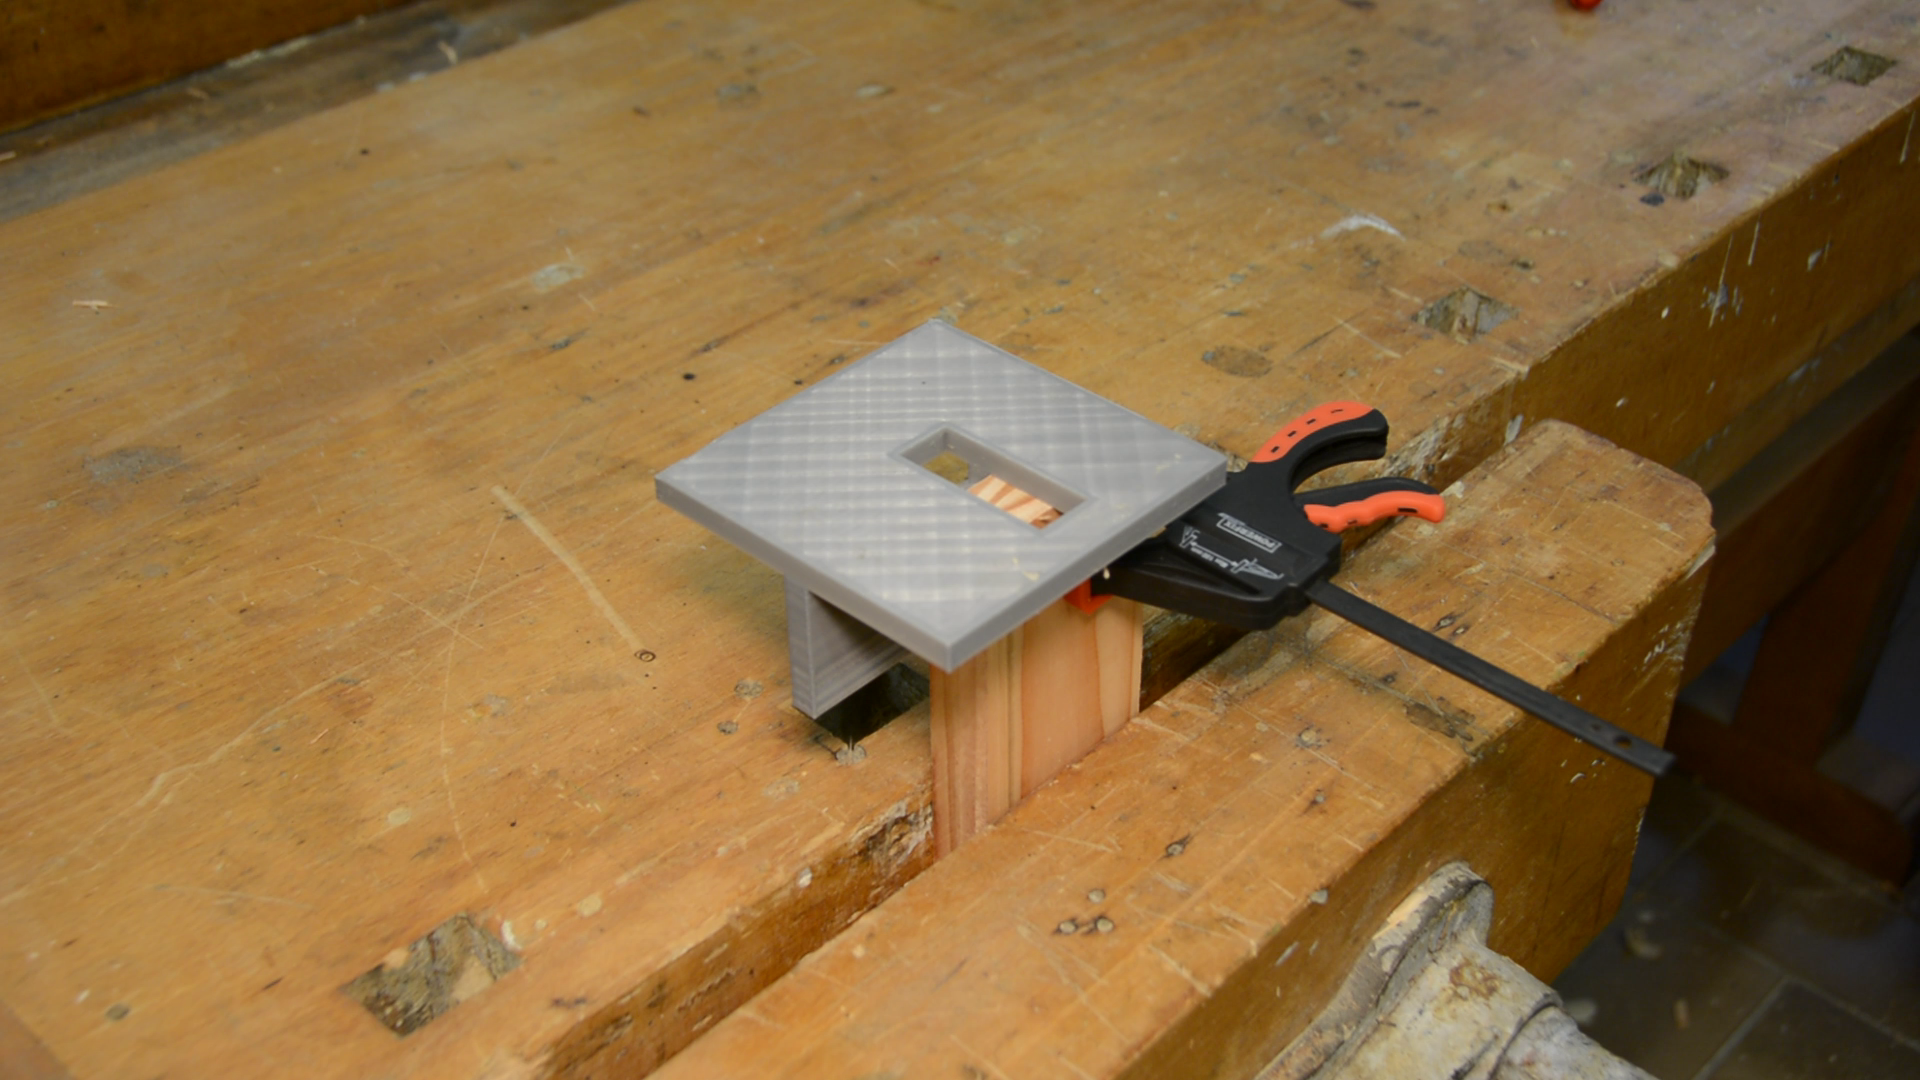
Overview of the box joint jig
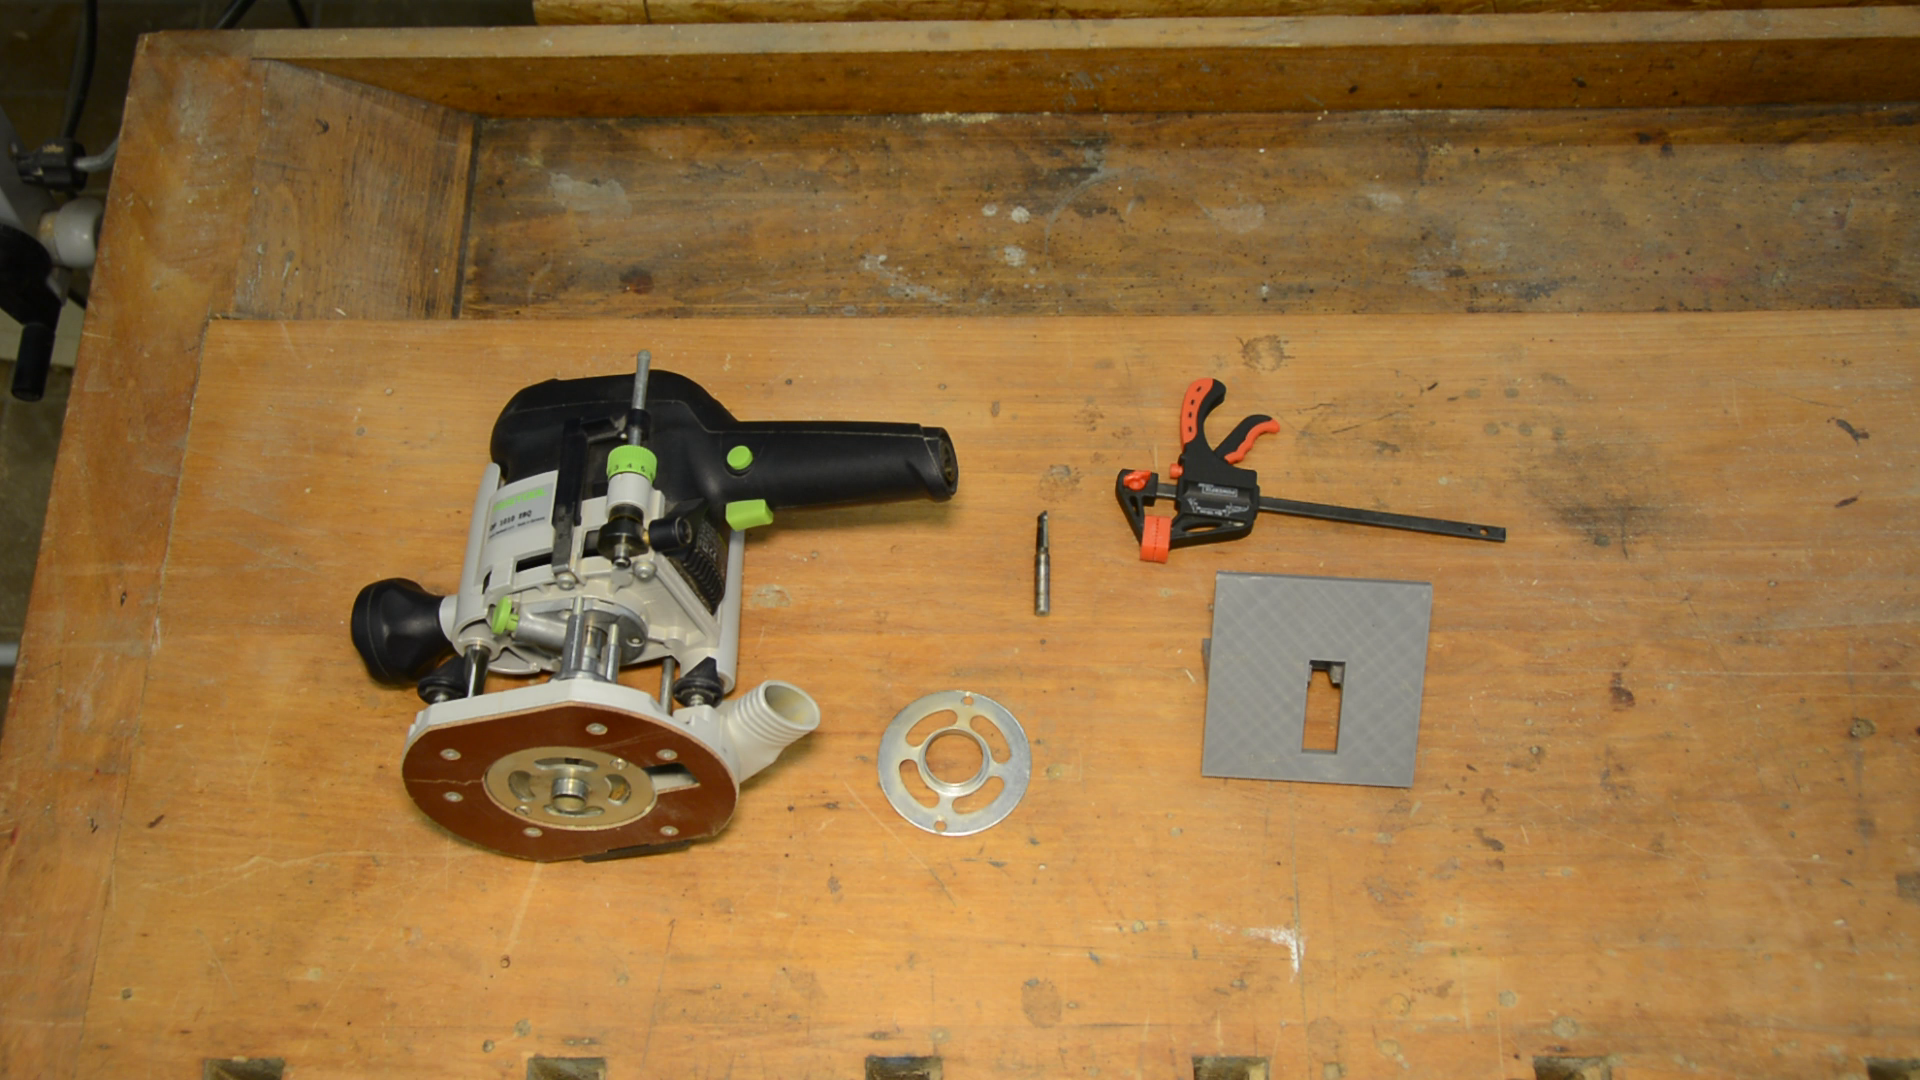
All you need is a router, a straight router bit and a guide bushing, the 3d printed jig and a clamp. If you don’t have a guide bushing at hand have a look at this article that shows you how to 3d print a custom guide bushing.

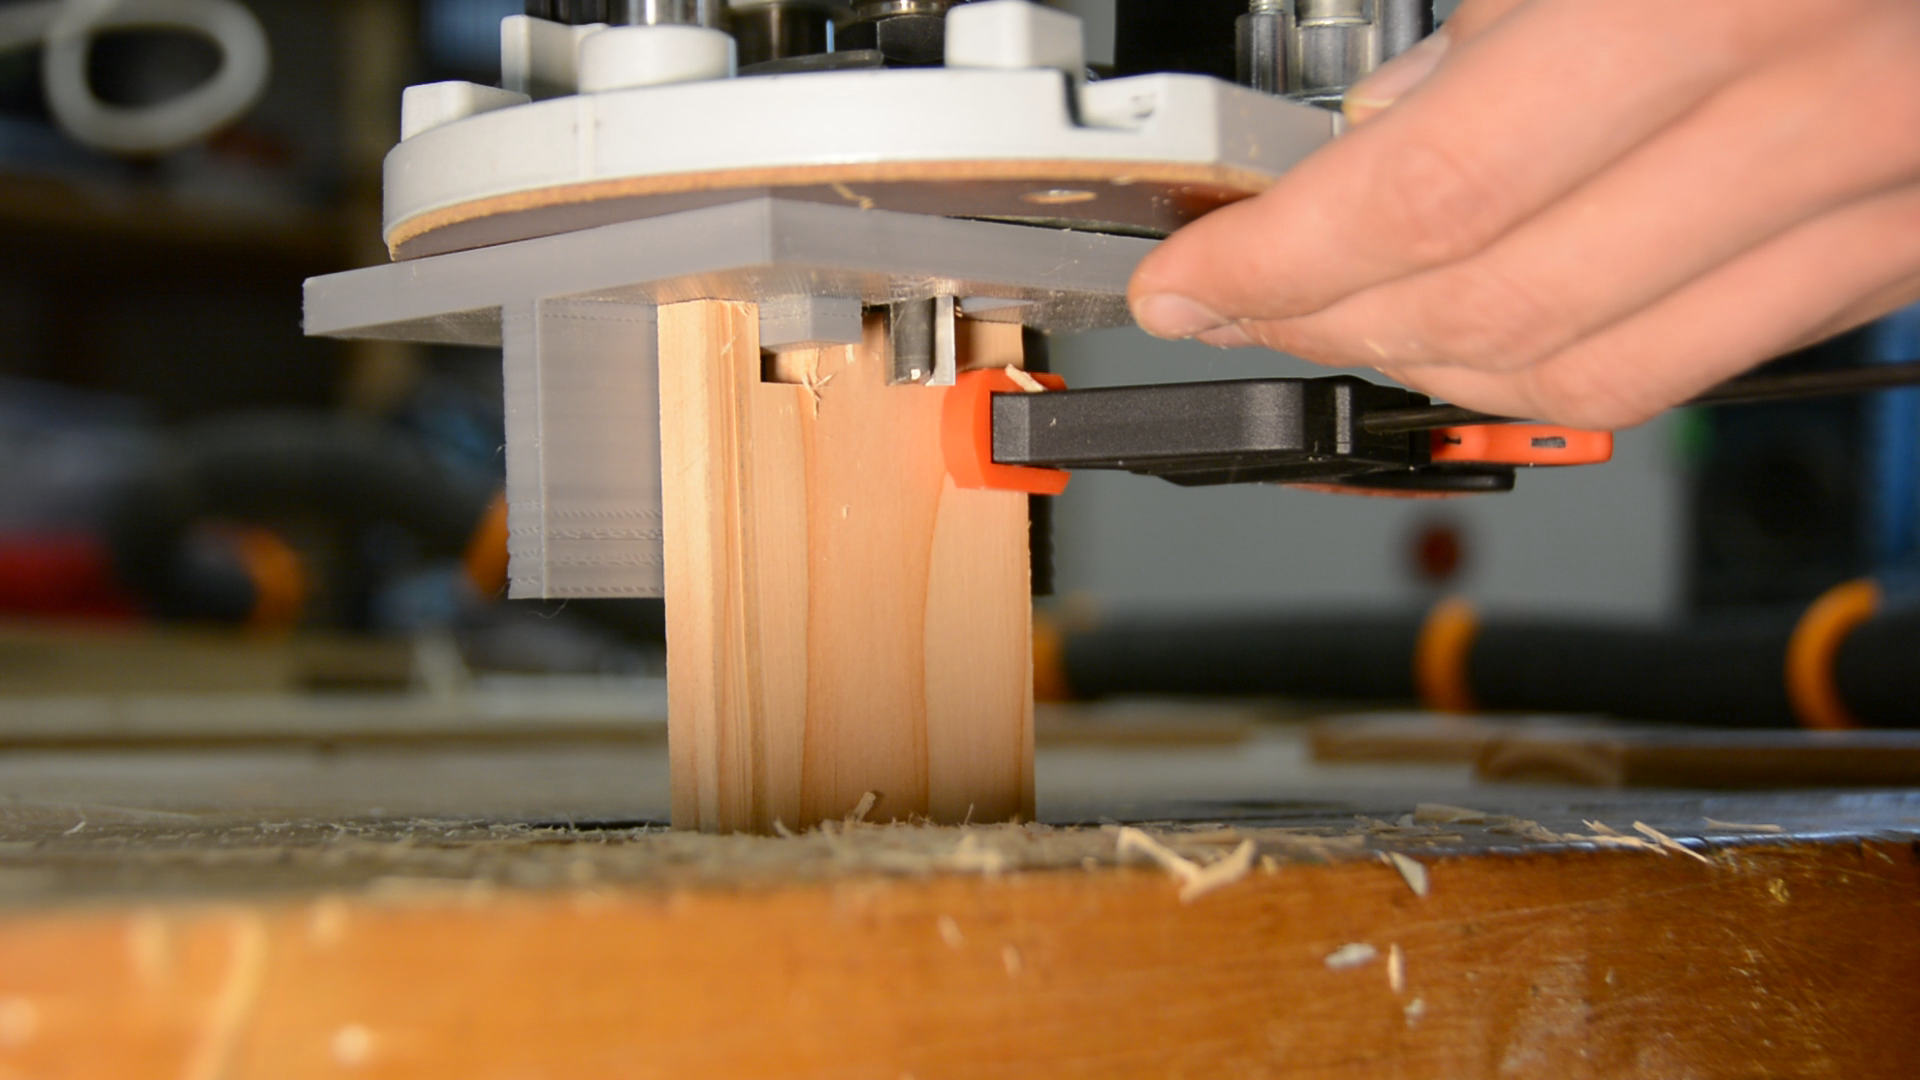
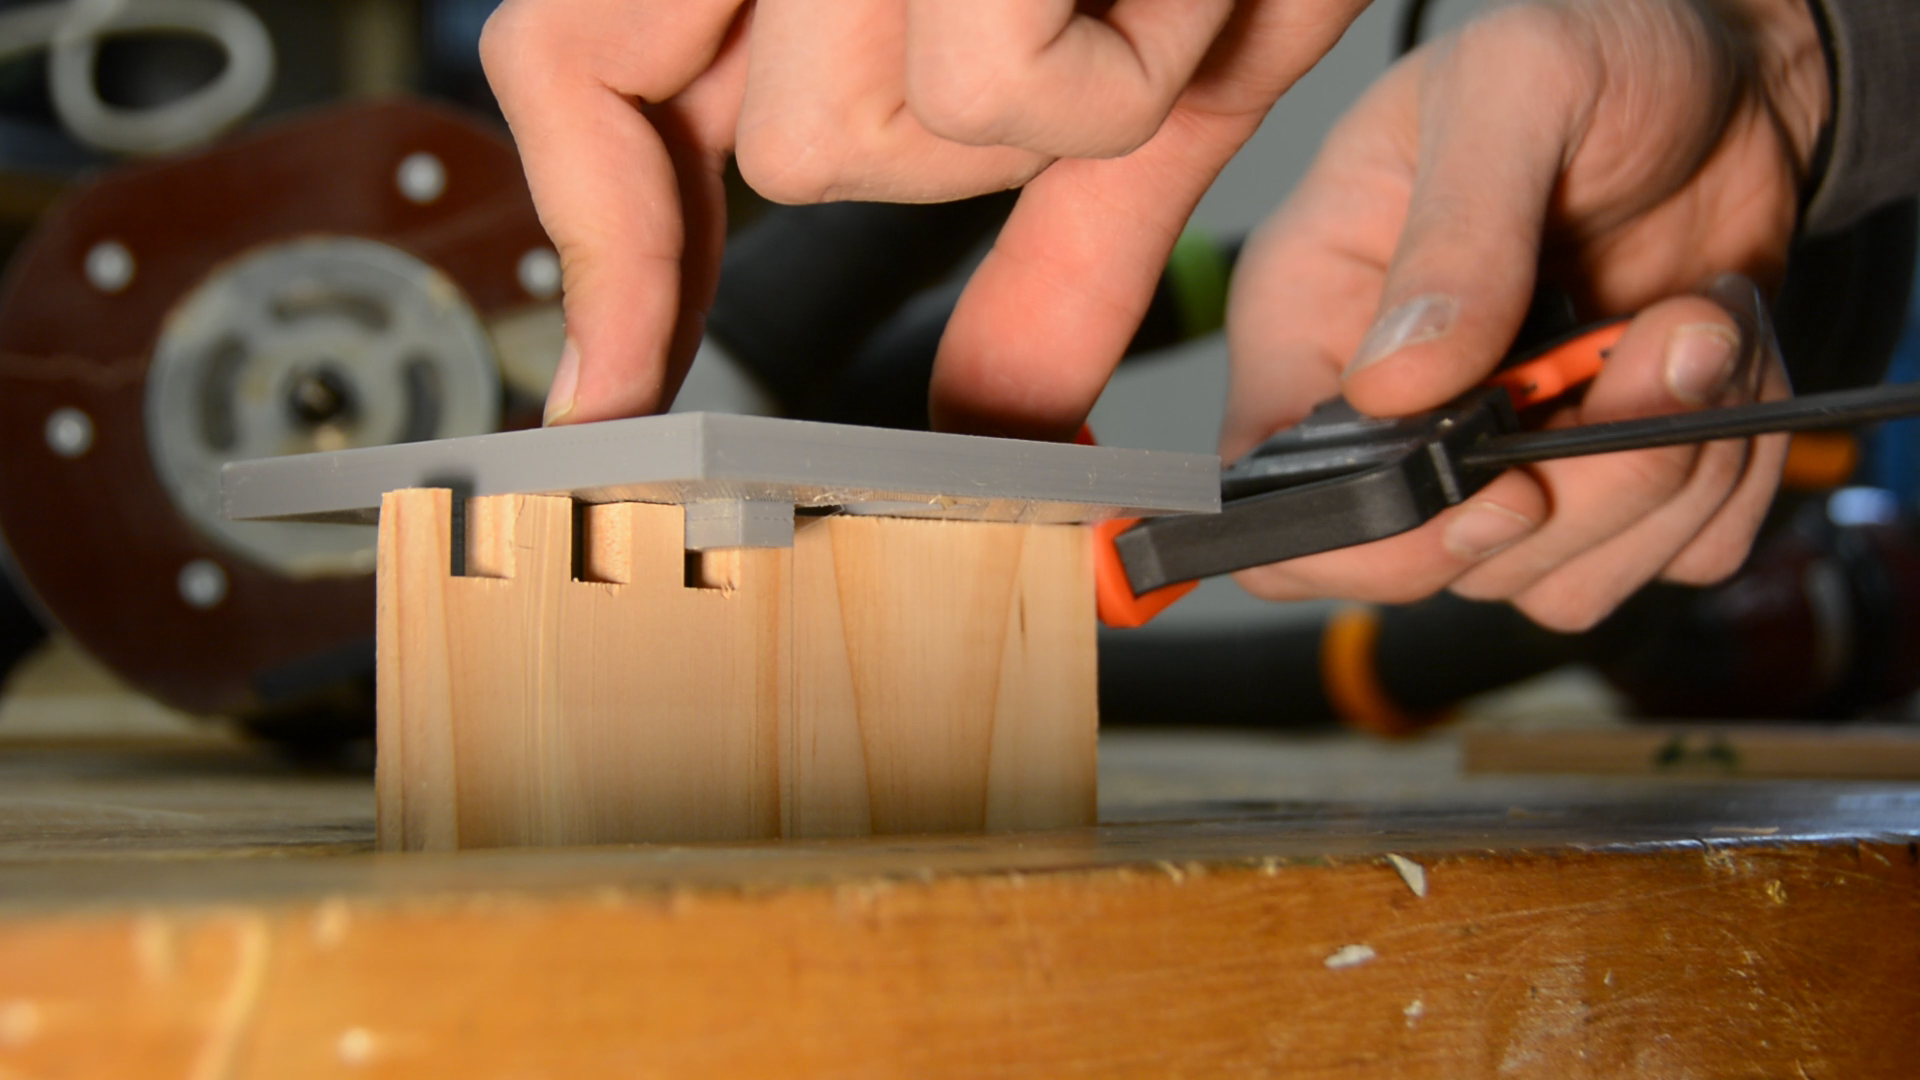
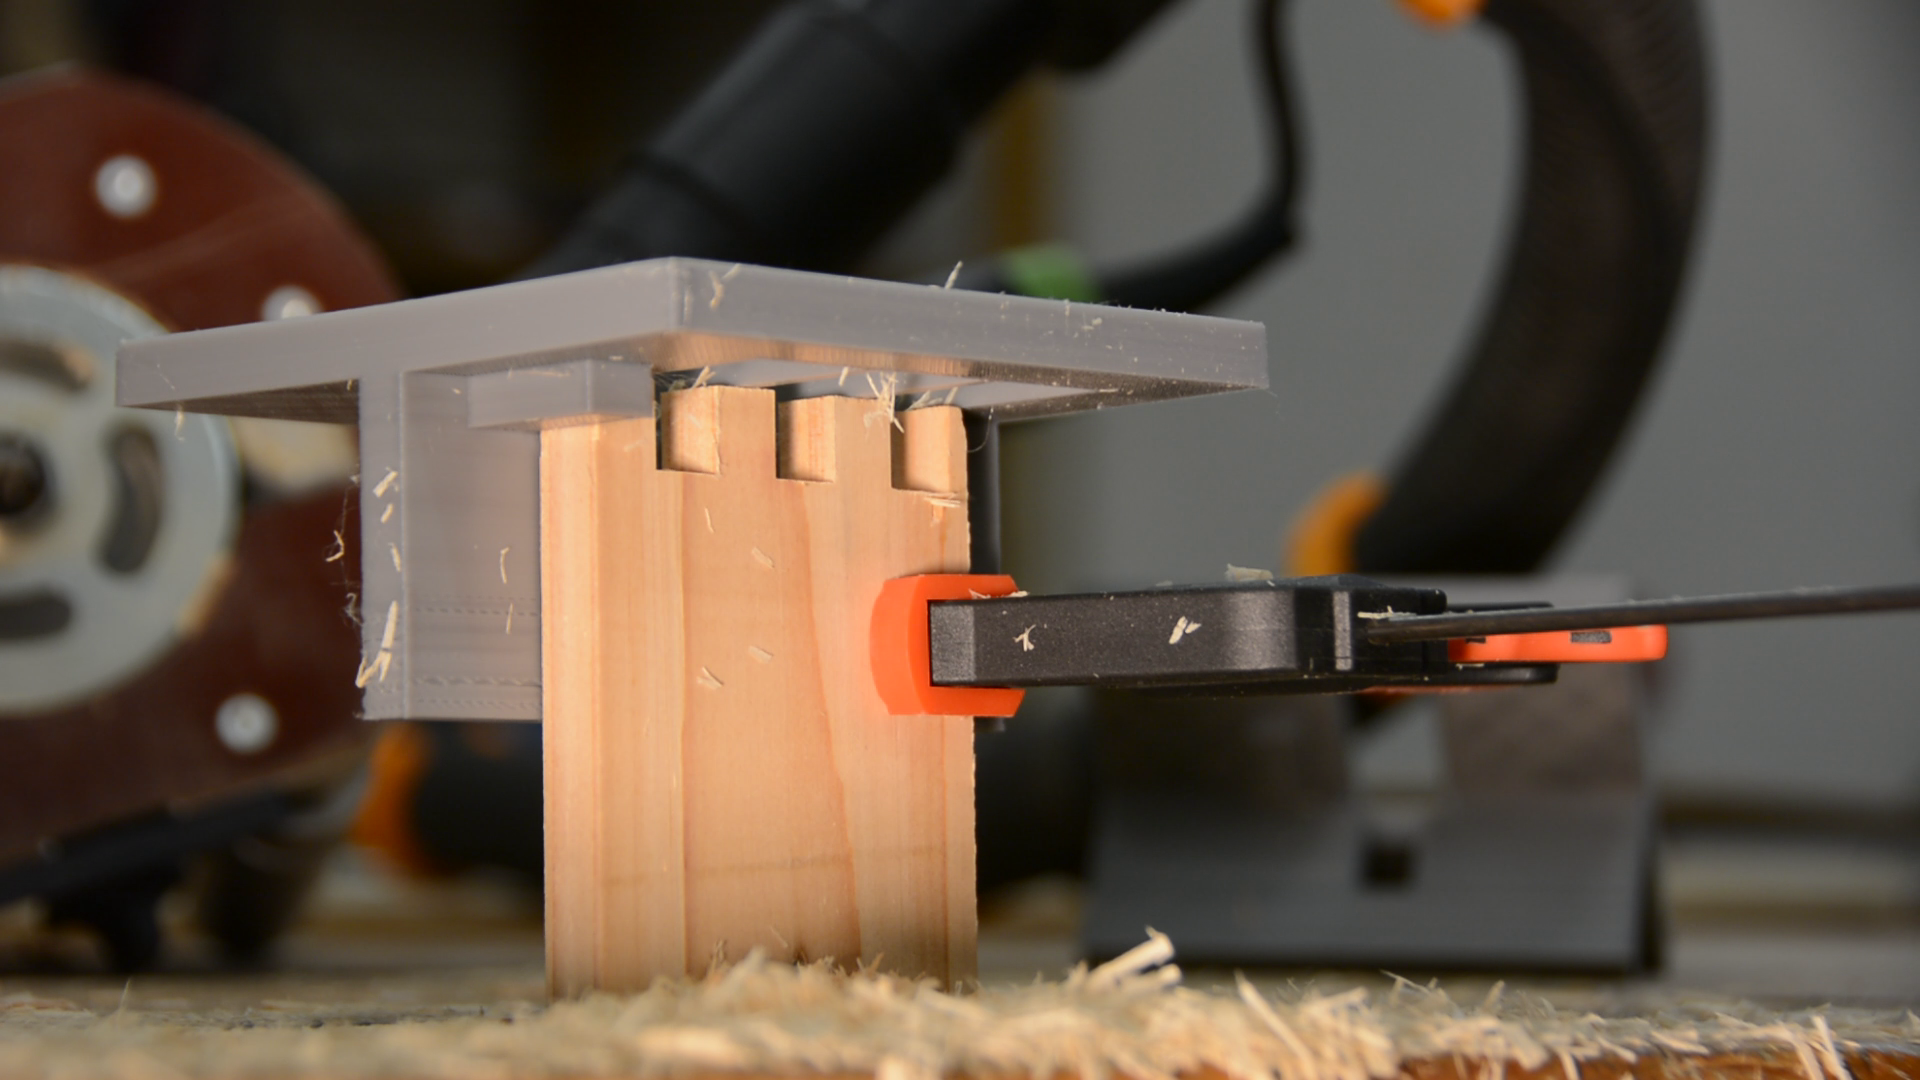
With a guide bushing riding in the slot we can route the fist finger. The pin on the underside then registers in this slot and we can continue to create more
fingers. Very simple setup and easy to use.
Create your own jig for free
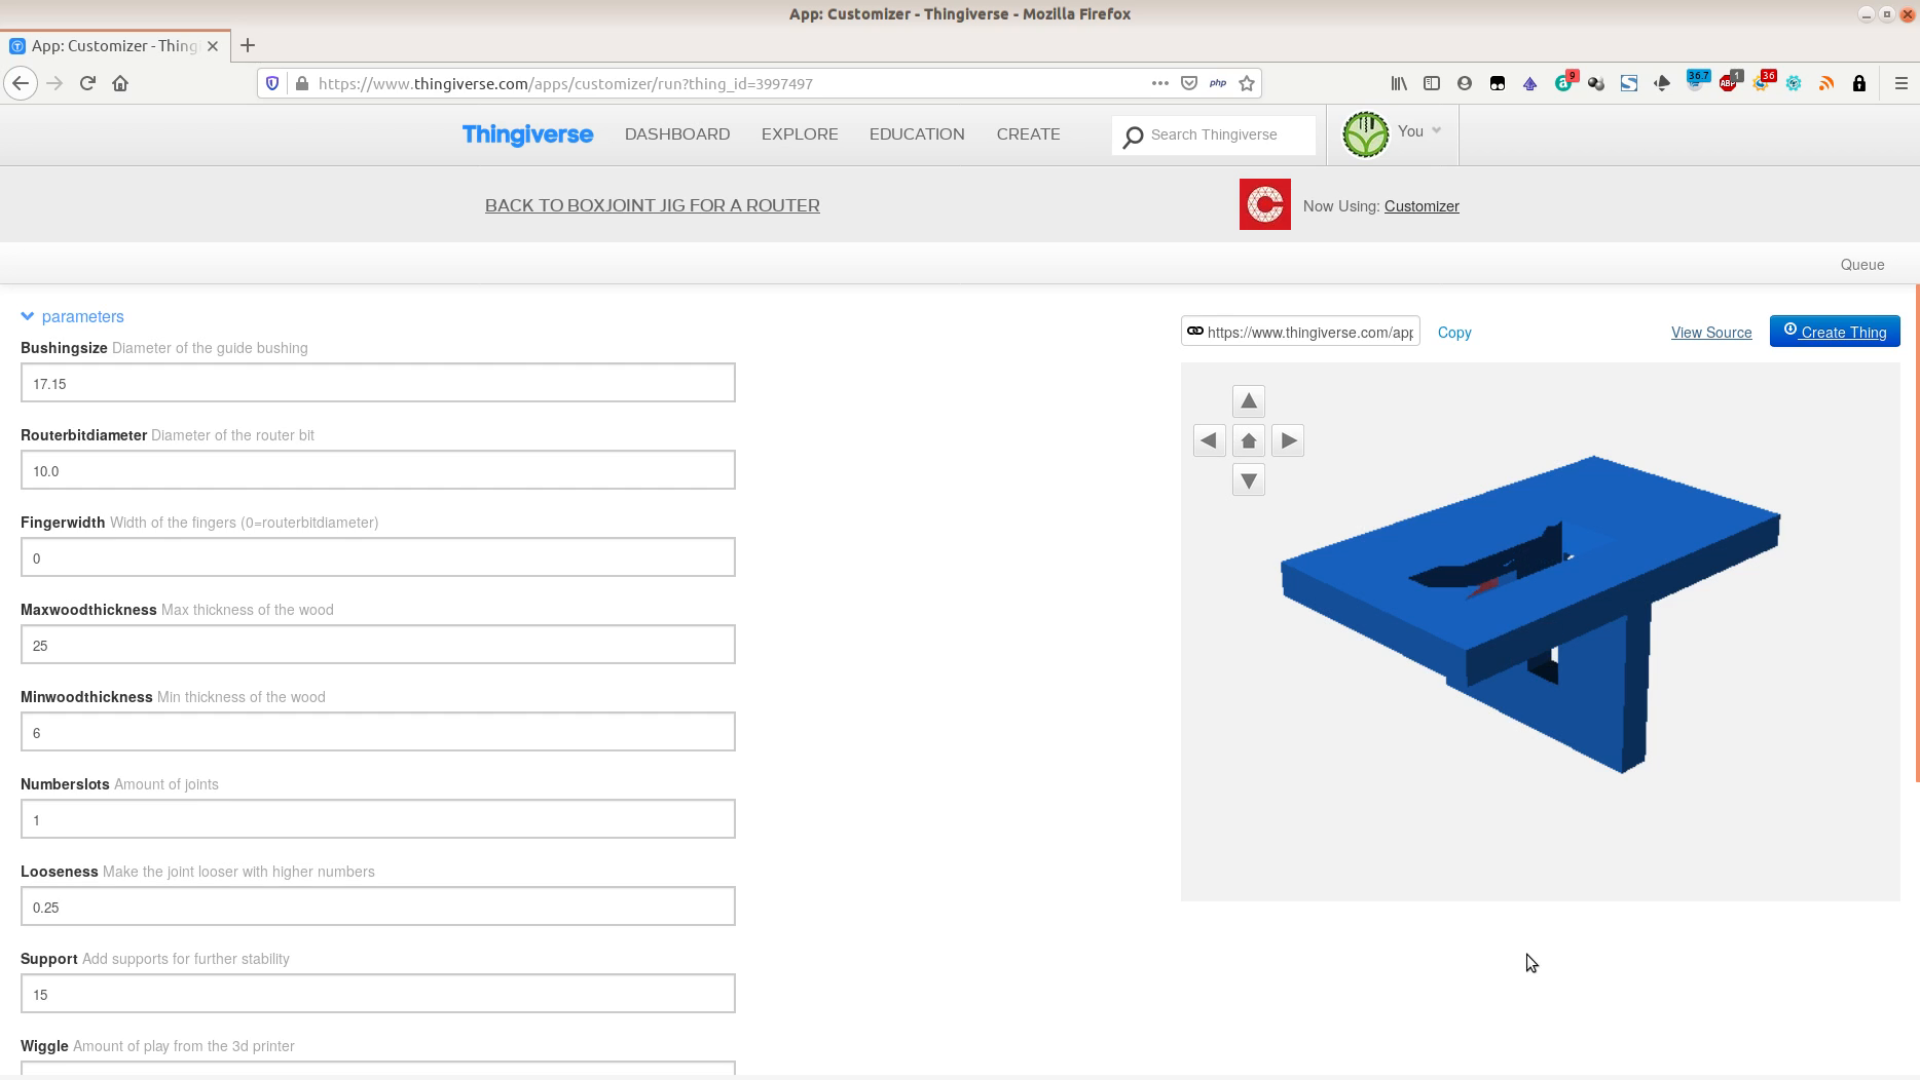
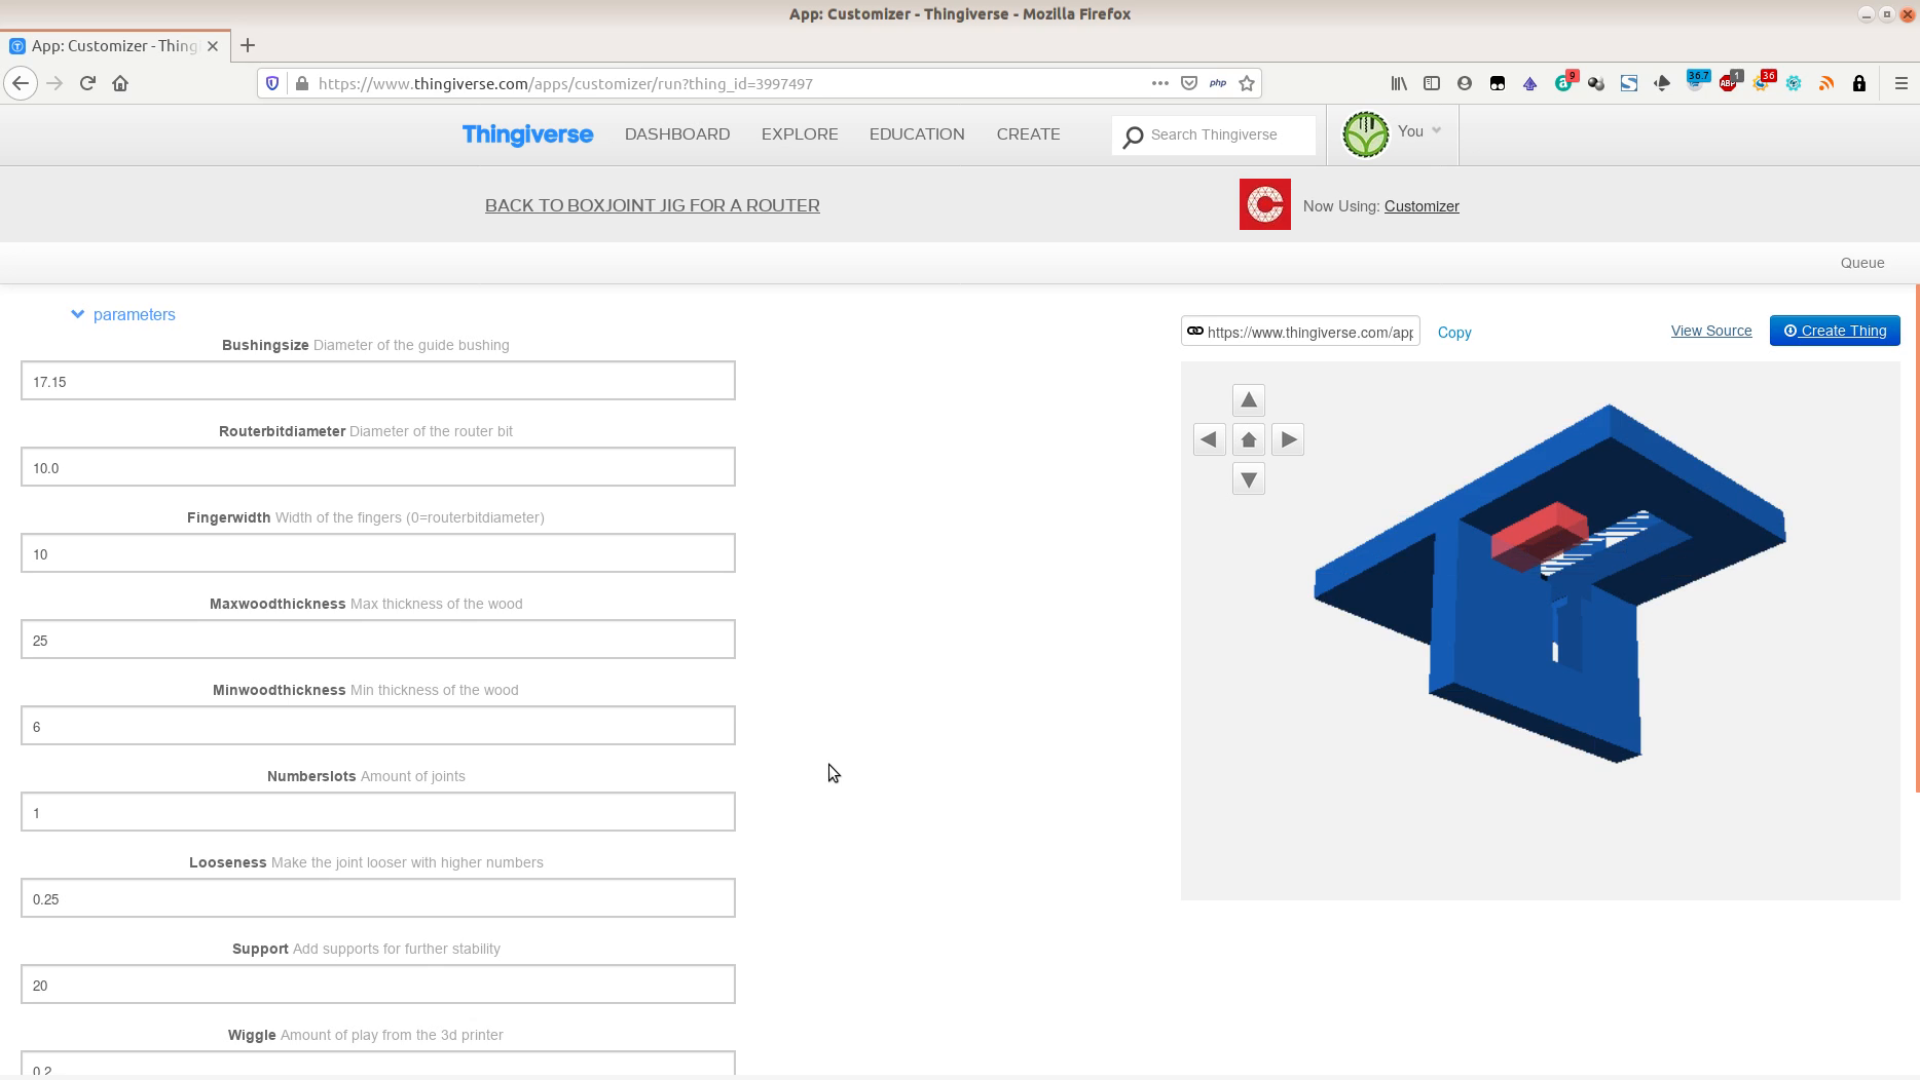
In order to create your own jig use the link to Thingiverse and click on the Customizer.
For a simple jig you ignore all setting but the size of the router bit and the size of your guide bushing. The customizer will work for a while. After downloading the model, use a slicer of your choice and send it to your printer.


Jig usage
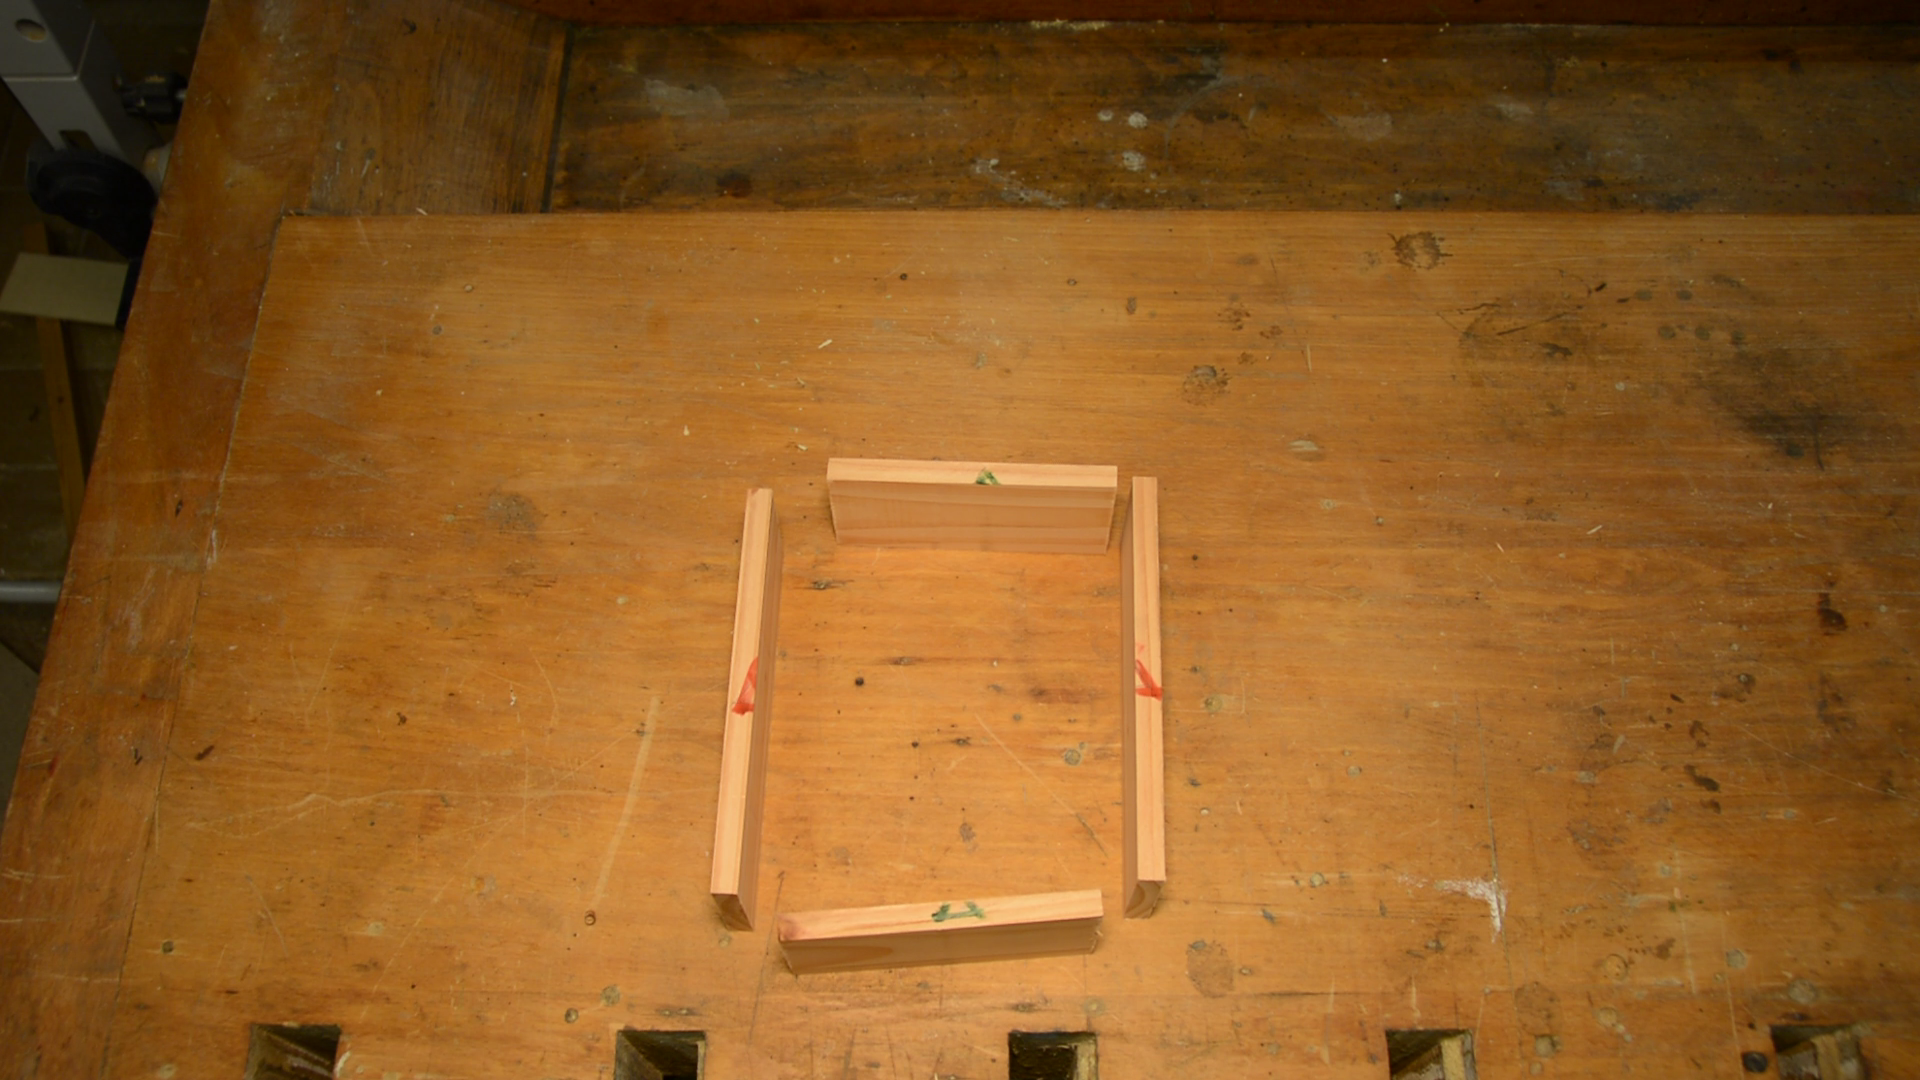
While the jig is printing we cut two long and two short pieces that will later form our box. All the top sides are marked.
We clamp a long piece with the top side to the left into a vice. The jig is then put on top of the wood. The registration pin on the underside is pressed firmly against the upper side of the long piece of wood. Then we clamp the jig in place.
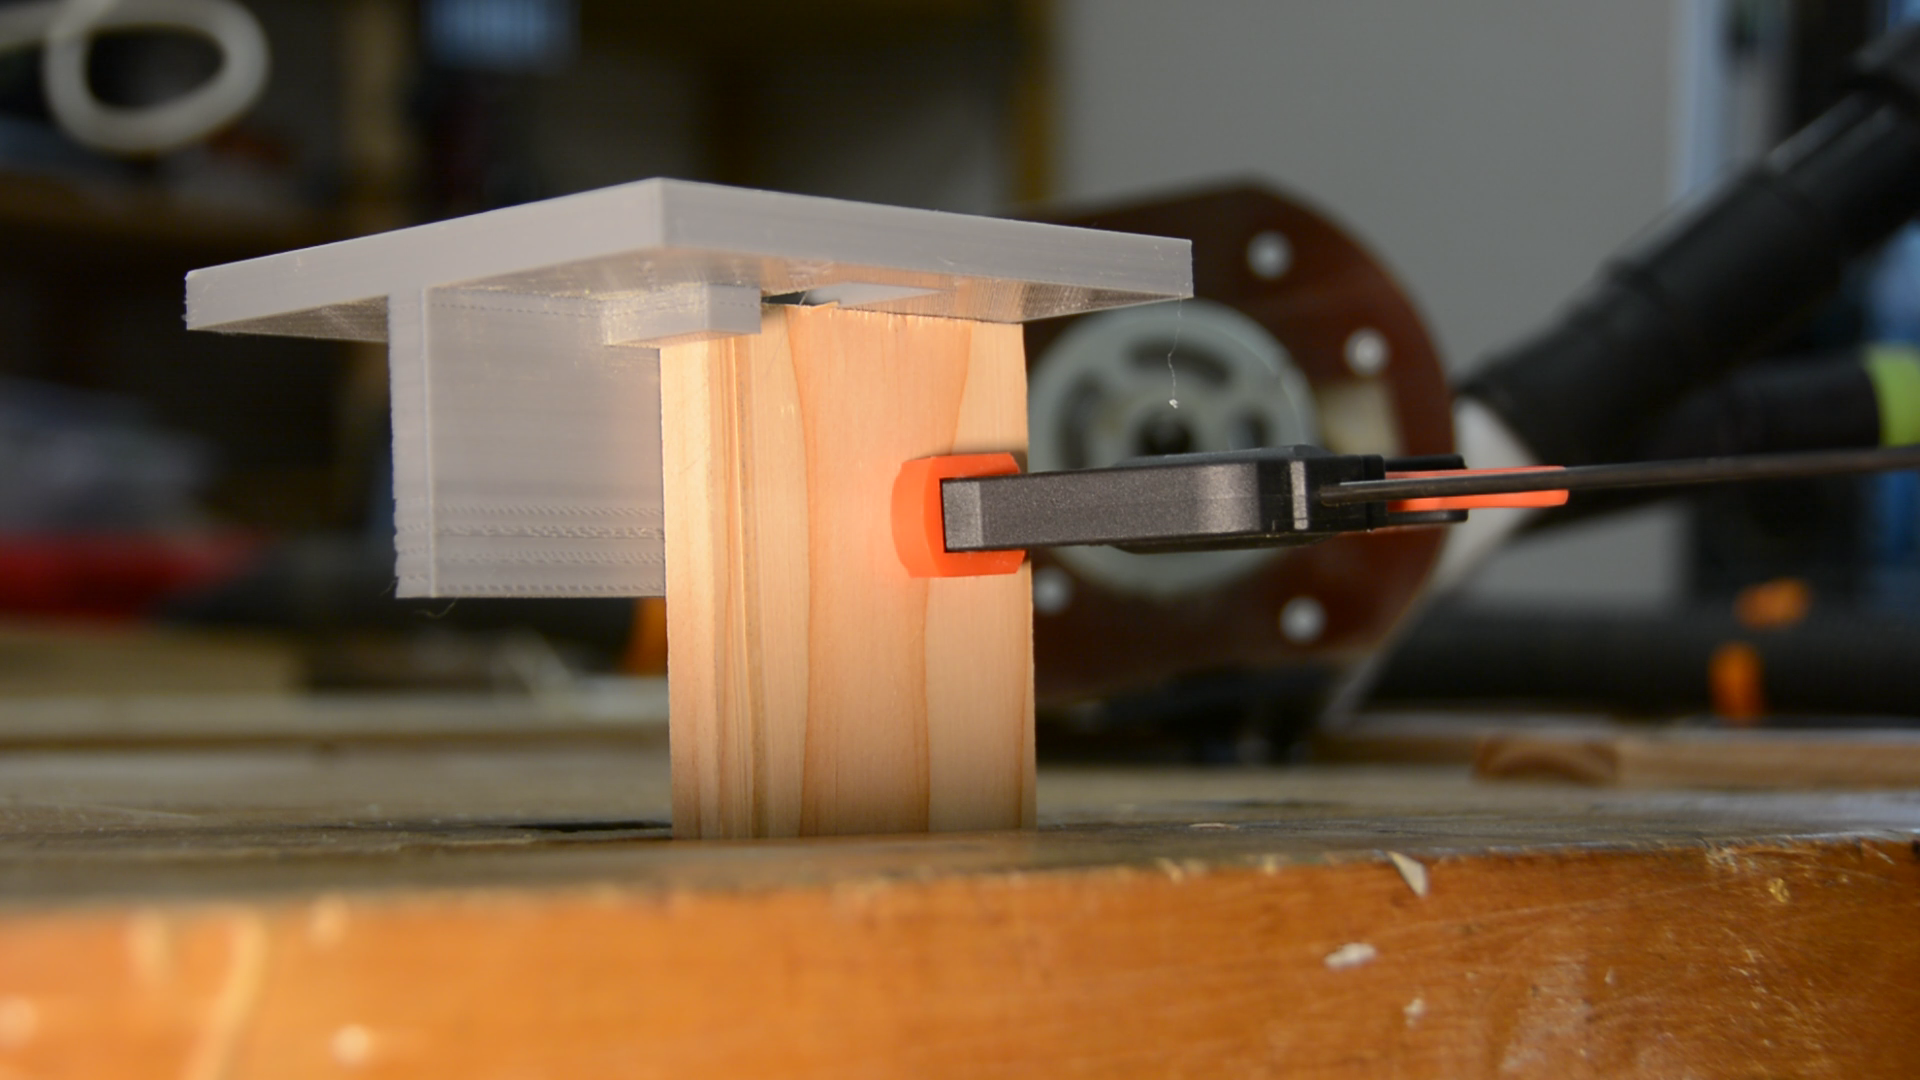
We position the router on top of the jig and lower the bit so far that it is just a hair below the thickness of one of the short boards.
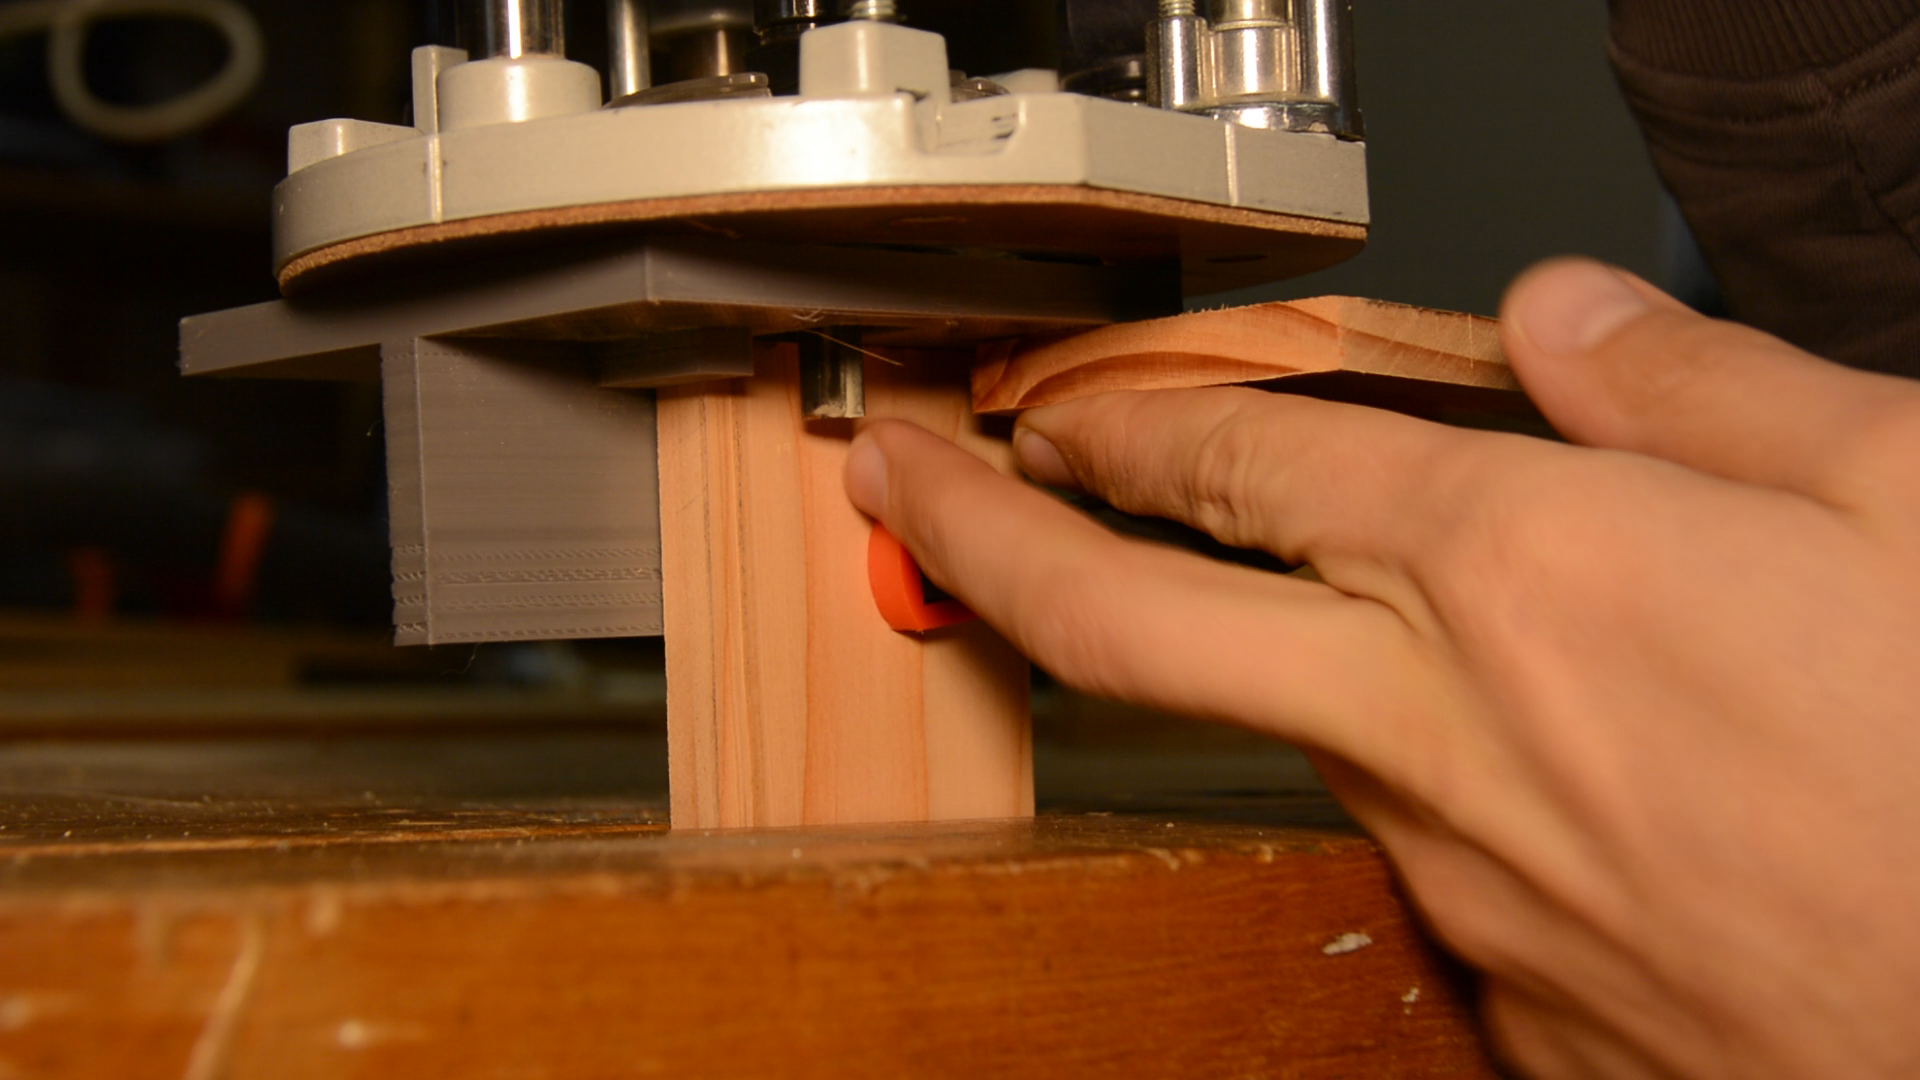
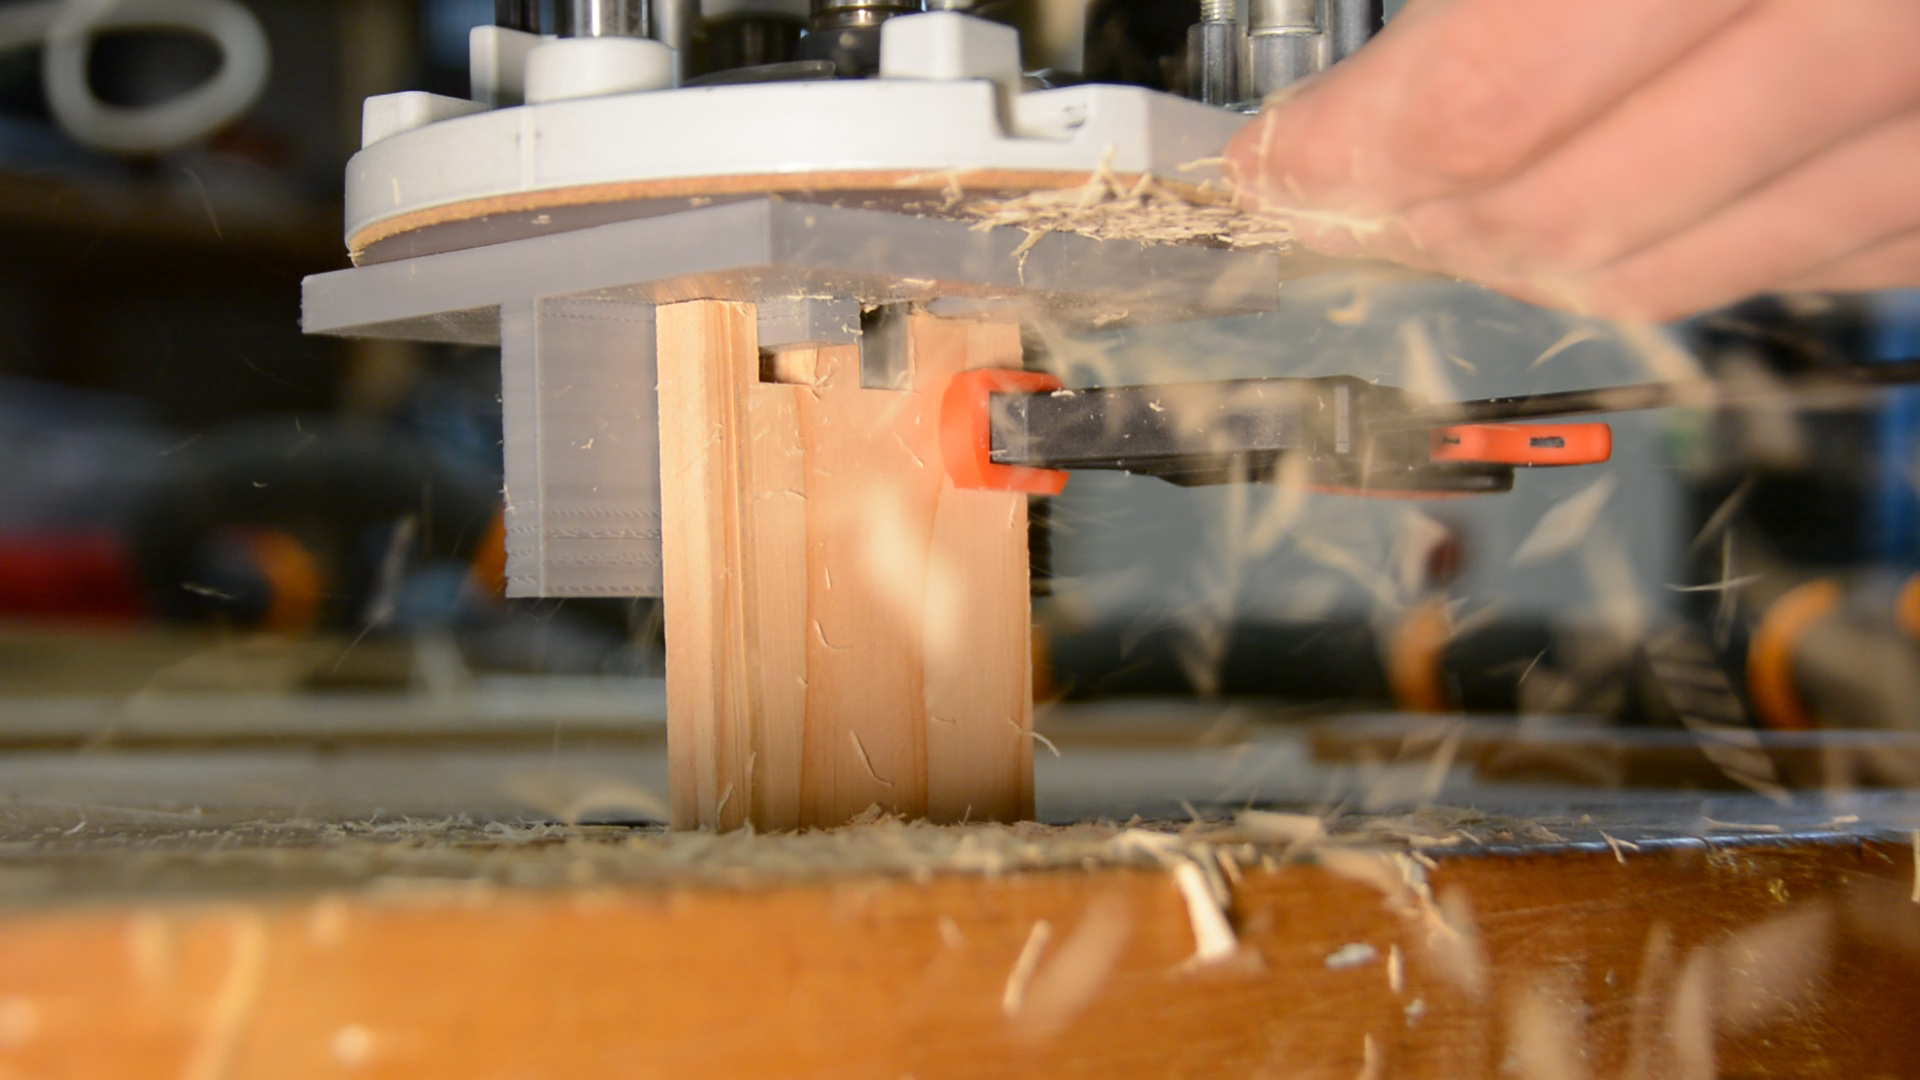
With the guide bushing riding in the slot we route the first finger, then move the jig to the next slot and continue till we reach the end of the board.
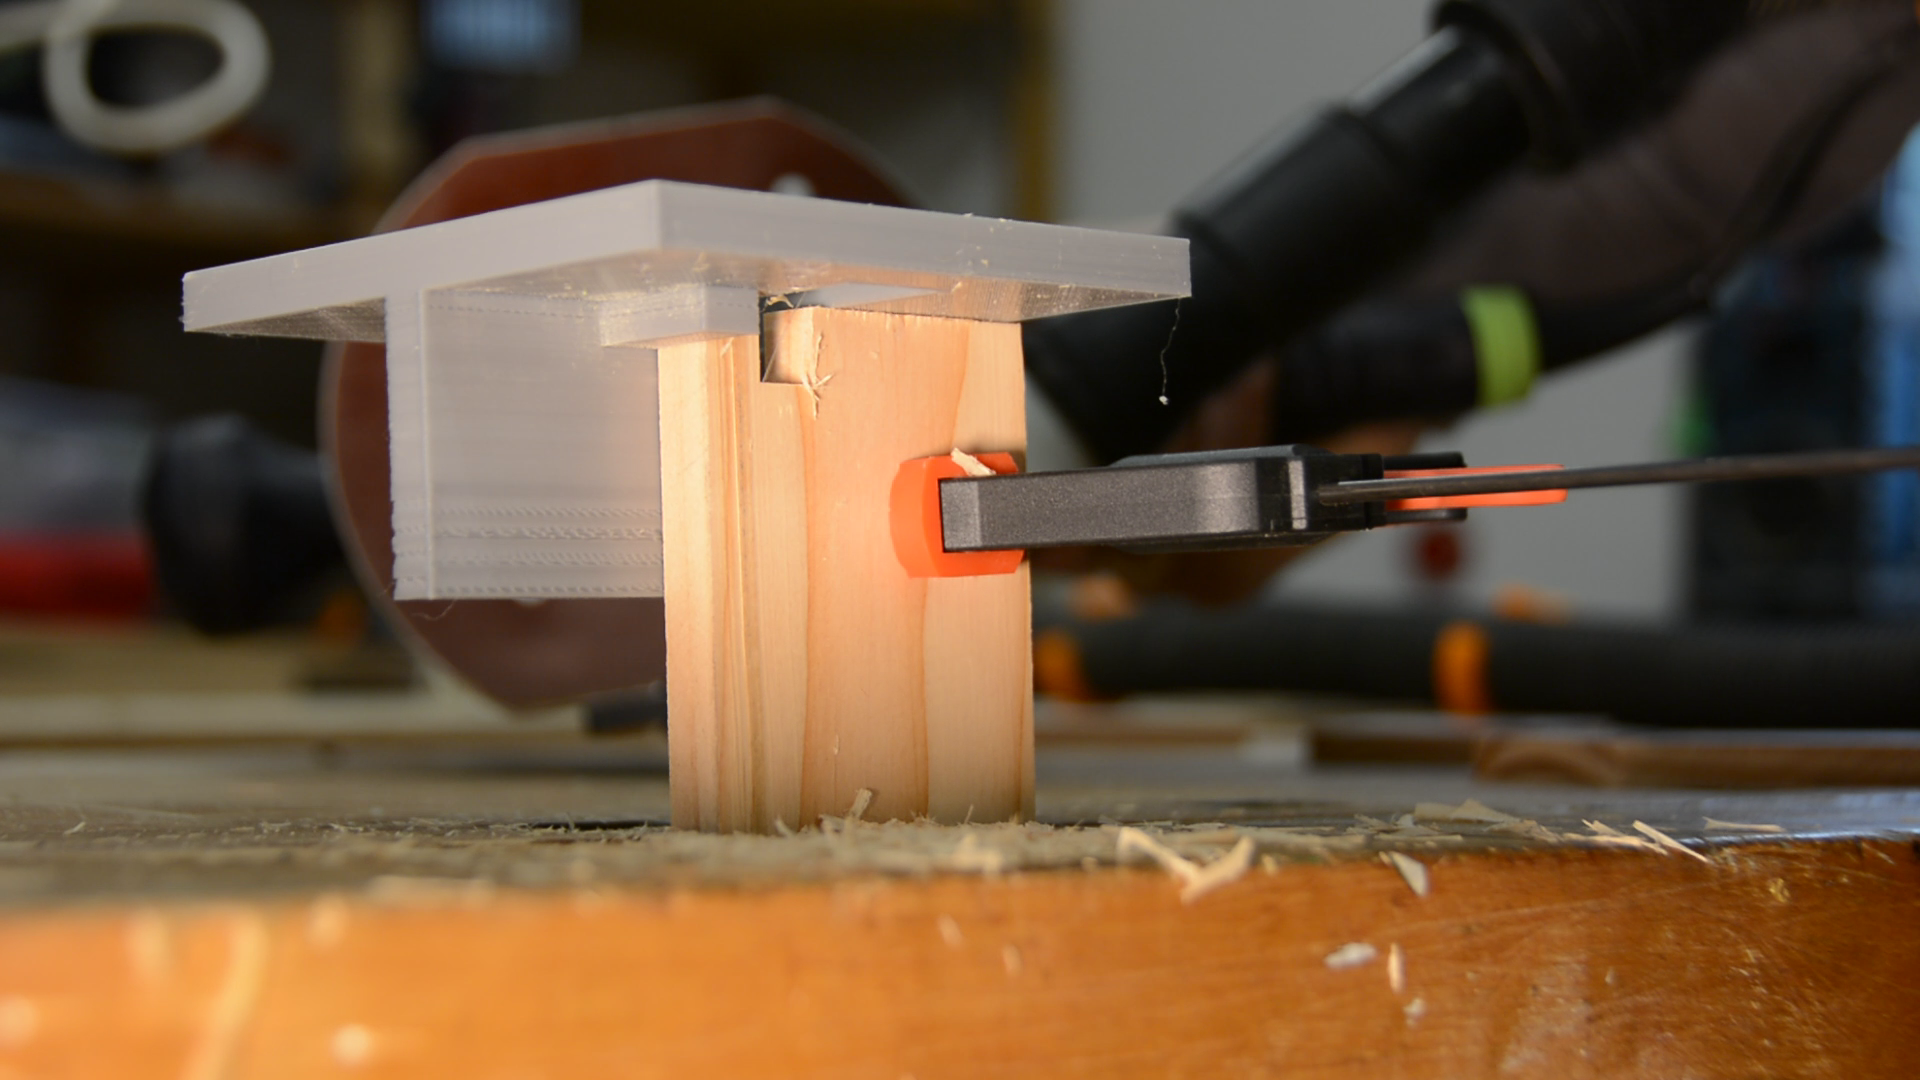

Once the end is reached we flip the long piece around so that the pin registers in the first slot and the marked side points towards the router bit.

We then clamp a short piece with its upper, marked part right next to the long piece and continue routing till the end of this board is reached.
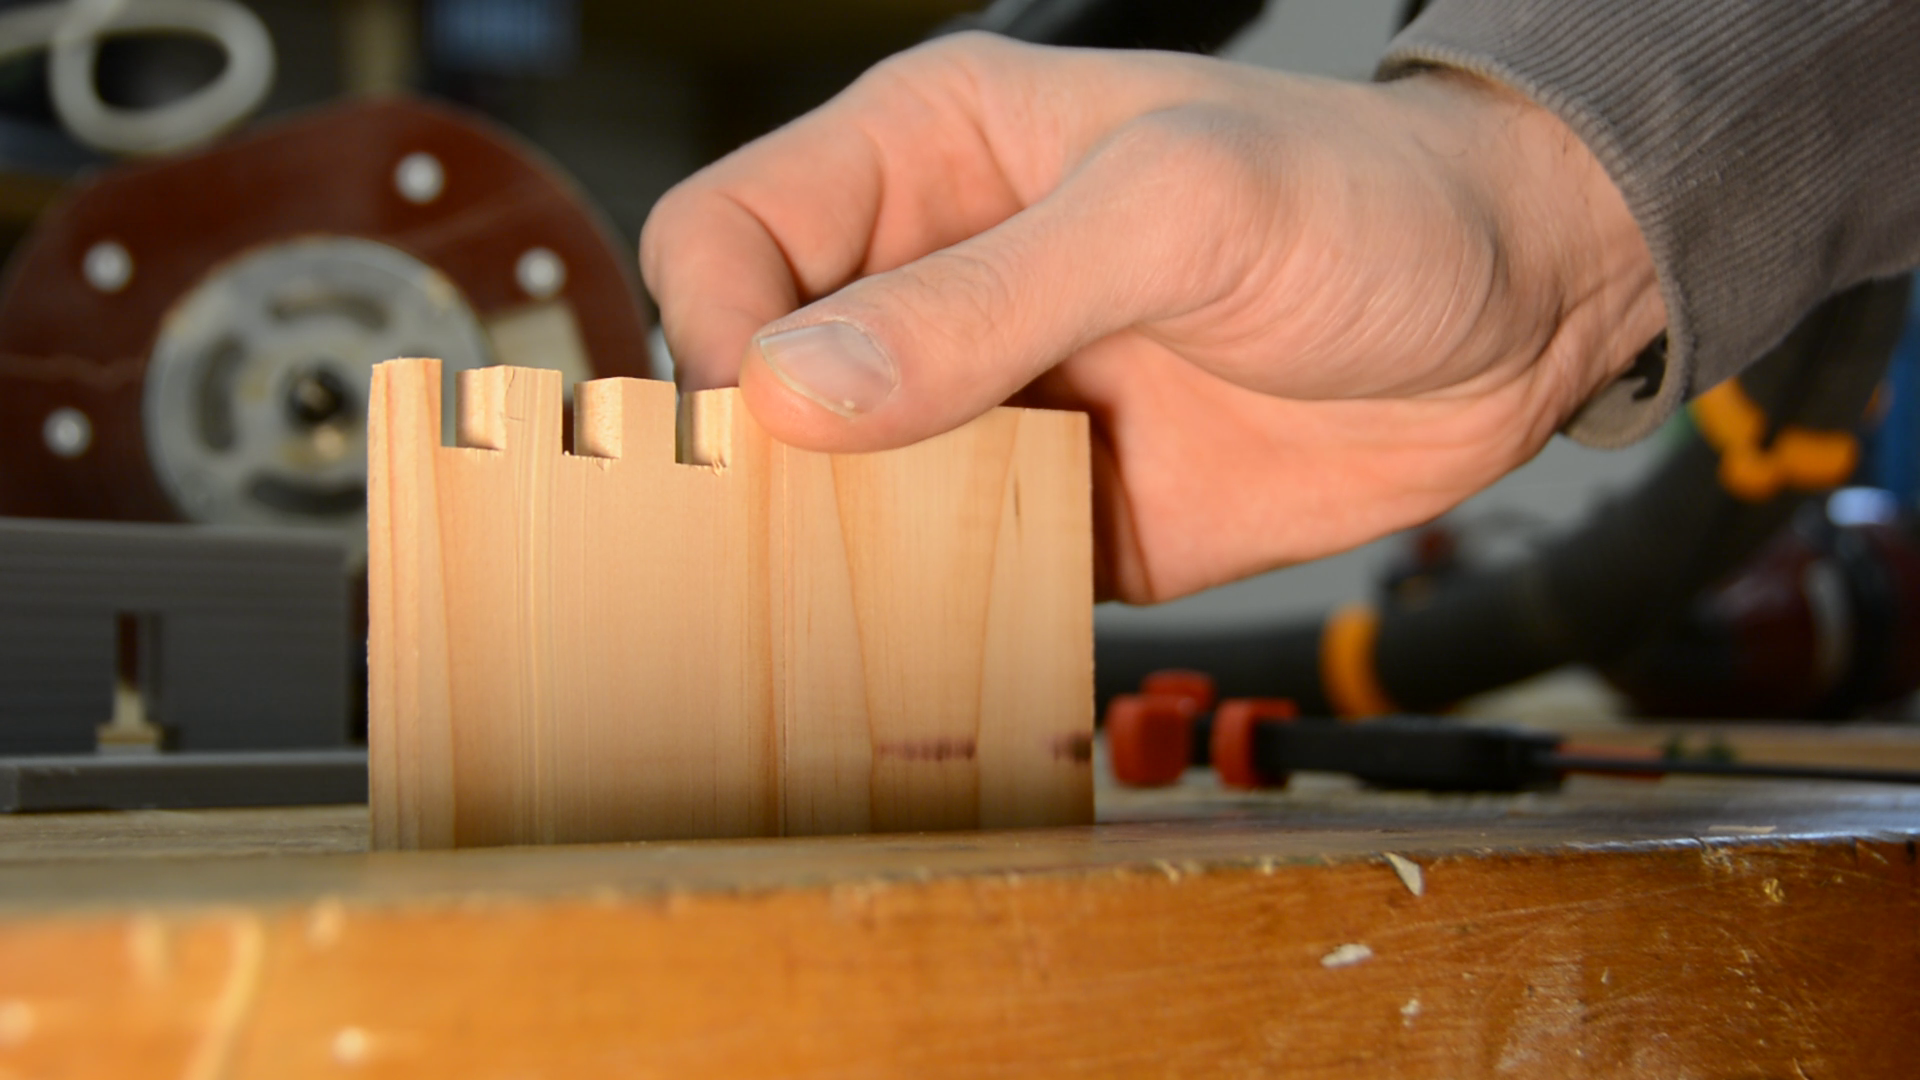
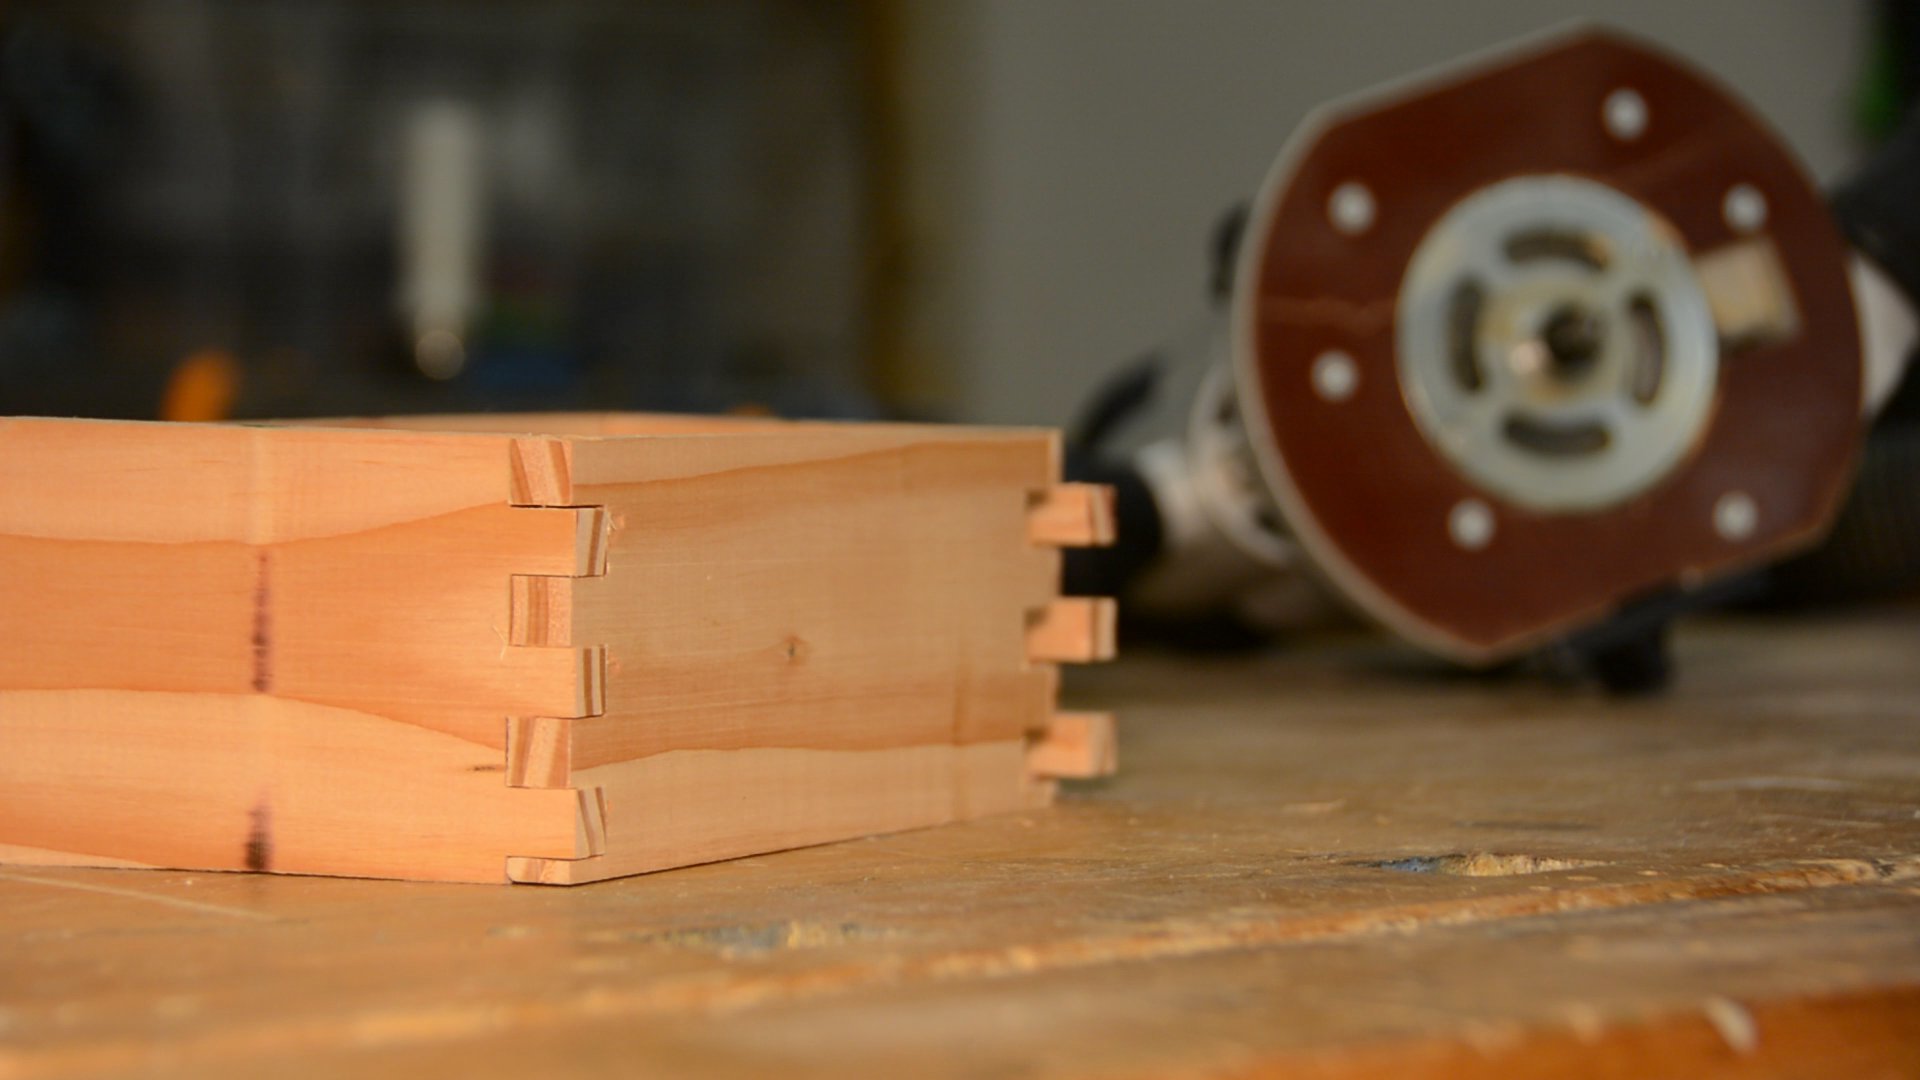
Repeat the same for all other sides. When all the sides are done we have a very snugly fitting box joint.
Configuring the box joint jig to your needs
Now let’s explore a few improvements we can make to the jig. Some of these features we have not yet fully tested. If you find a bug please leave a comment.

The first one is changing is the tightness of the box joint. Adjust the loose fit parameter to a value above zero and the fit will be less tight. We go with 0.25 mm and get a bit of a looser fit that’s going to leave more room for the glue.
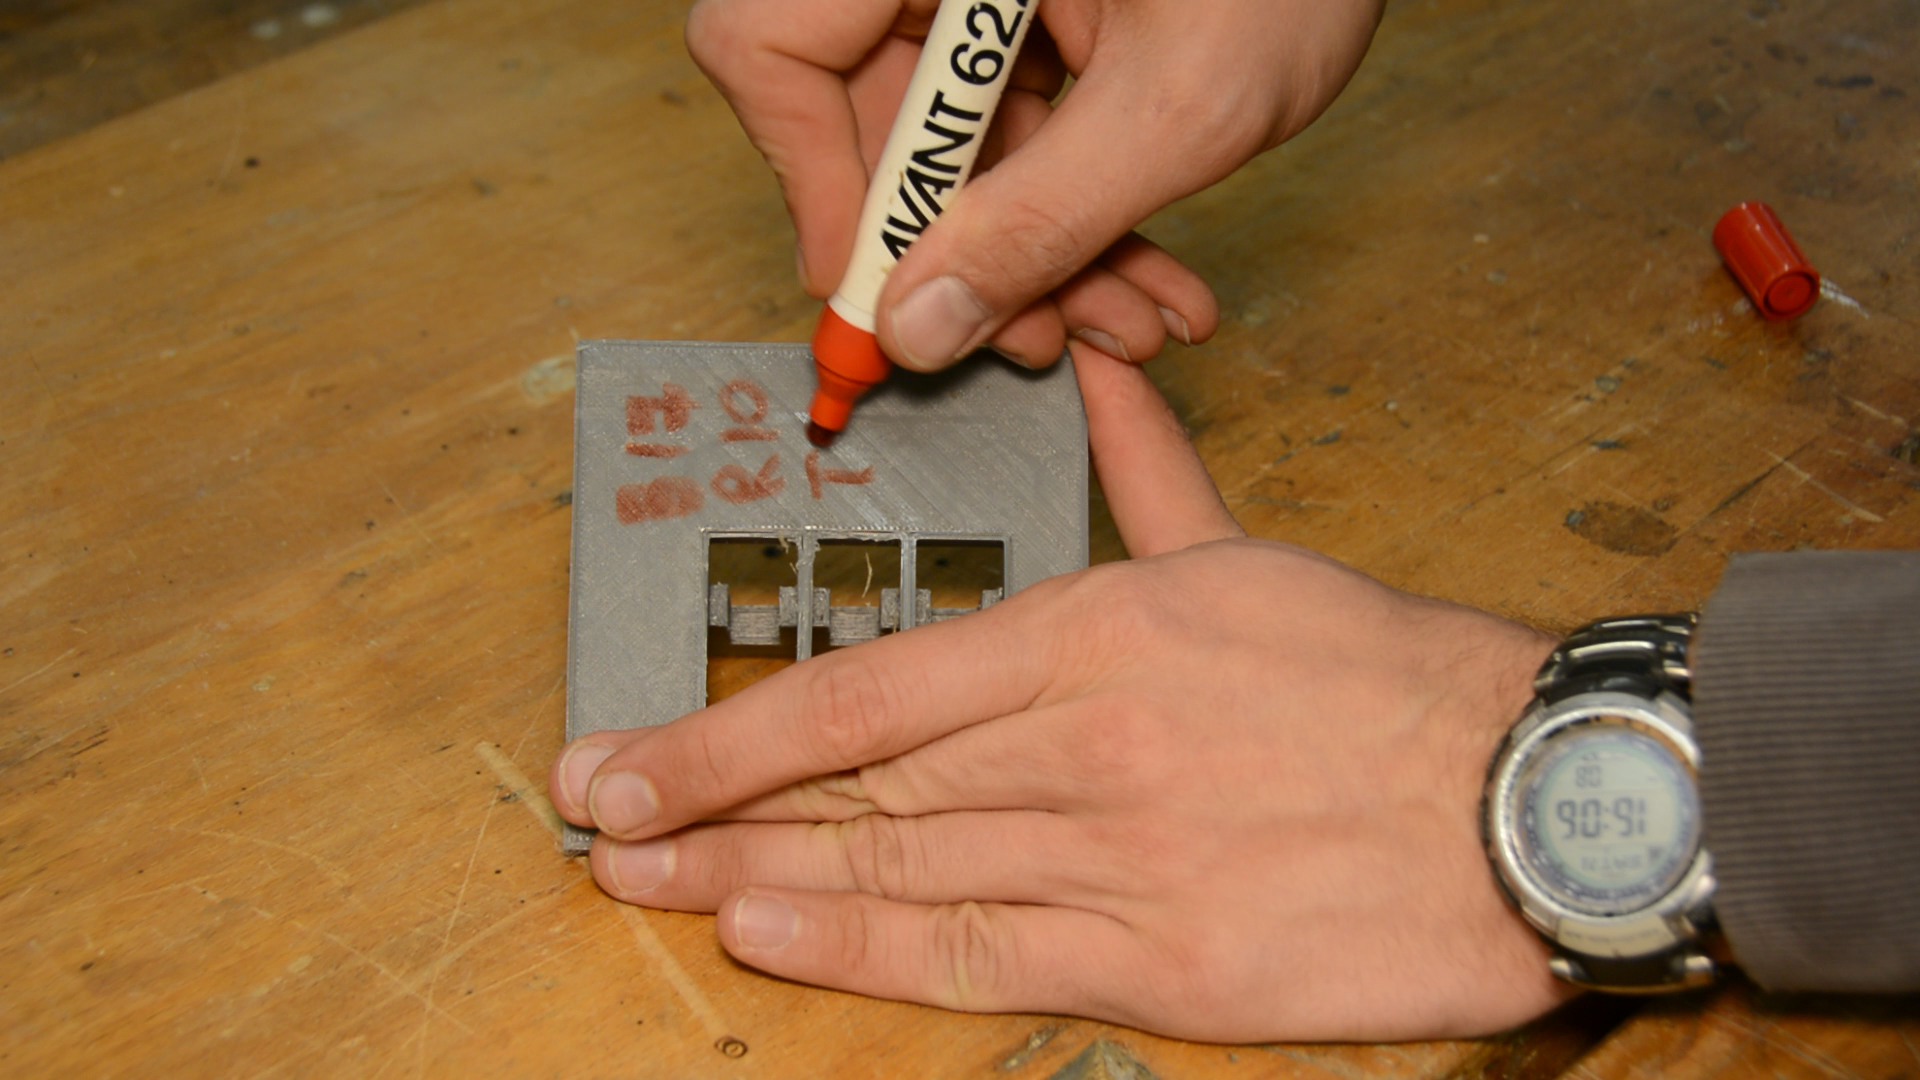
Here is a quick tip: write all the settings on the jig itself. This way you don’t confuse similar settings.
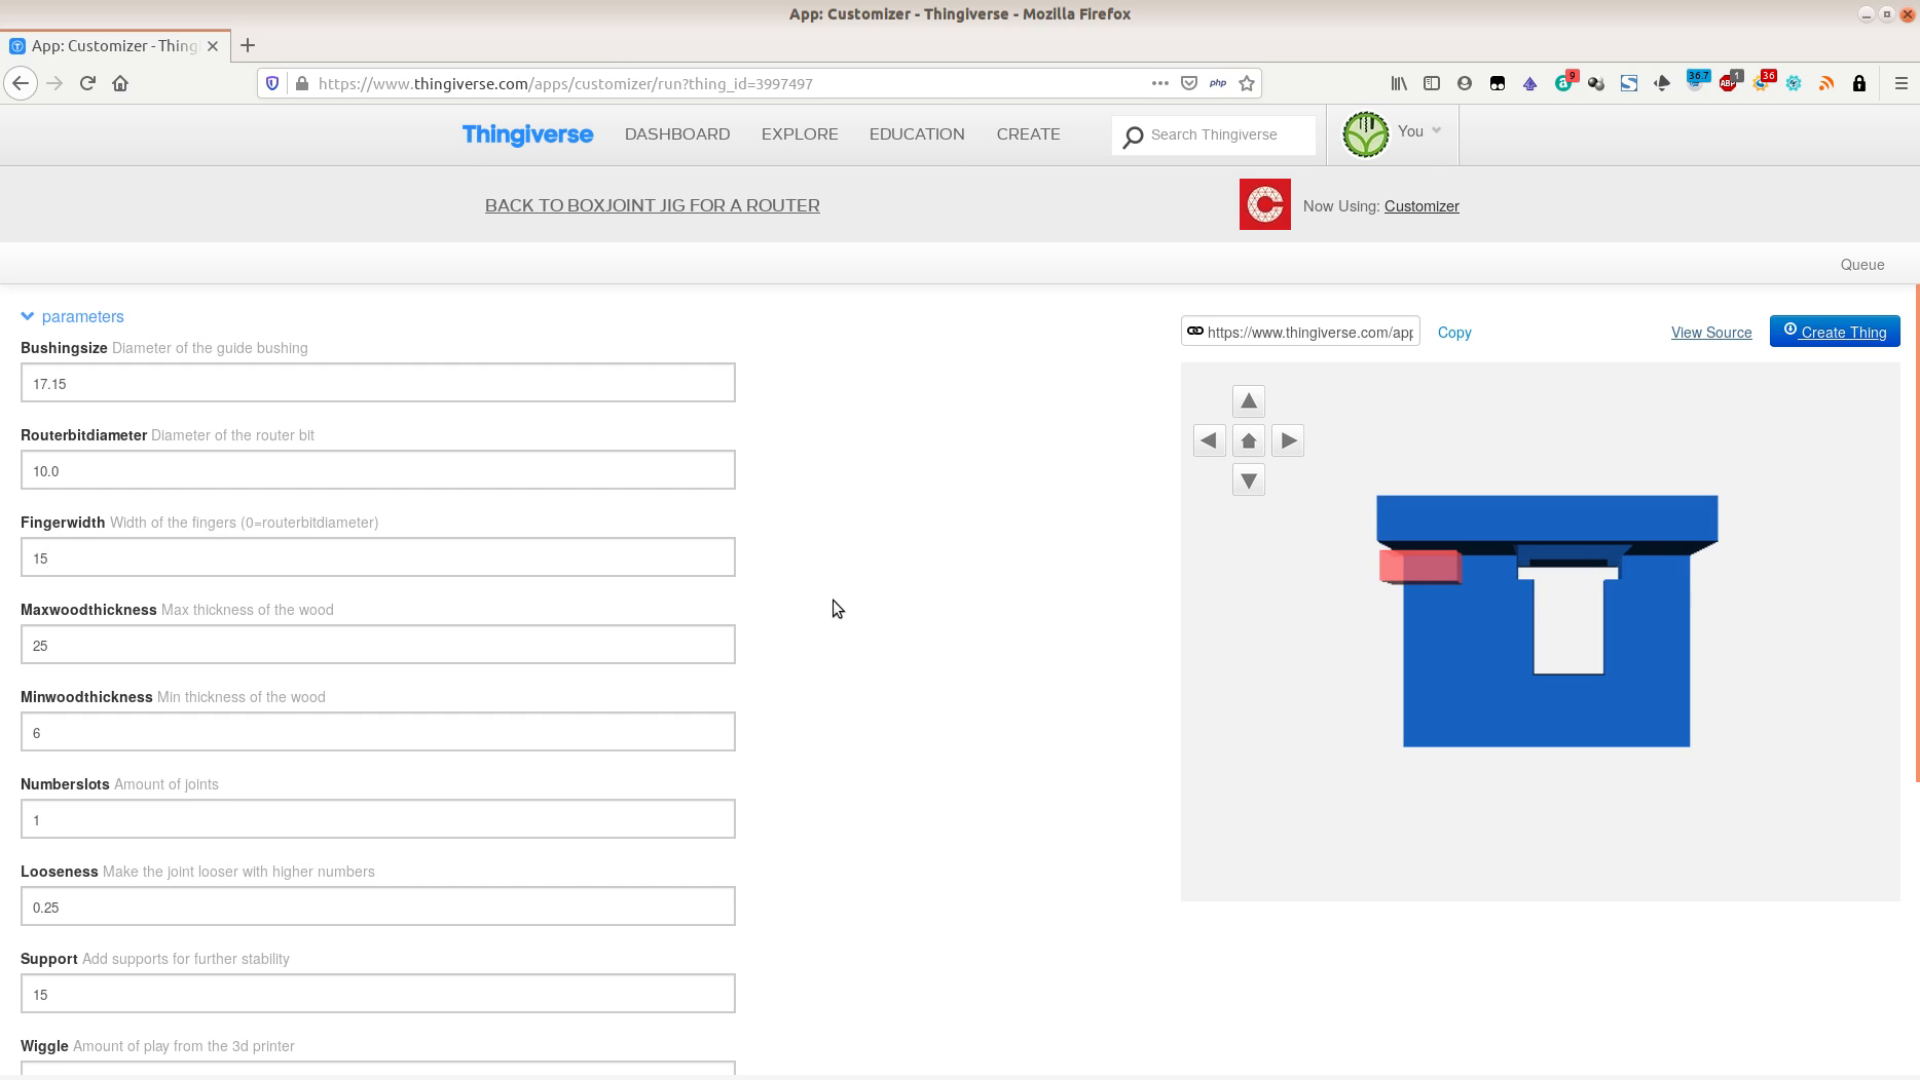
Larger fingers
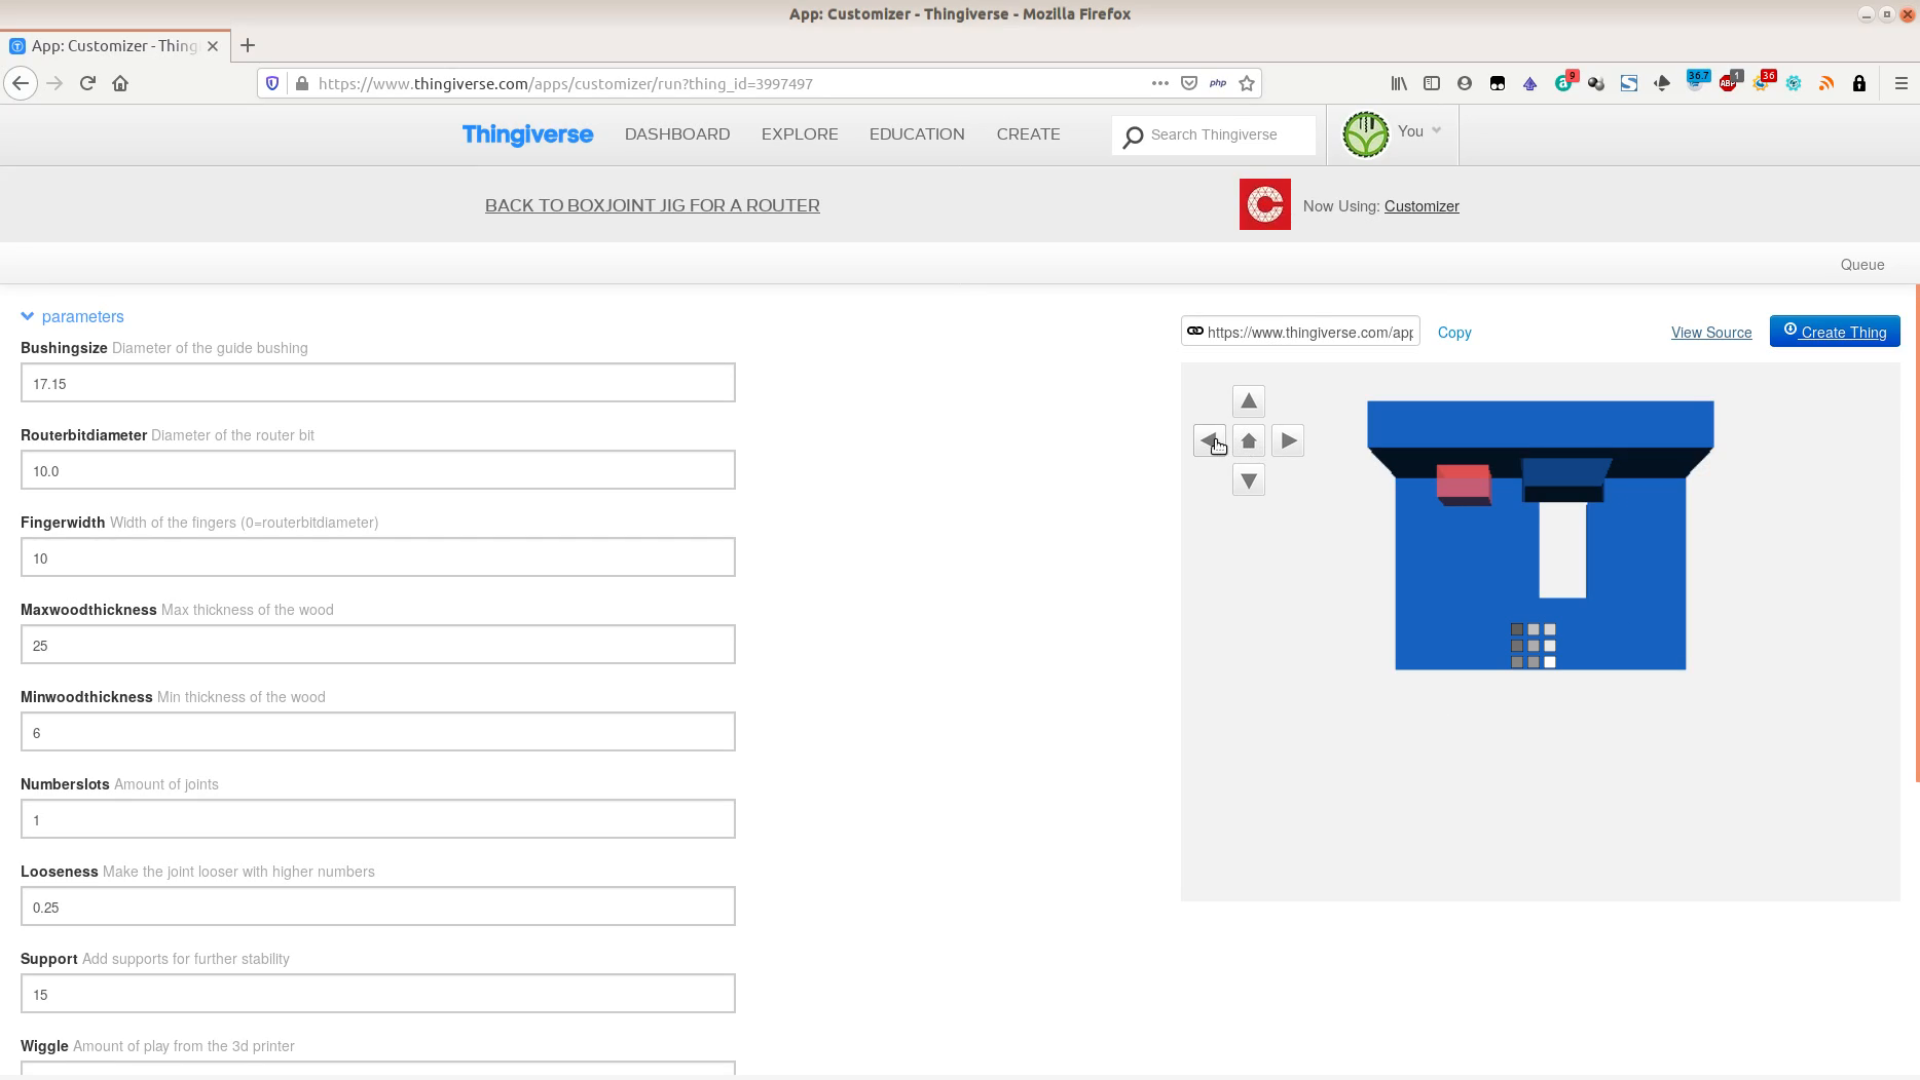
A feature that we have not yet used is to create fingers wider than the router bit. We can change this in the Customizer. We set the finger width to 15, the router bit diameter to 10 and the guide bushing diameter to 17.
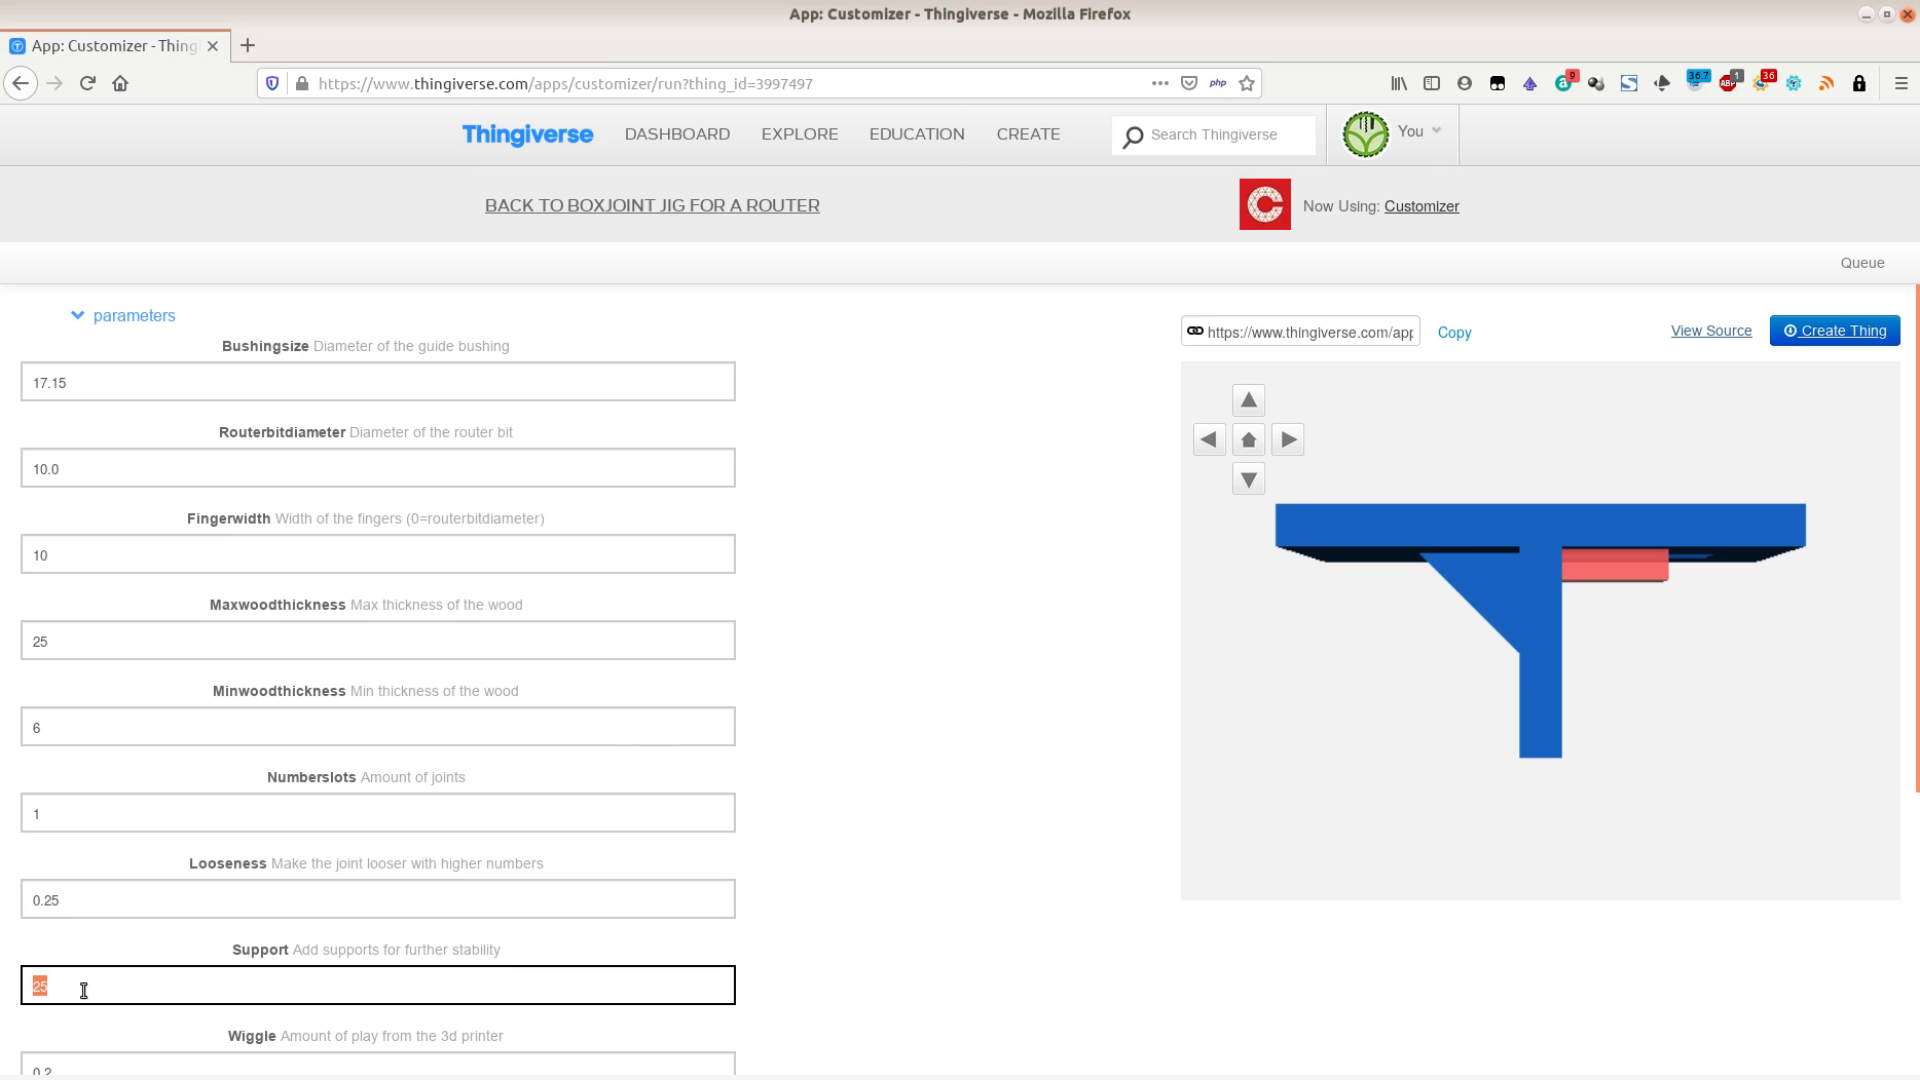
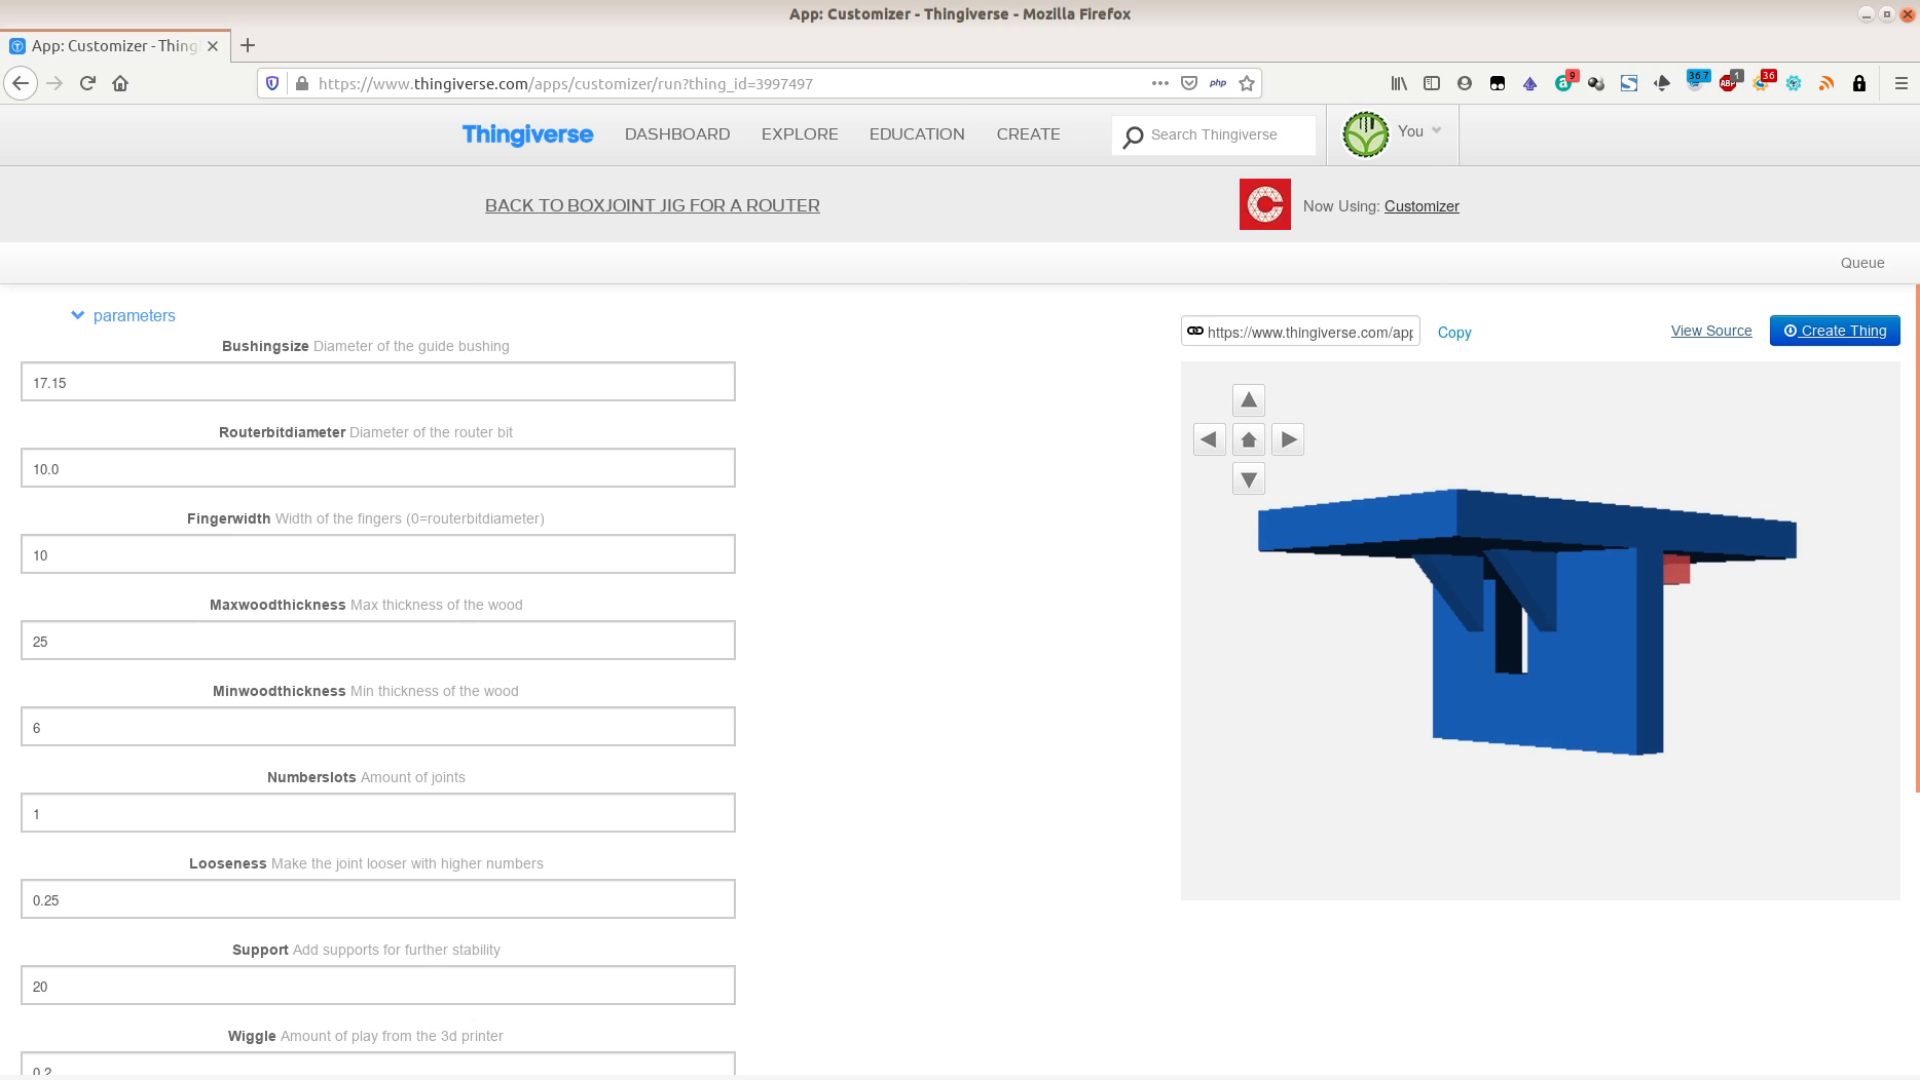
More support
The resulting jig allows the guide bushing to ride on both sides. The resulting fingers are wider than the router bit. If we set the support value to anything above zero the jig gets supporting triangles on the backside that increase the stability.
Stacking boards
Another interesting parameter is the maximum wood thickness. We use a max thickness of two times our material thickness the resulting registration pin is long enough so that we can use two boards at once.

This way we can cut the routing time in half.
Cutting 3 slots at once
The only thing left that is still quite annoying is moving the jig after each cut.
Depending on the size of your print bed there is an easy solution. We set the number of slots to 3 in the Customizer. The model now has three slots which is going to accelerate the routing of the box joints even more.
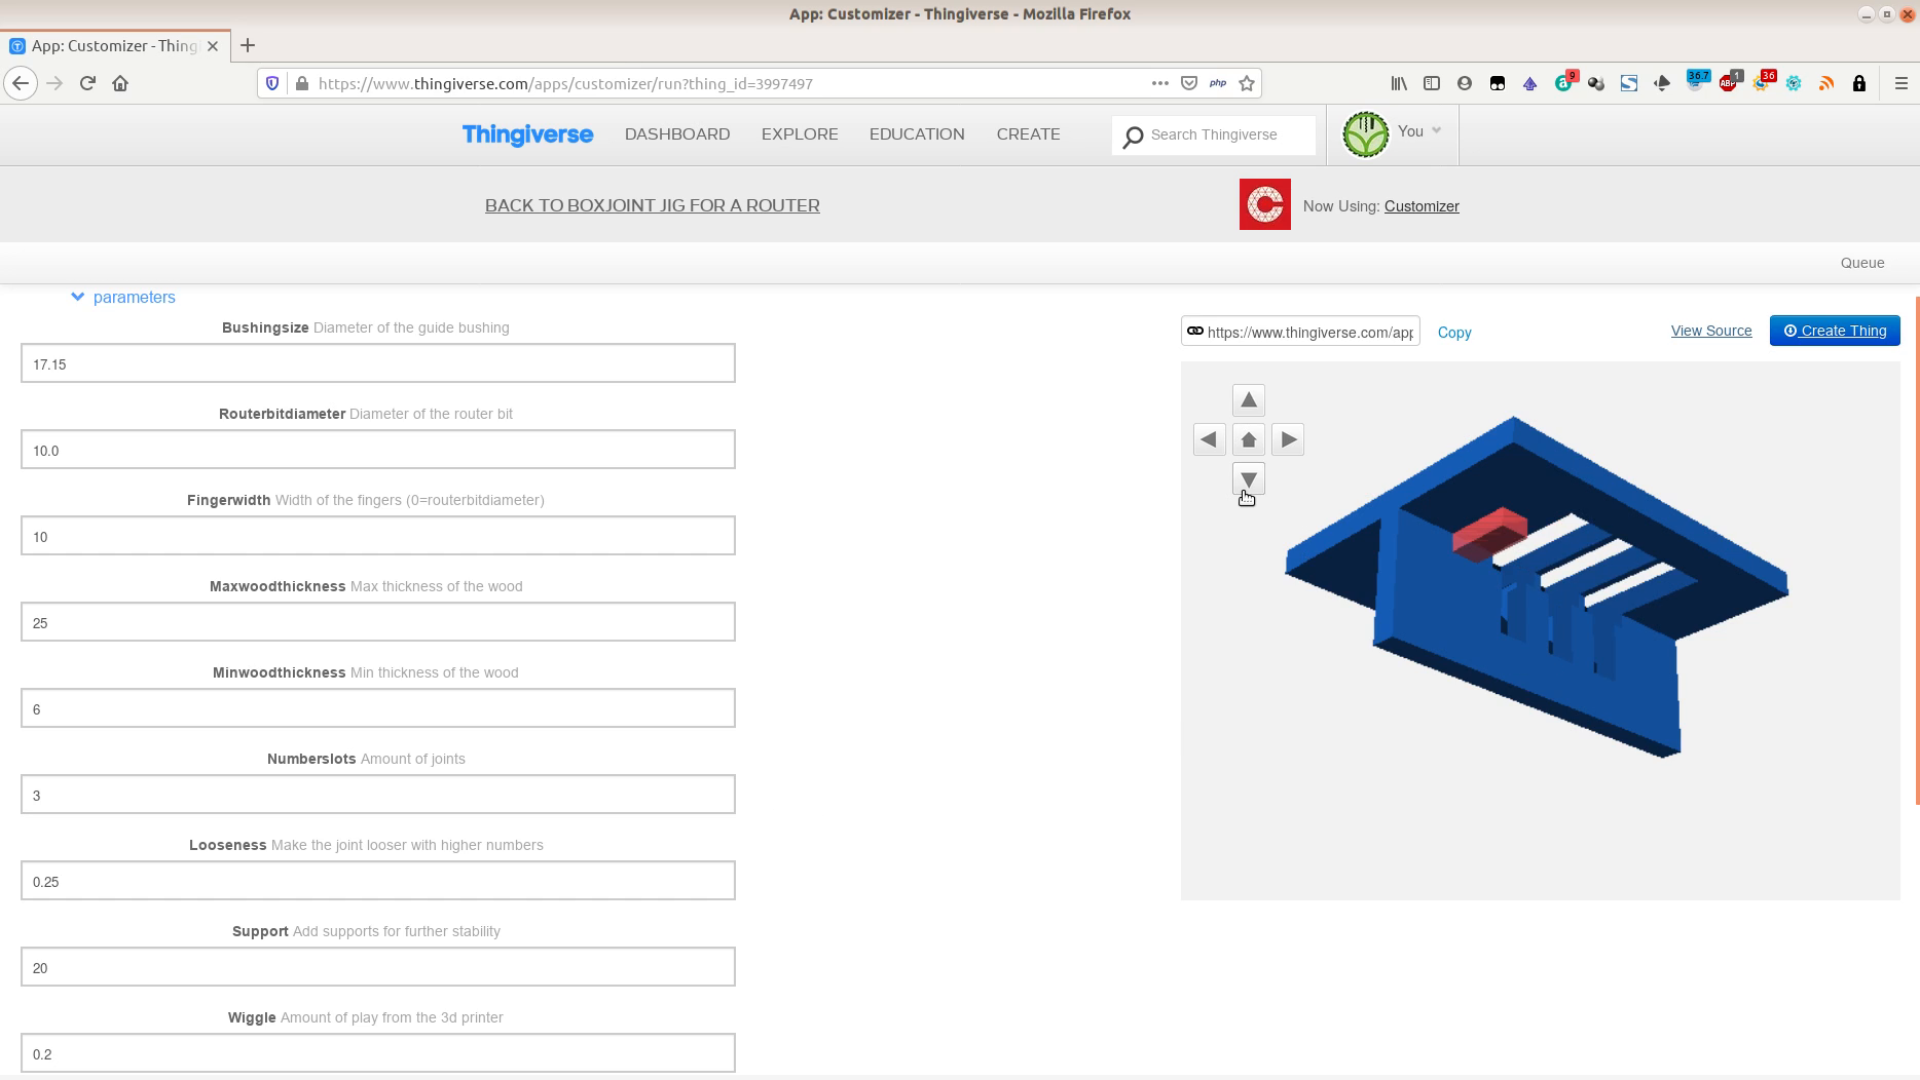
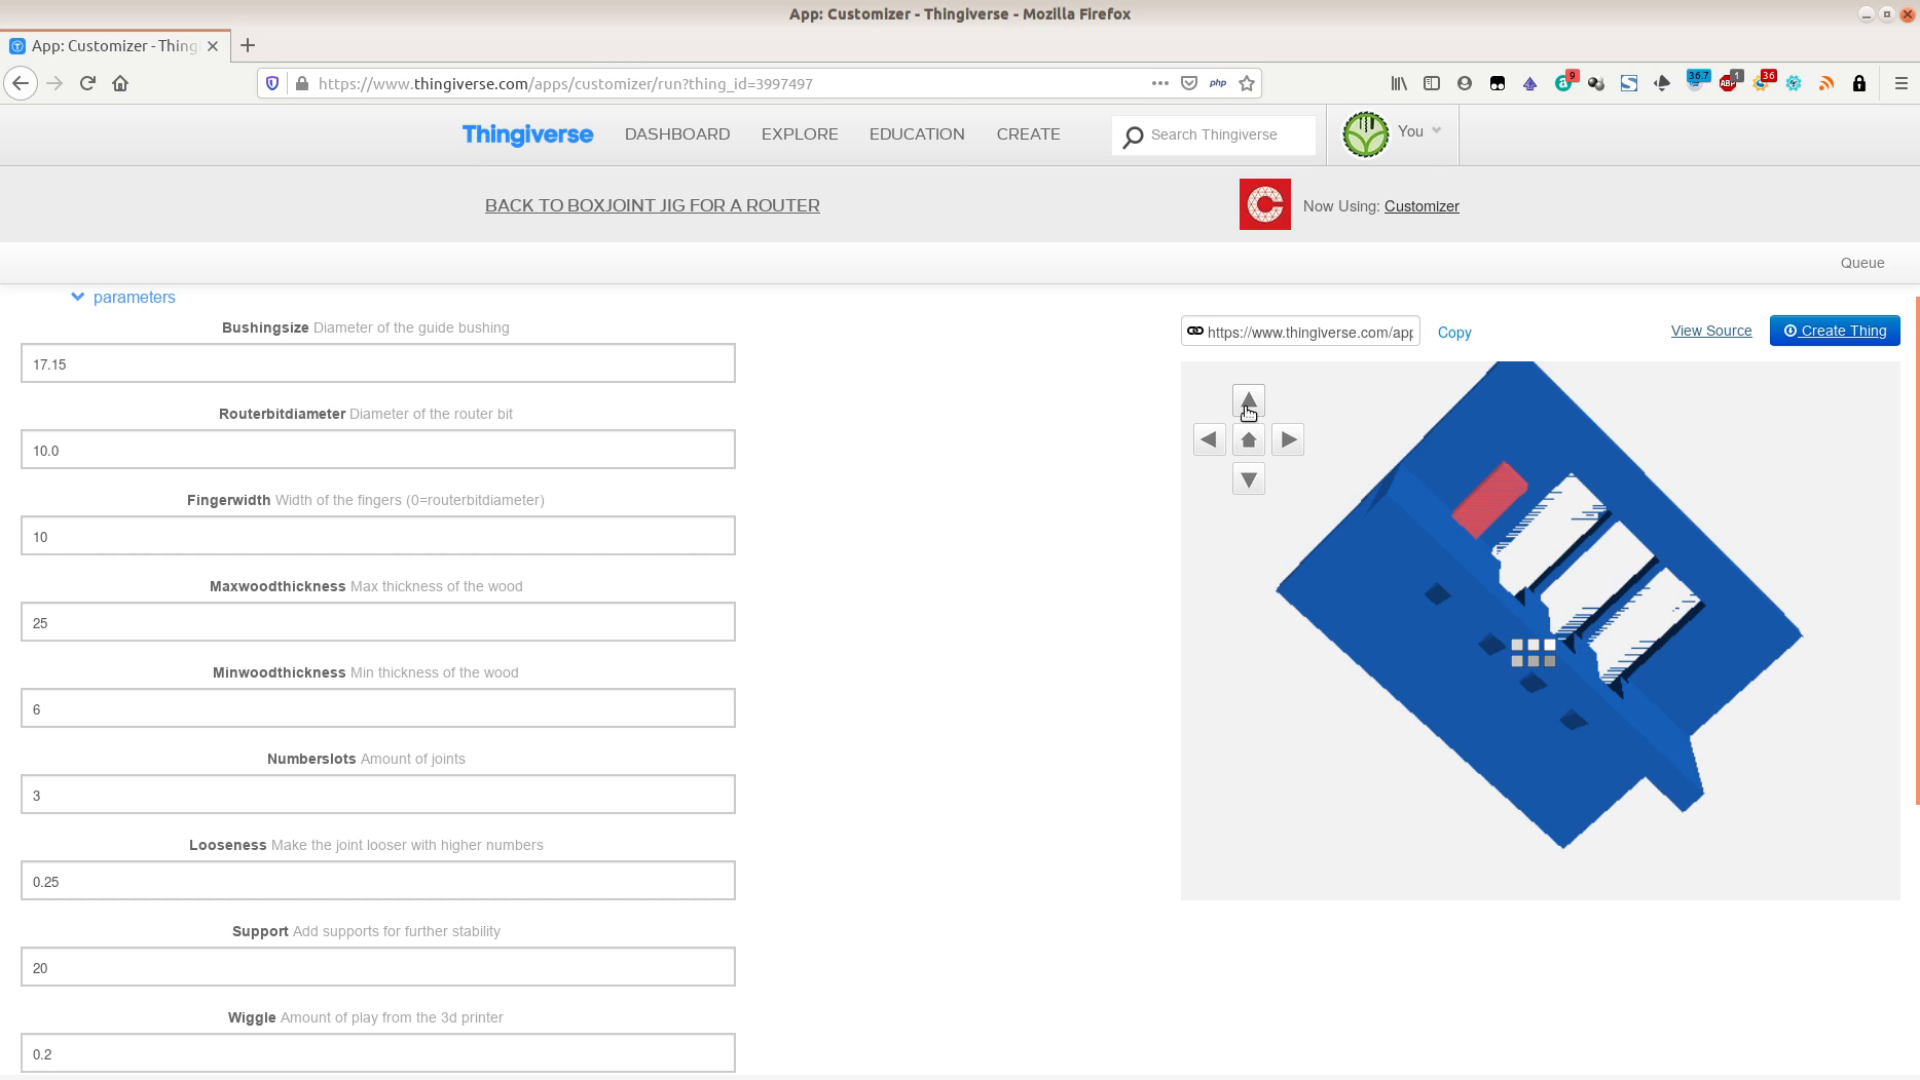
This obviously is only going to work with a guide bushing diameter close to the router bit diameter. When the difference gets too big these supports would break. With a large enough print bed you could create a jig to route all the slots of a box joint at once.
The jig shows another neat use for the 3D printer in the woodworking shop.