

This article shows a step-by-step instruction of a chair restoration project. I will remove the old finish, add a new upholstery and a natural oli-based finish. The article also shows how to properly fix broken joints using hide glue and how to repair worn out screw holes.
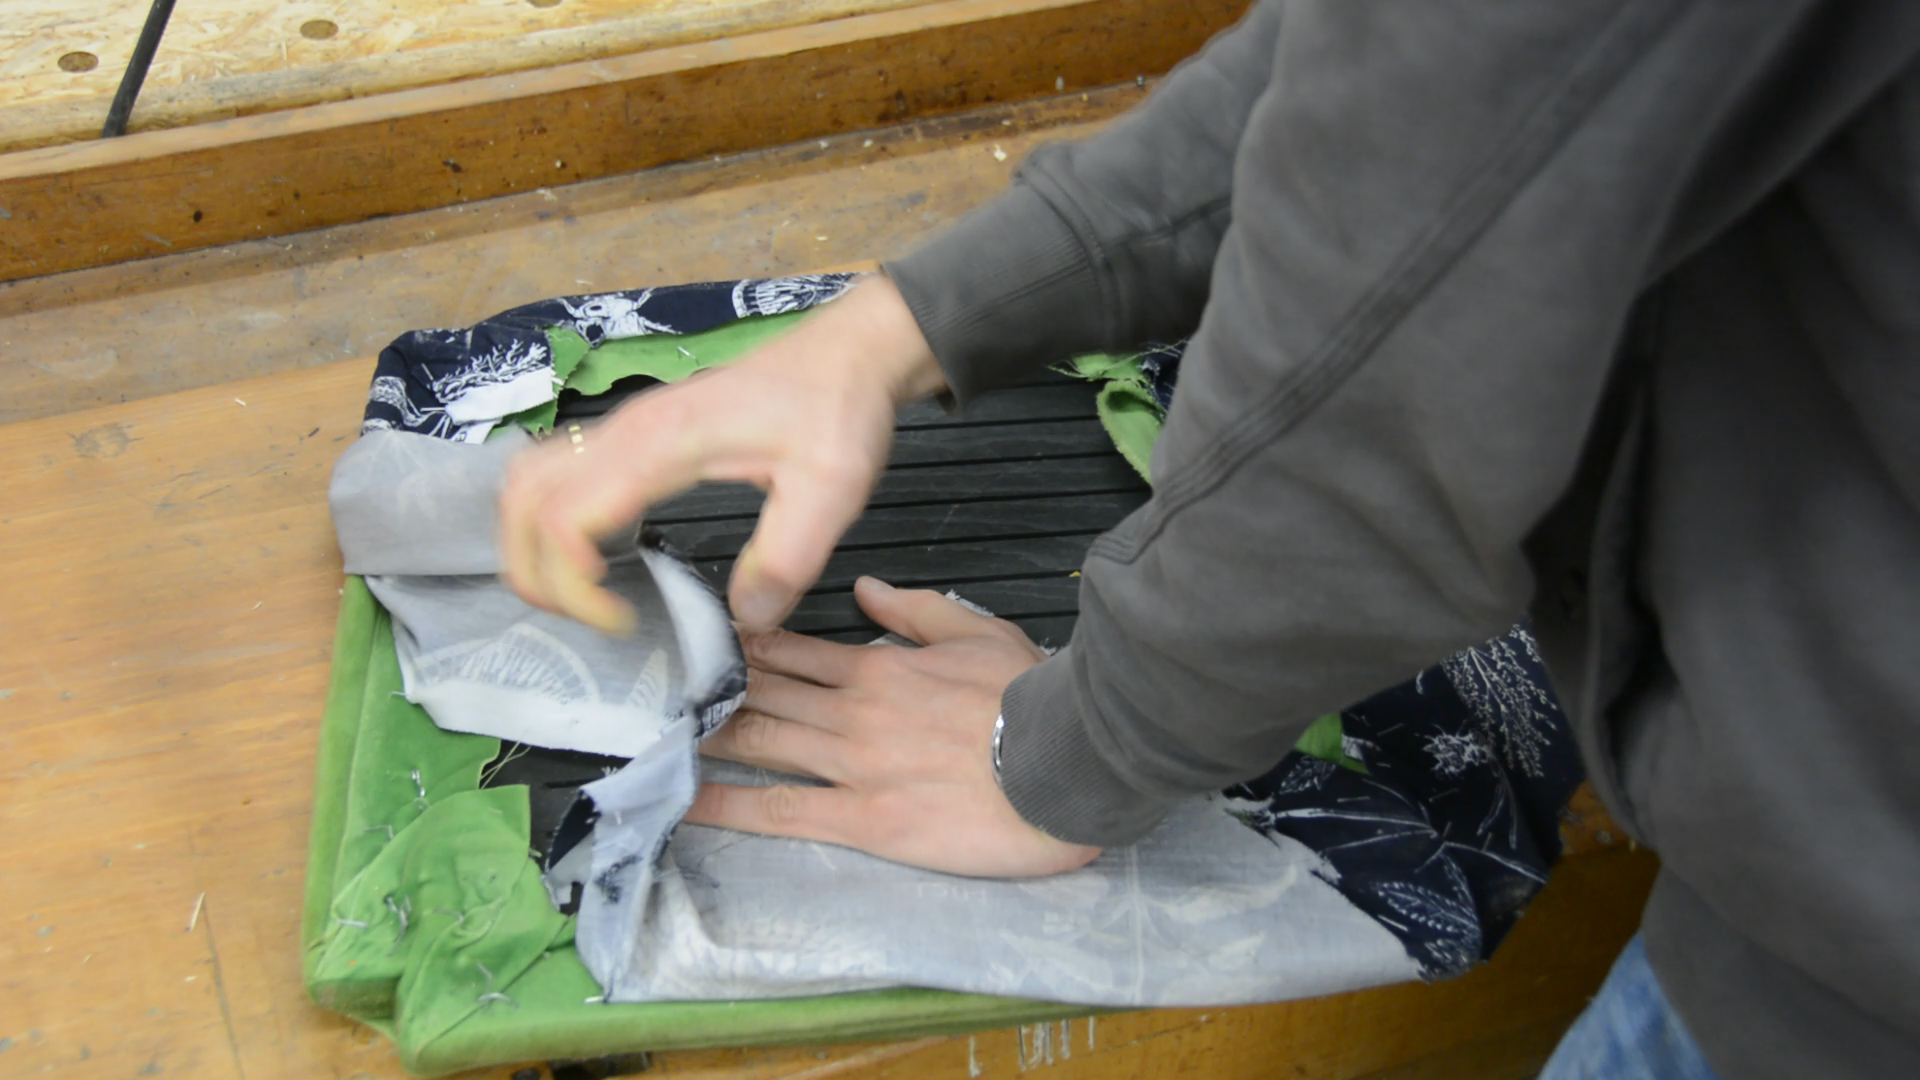
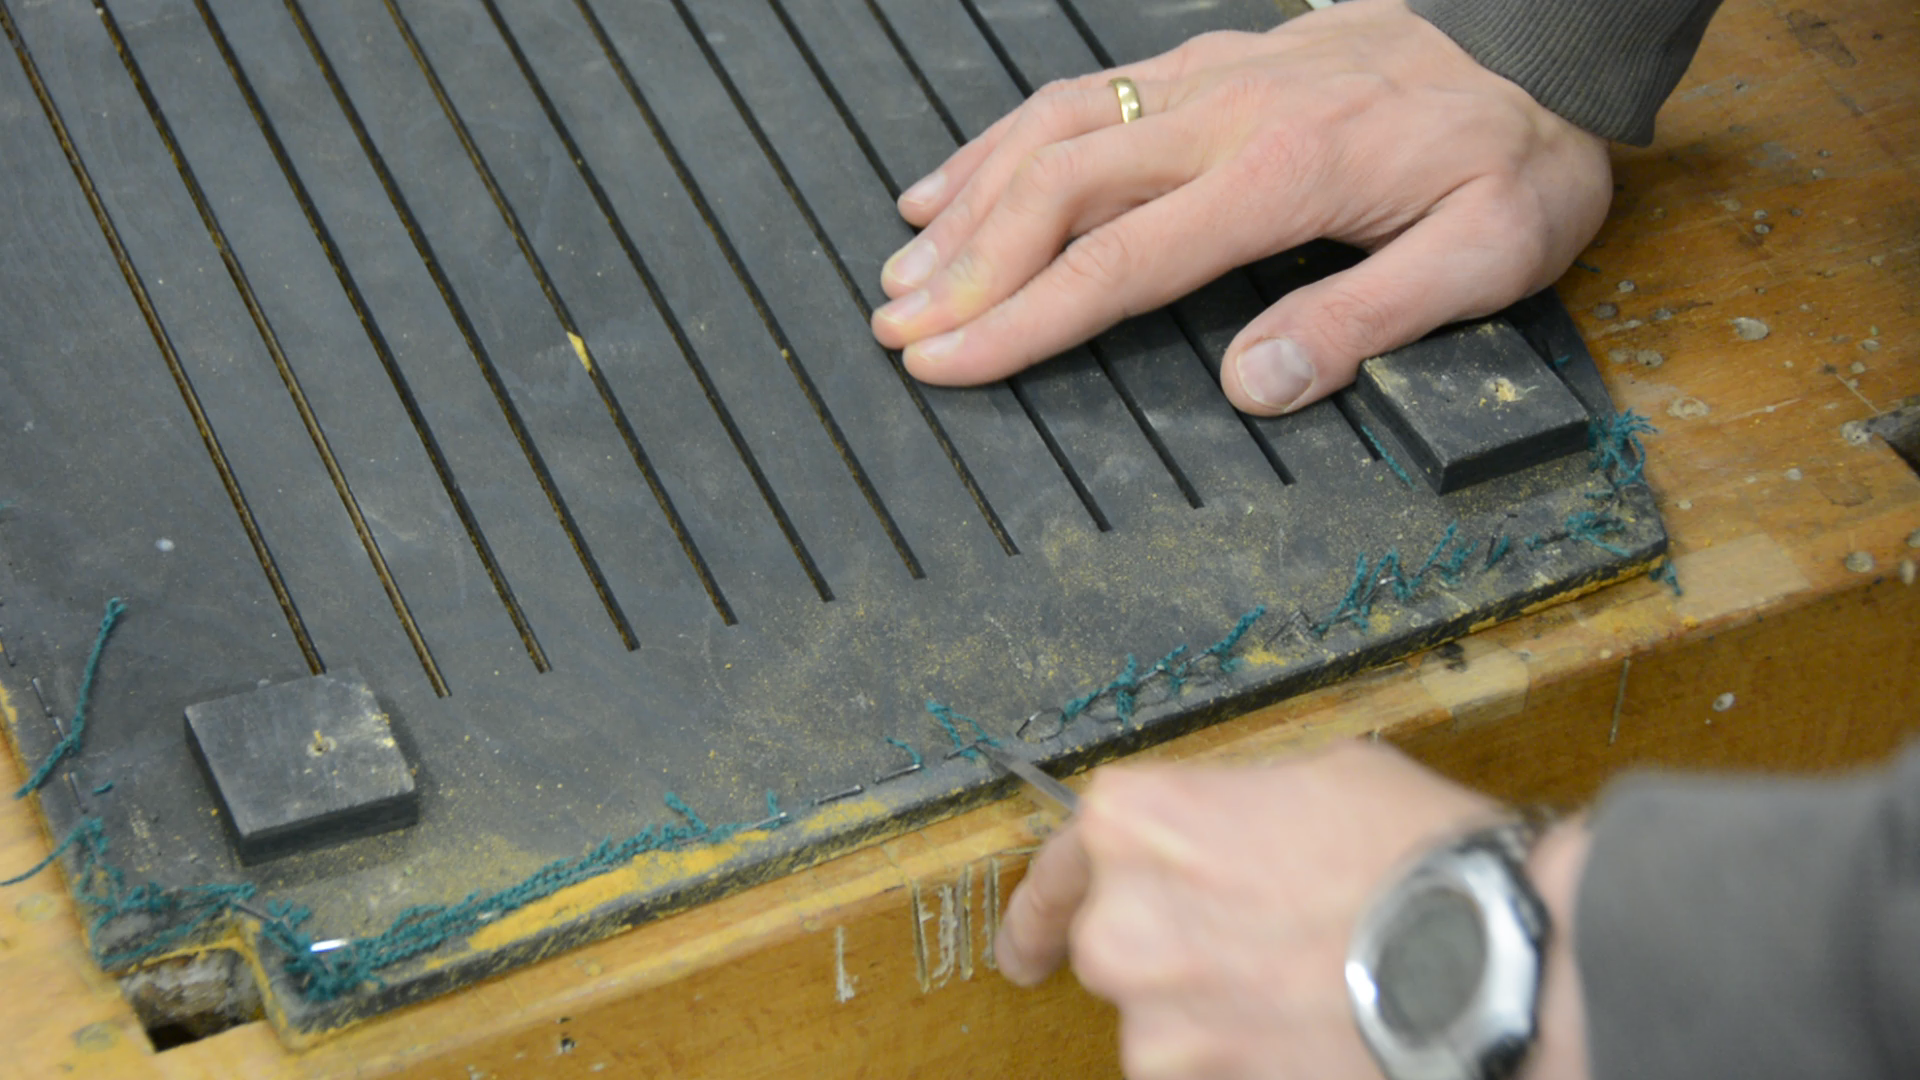
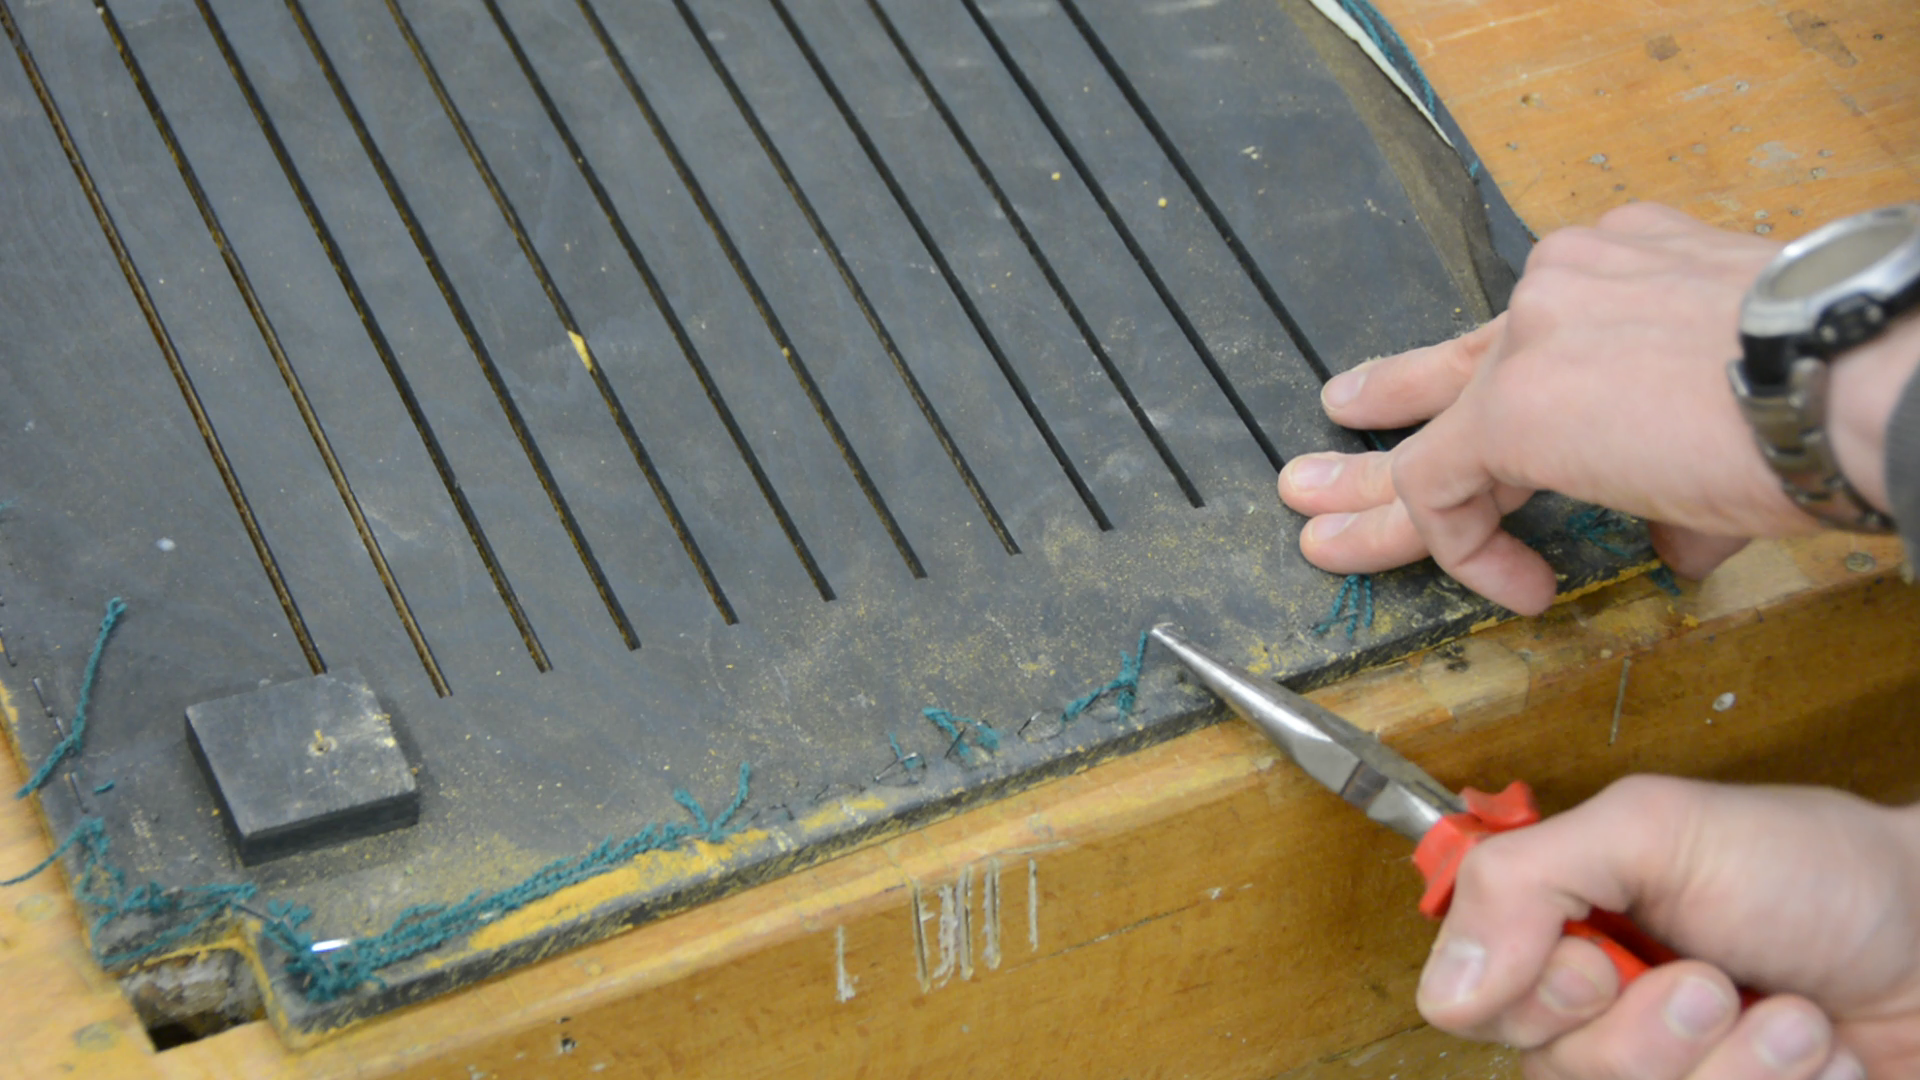
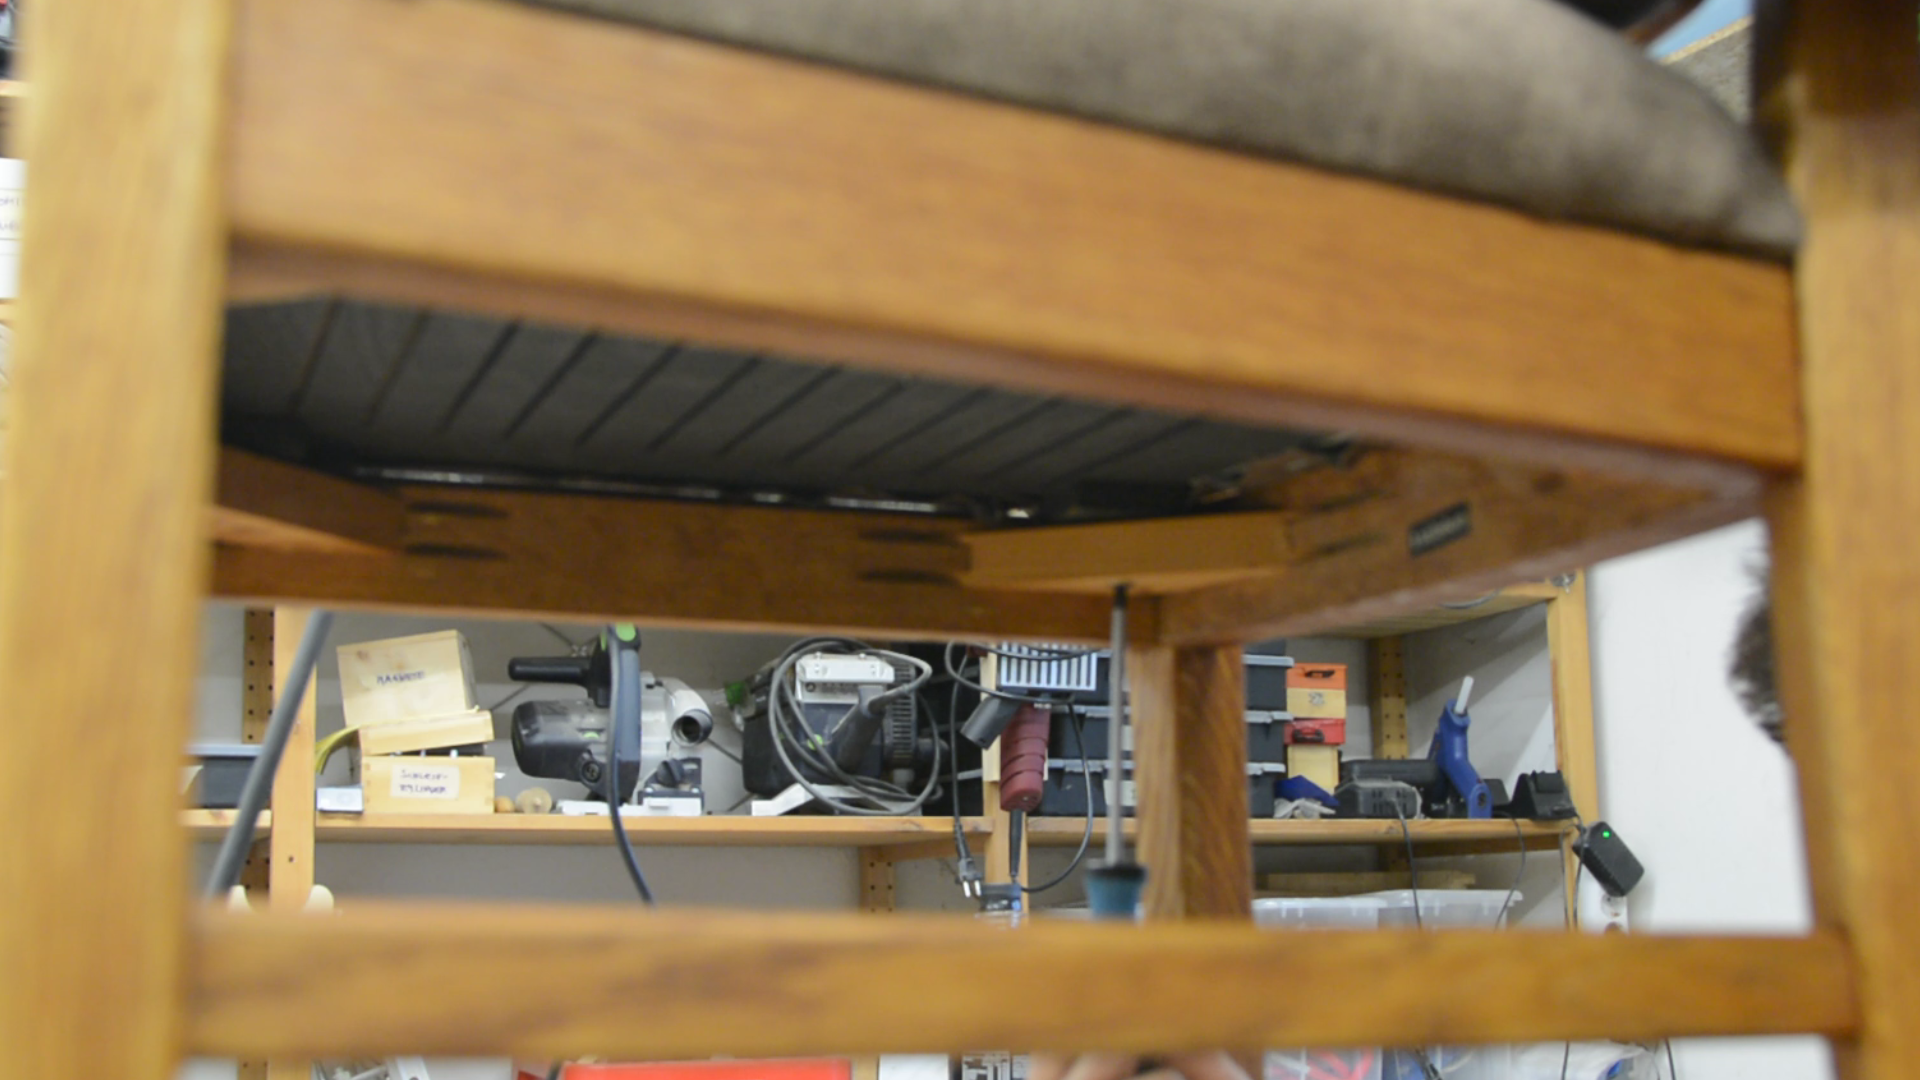
These chairs have been in my household for more than 10 years and before that belonged to my grandmother. They are pretty beat up and need a restoration. I start by removing the remainder of the old upholstery. After cutting the fabric in pieces I was hoping to pull the staples out with the fabric – which did not work. I also bought a fancy tool to remove the staples. It worked but at the end I used an awl to loosen each stable and then pulled it out with a pair of pliers – which was way faster than the specialized tool.
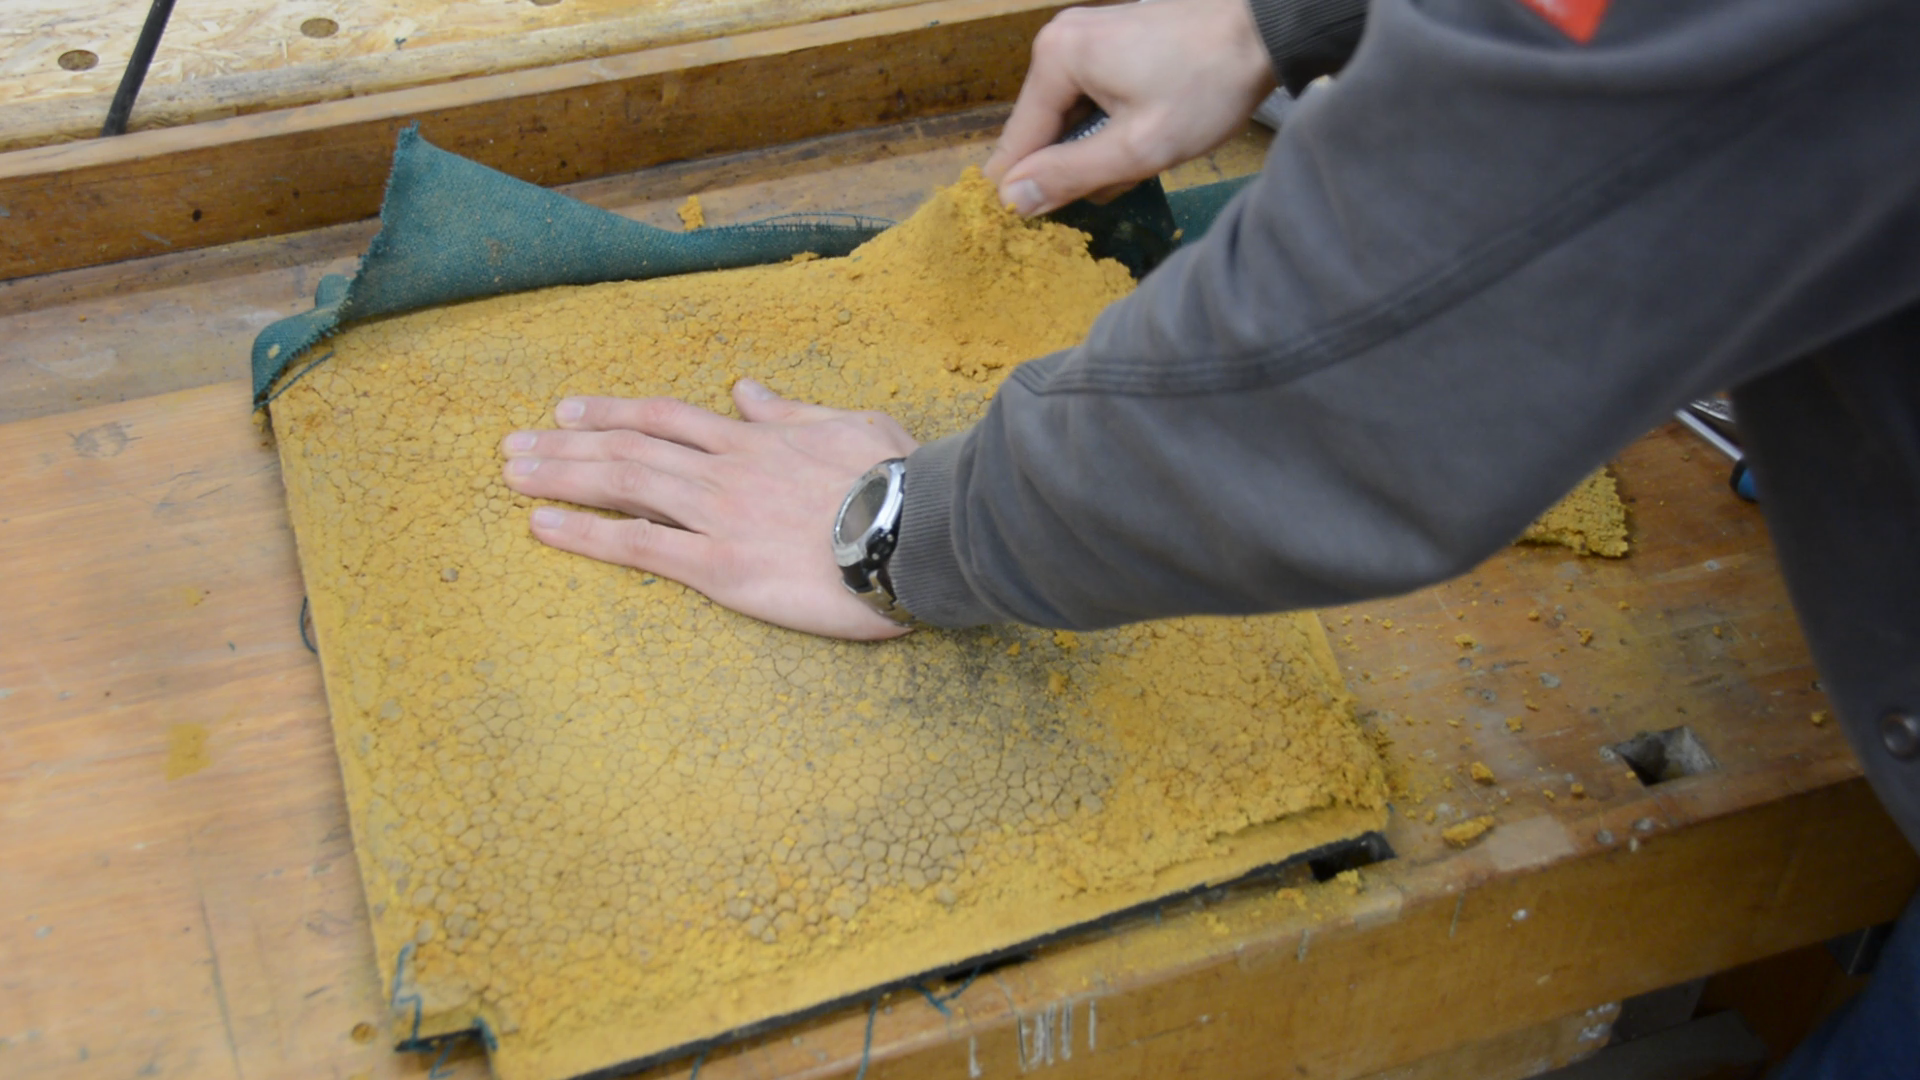
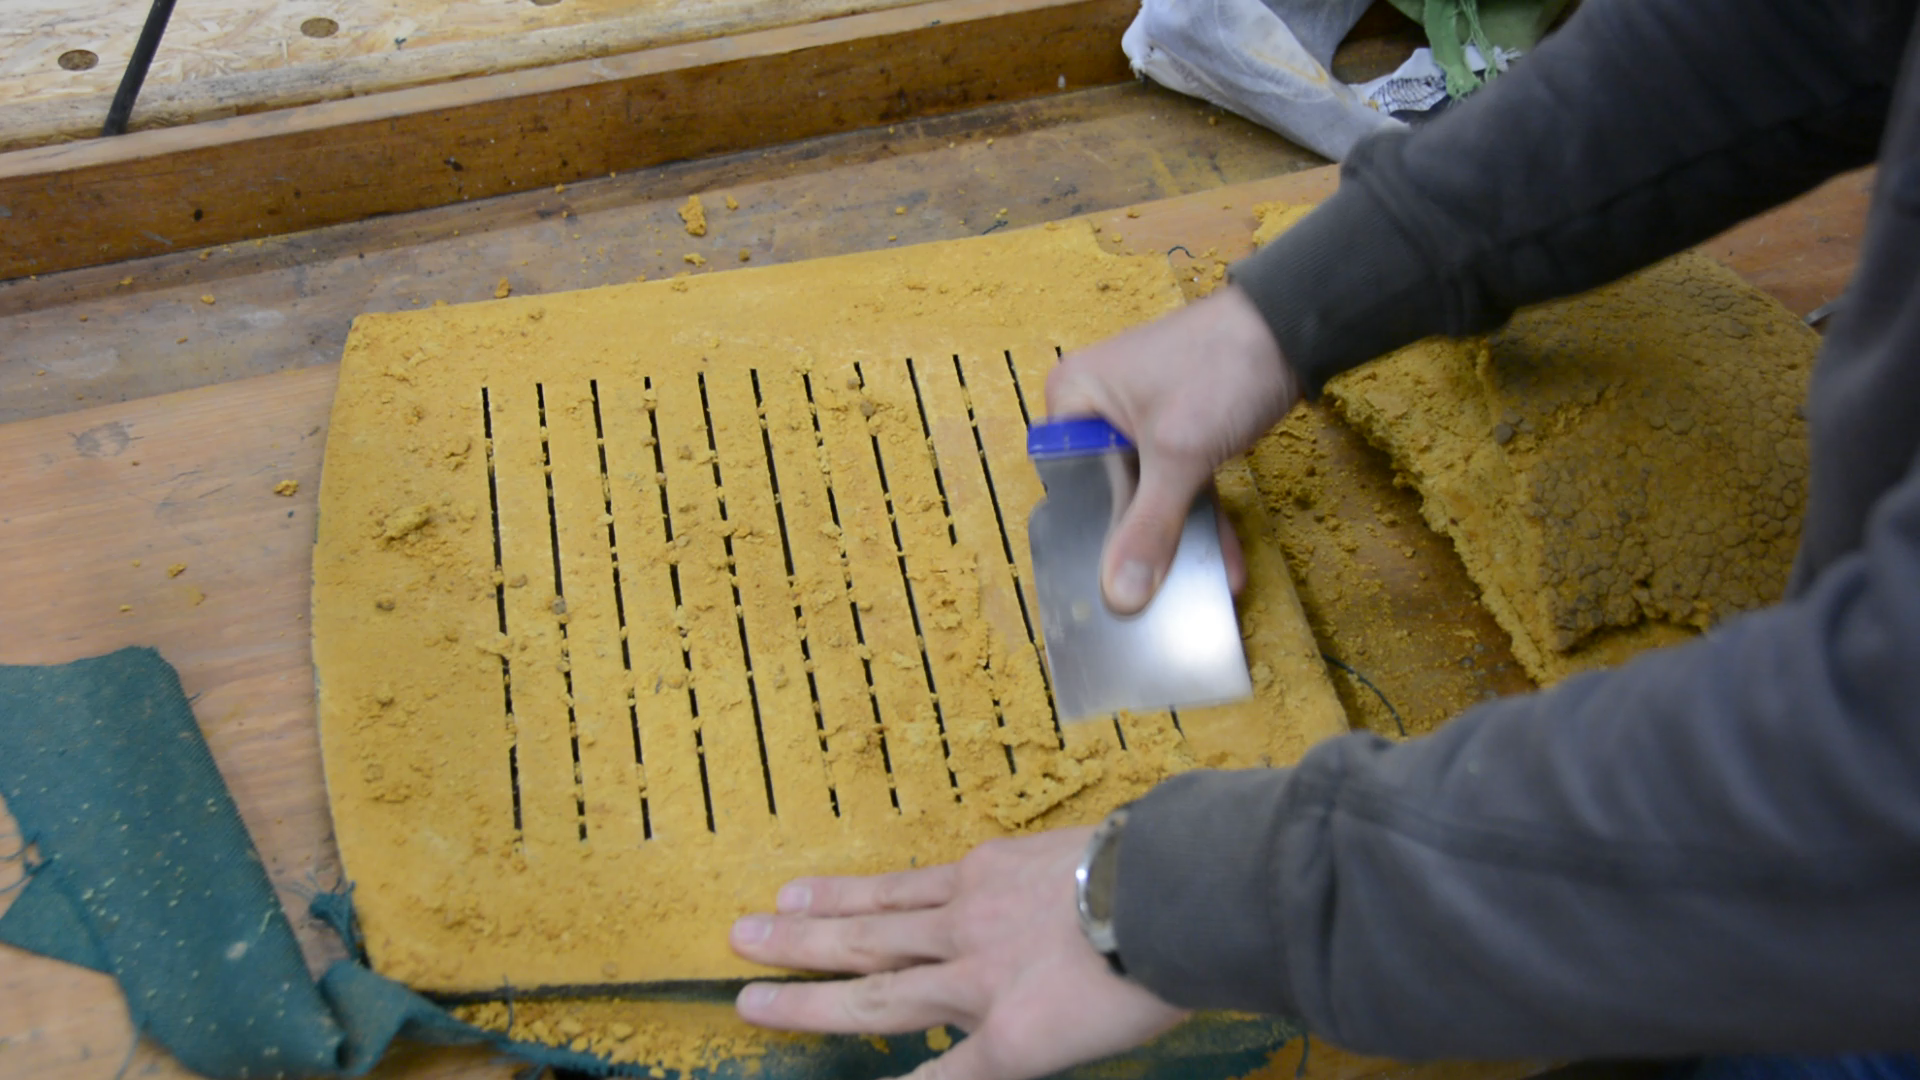
The foam was totally disintegrated and I removed it with a putty knife.
Repair broken joints
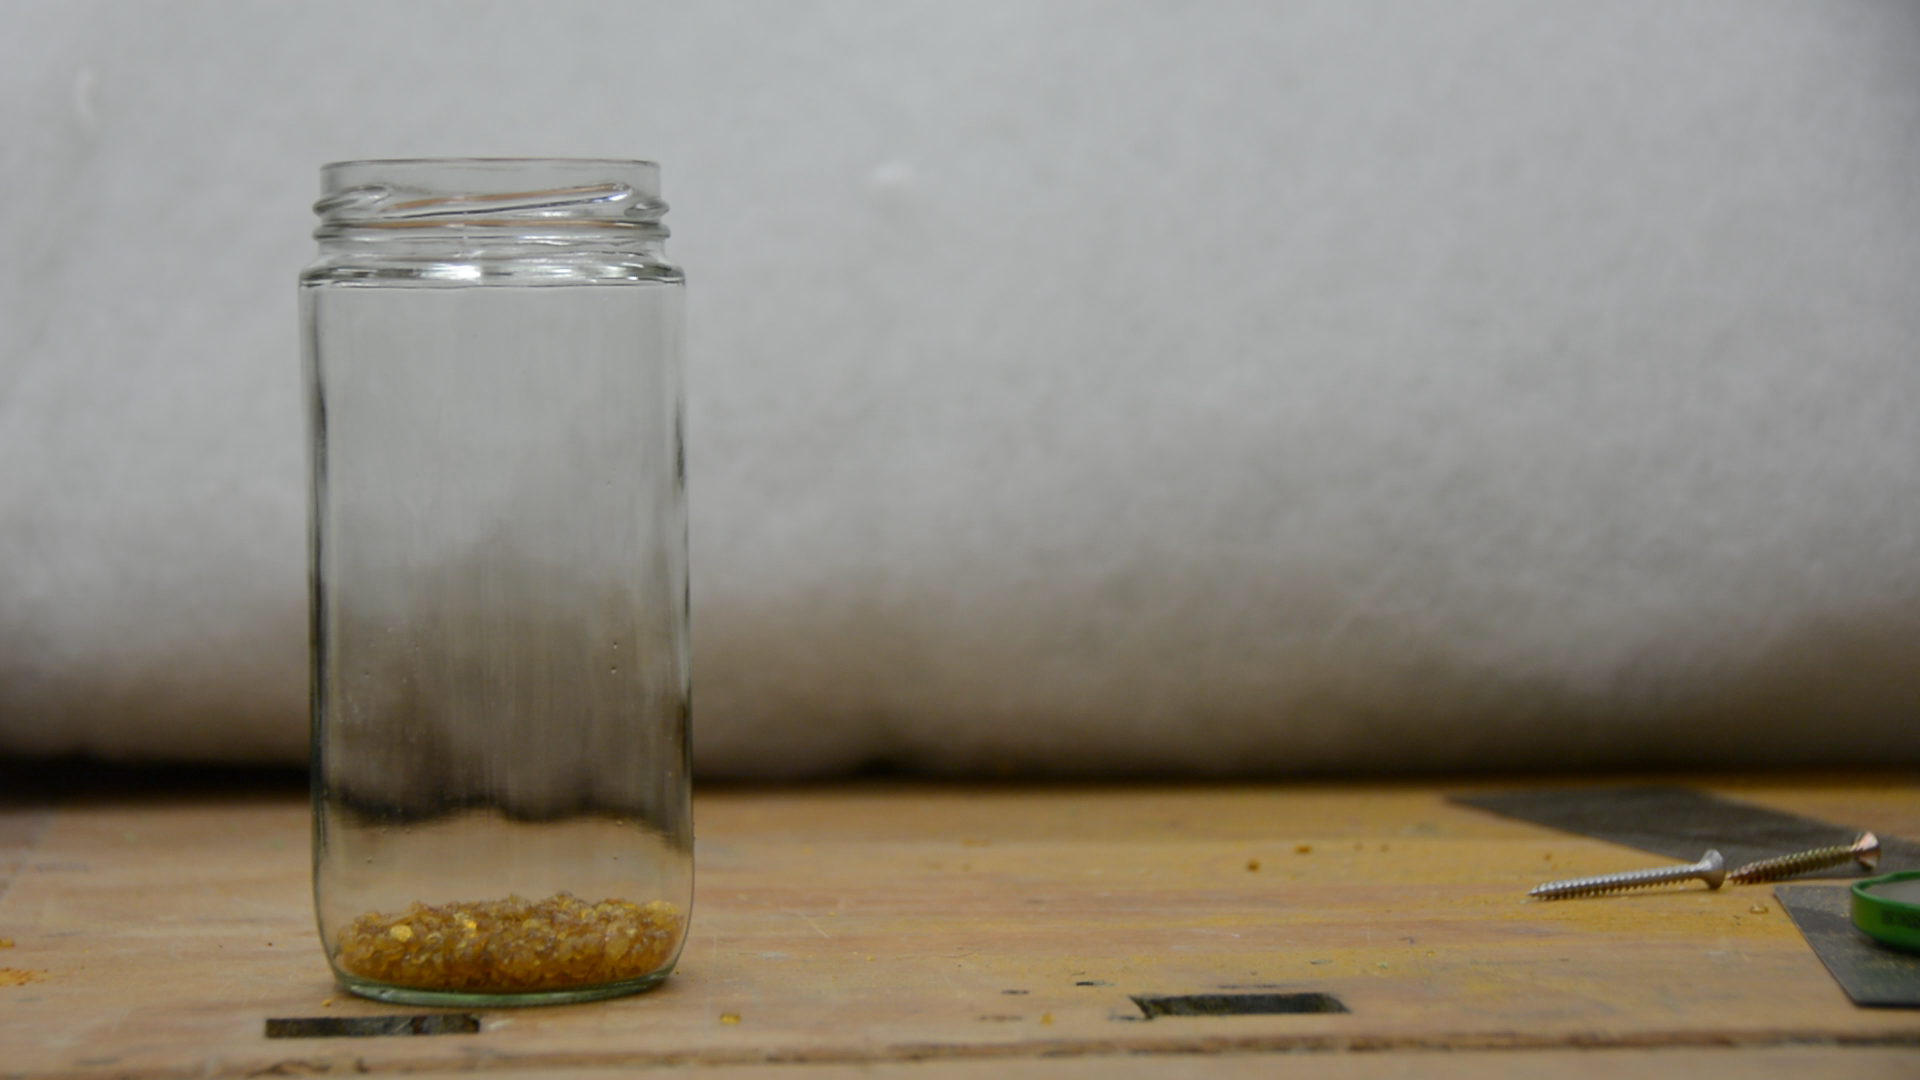
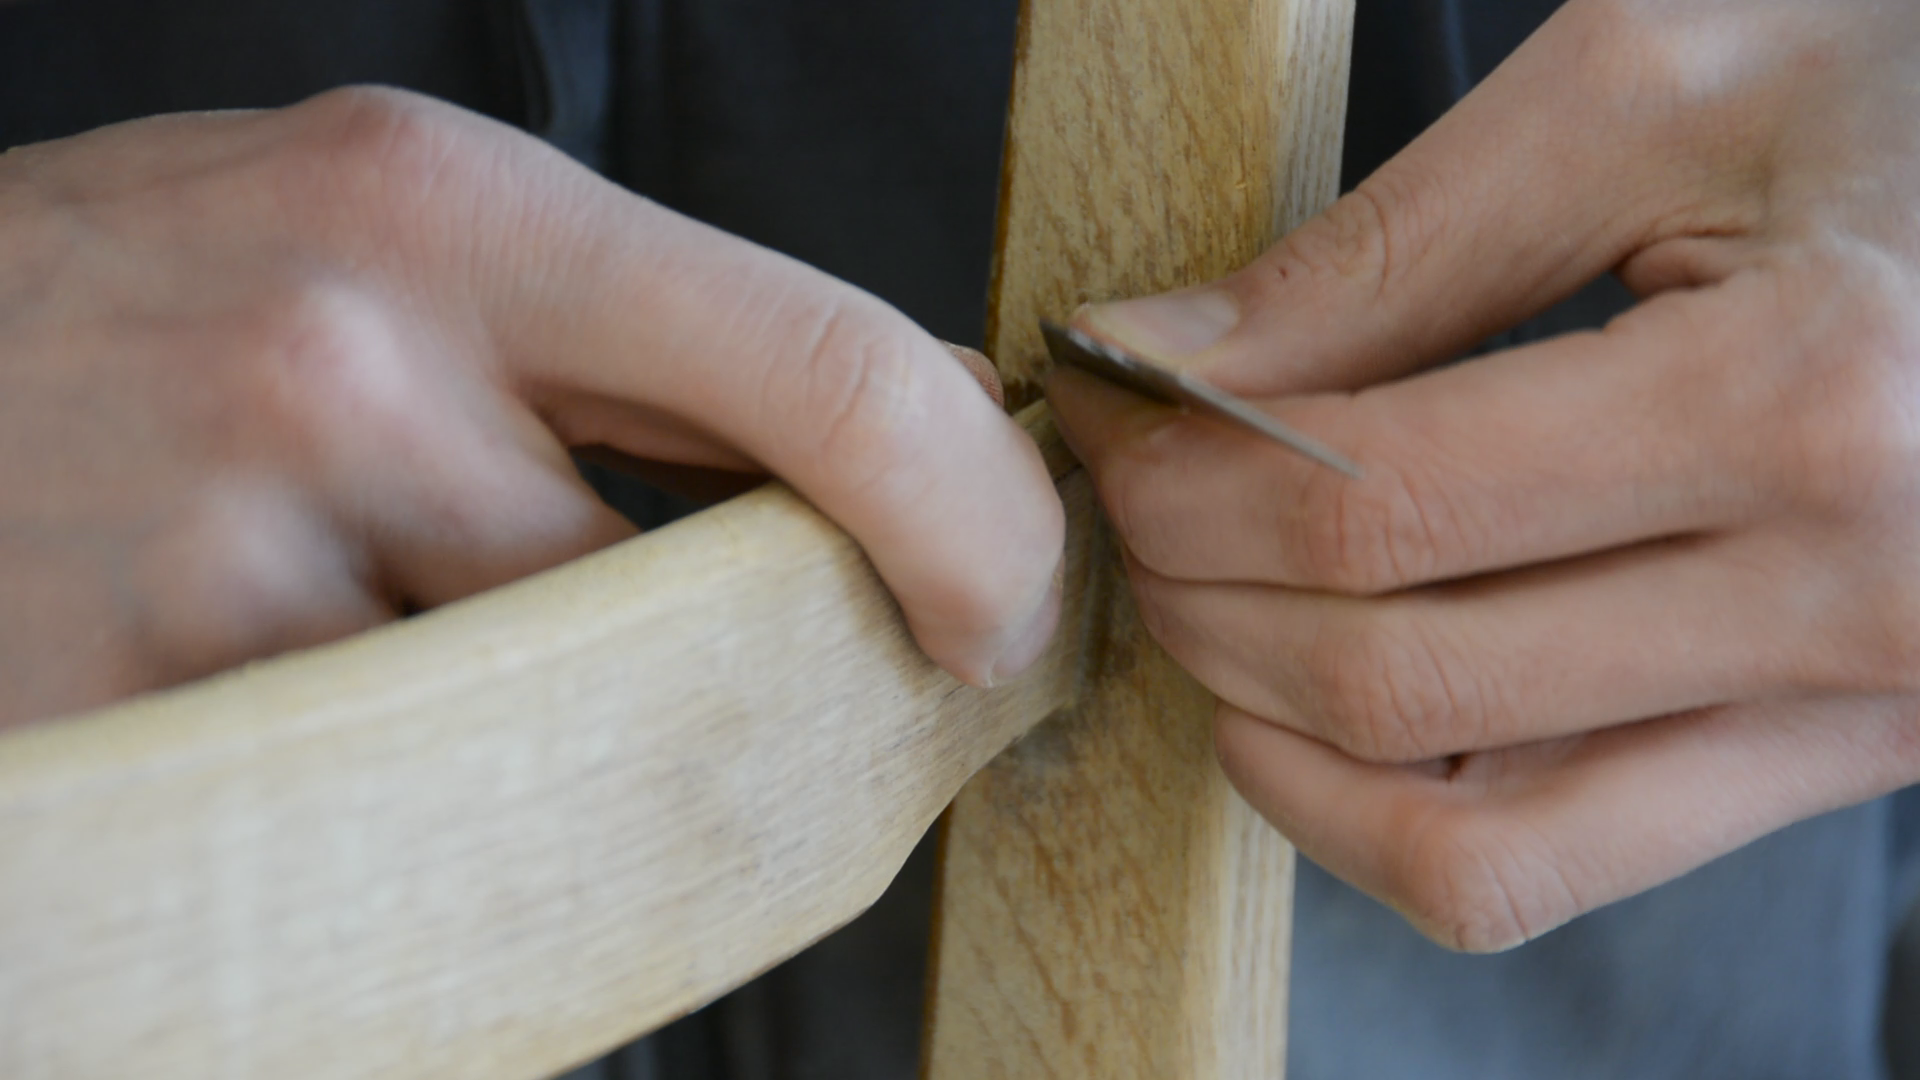
A few joints are loose and need a repair. As the chairs are quite old the joints are most likely put together using hide glue. The advantage of hide glue is that it is reversible by adding heat and water. I would like to make future restorations easy and keep that feature.

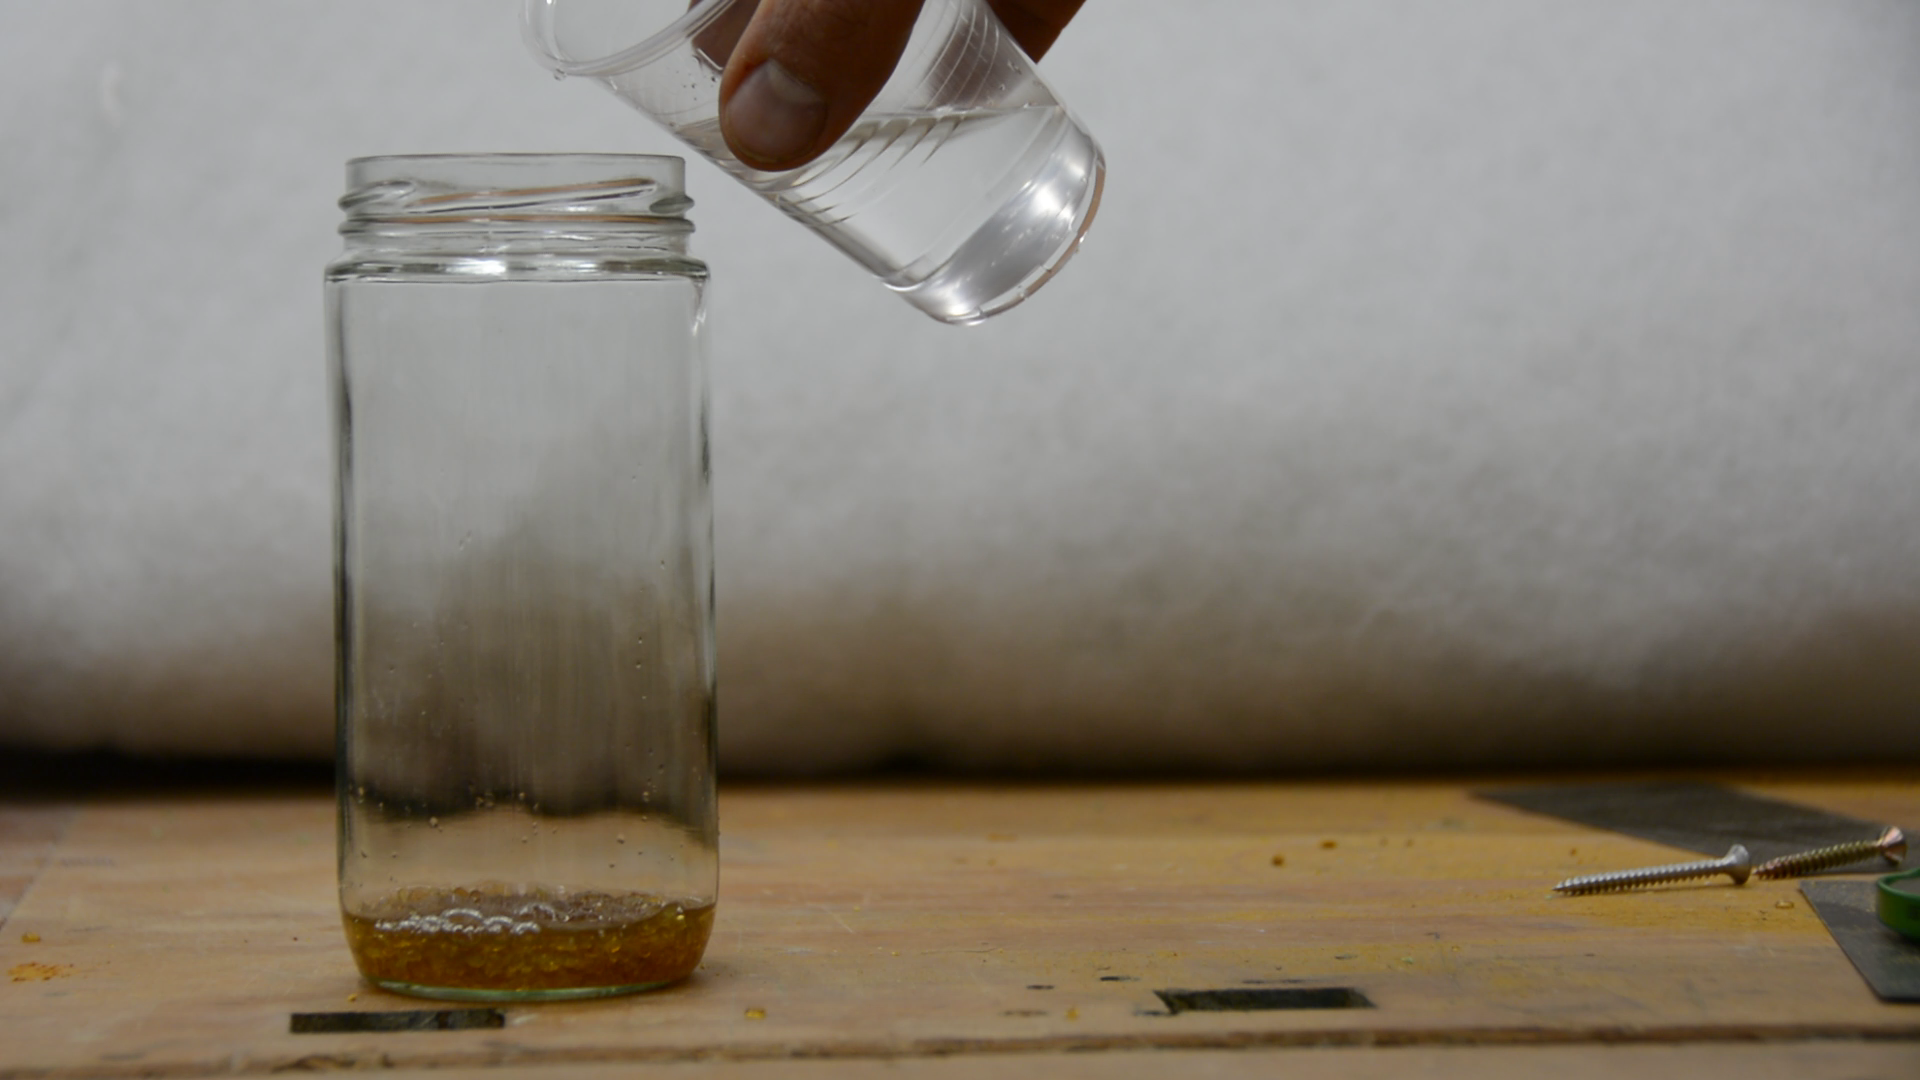
So put some beads of hide glue in water and let them soak up the water overnight. The next day I heat the glue in a baby bottle heater.

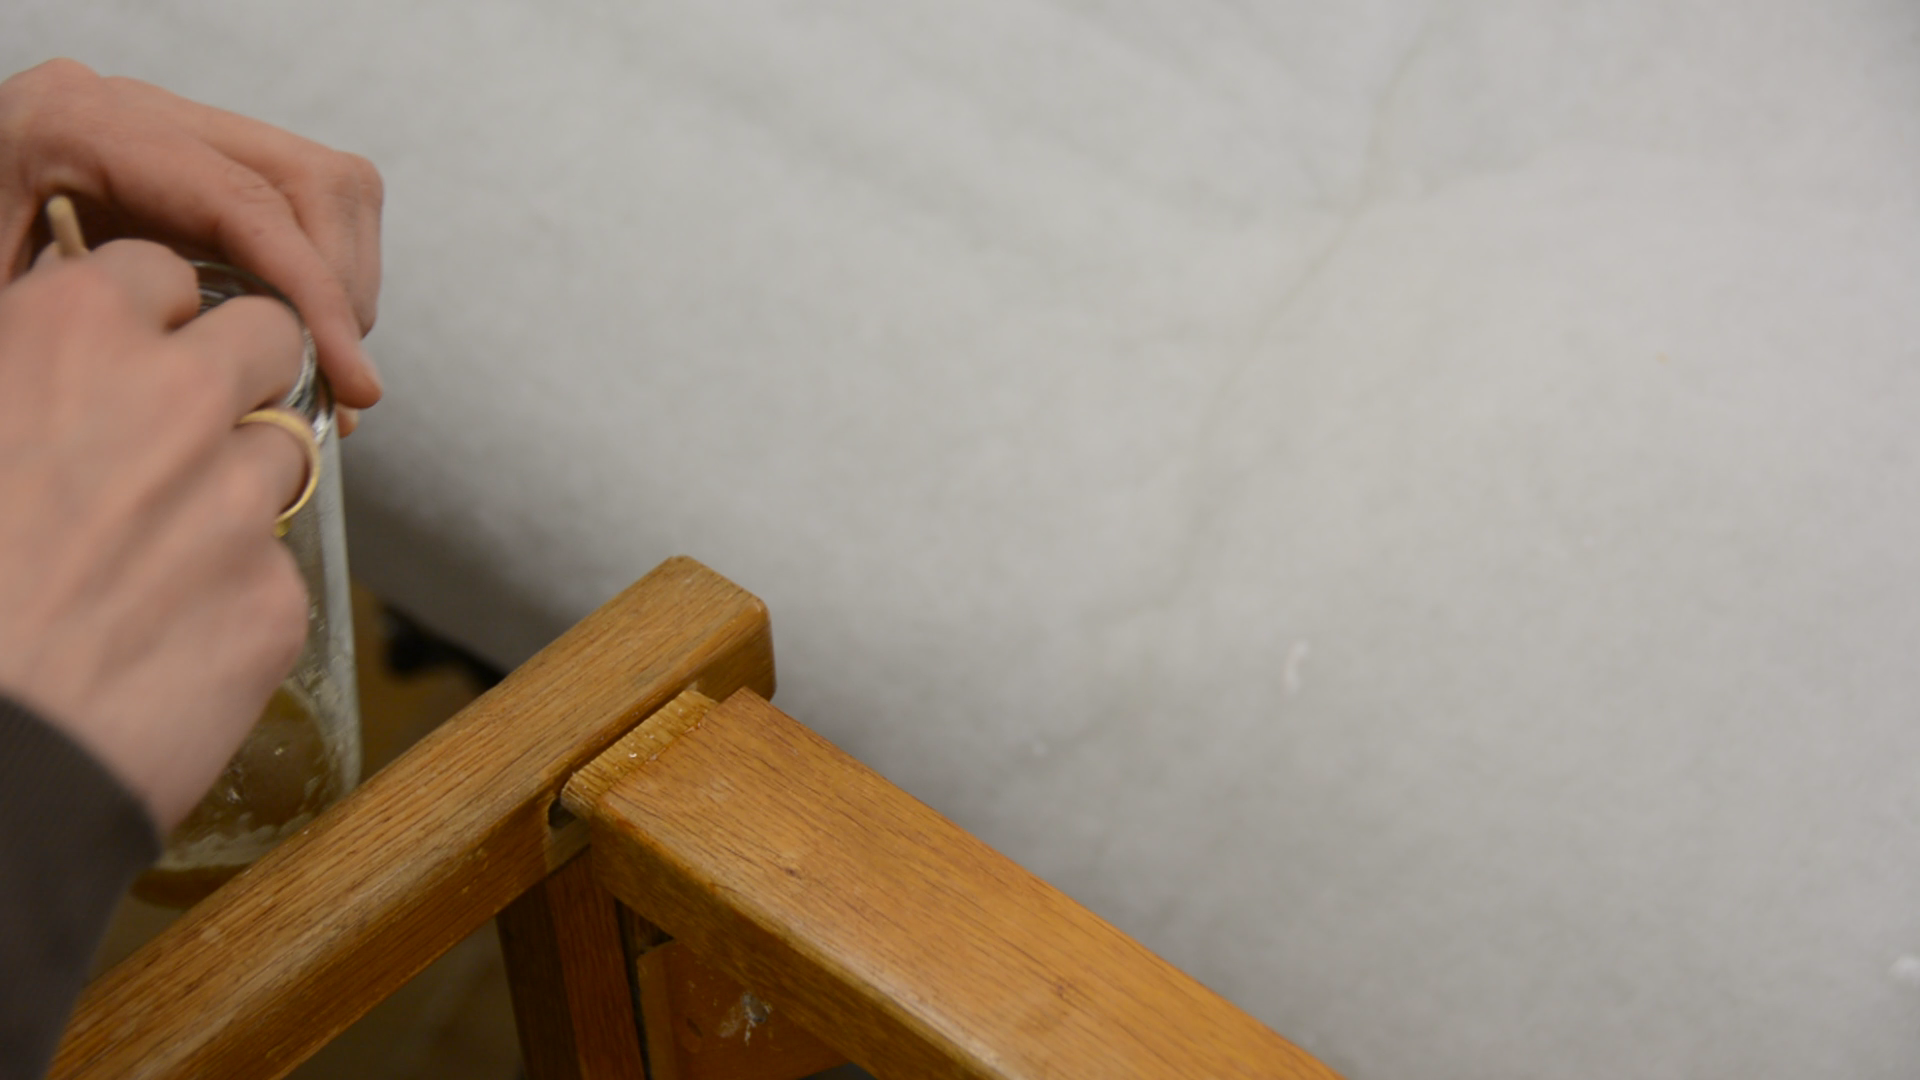
I add a liberal amount of glue to the joint, clamp it together and remove the excess.

Removing the old finish
As a next step in this chair restoration the old varnish is now sanded and scraped away. To remove the varnish from the rounded parts I first use a scraper and then follow up with some 80 grit sandpaper. If you haven’t used a card scraper before you should give it a try. It is very efficient in removing old finish.
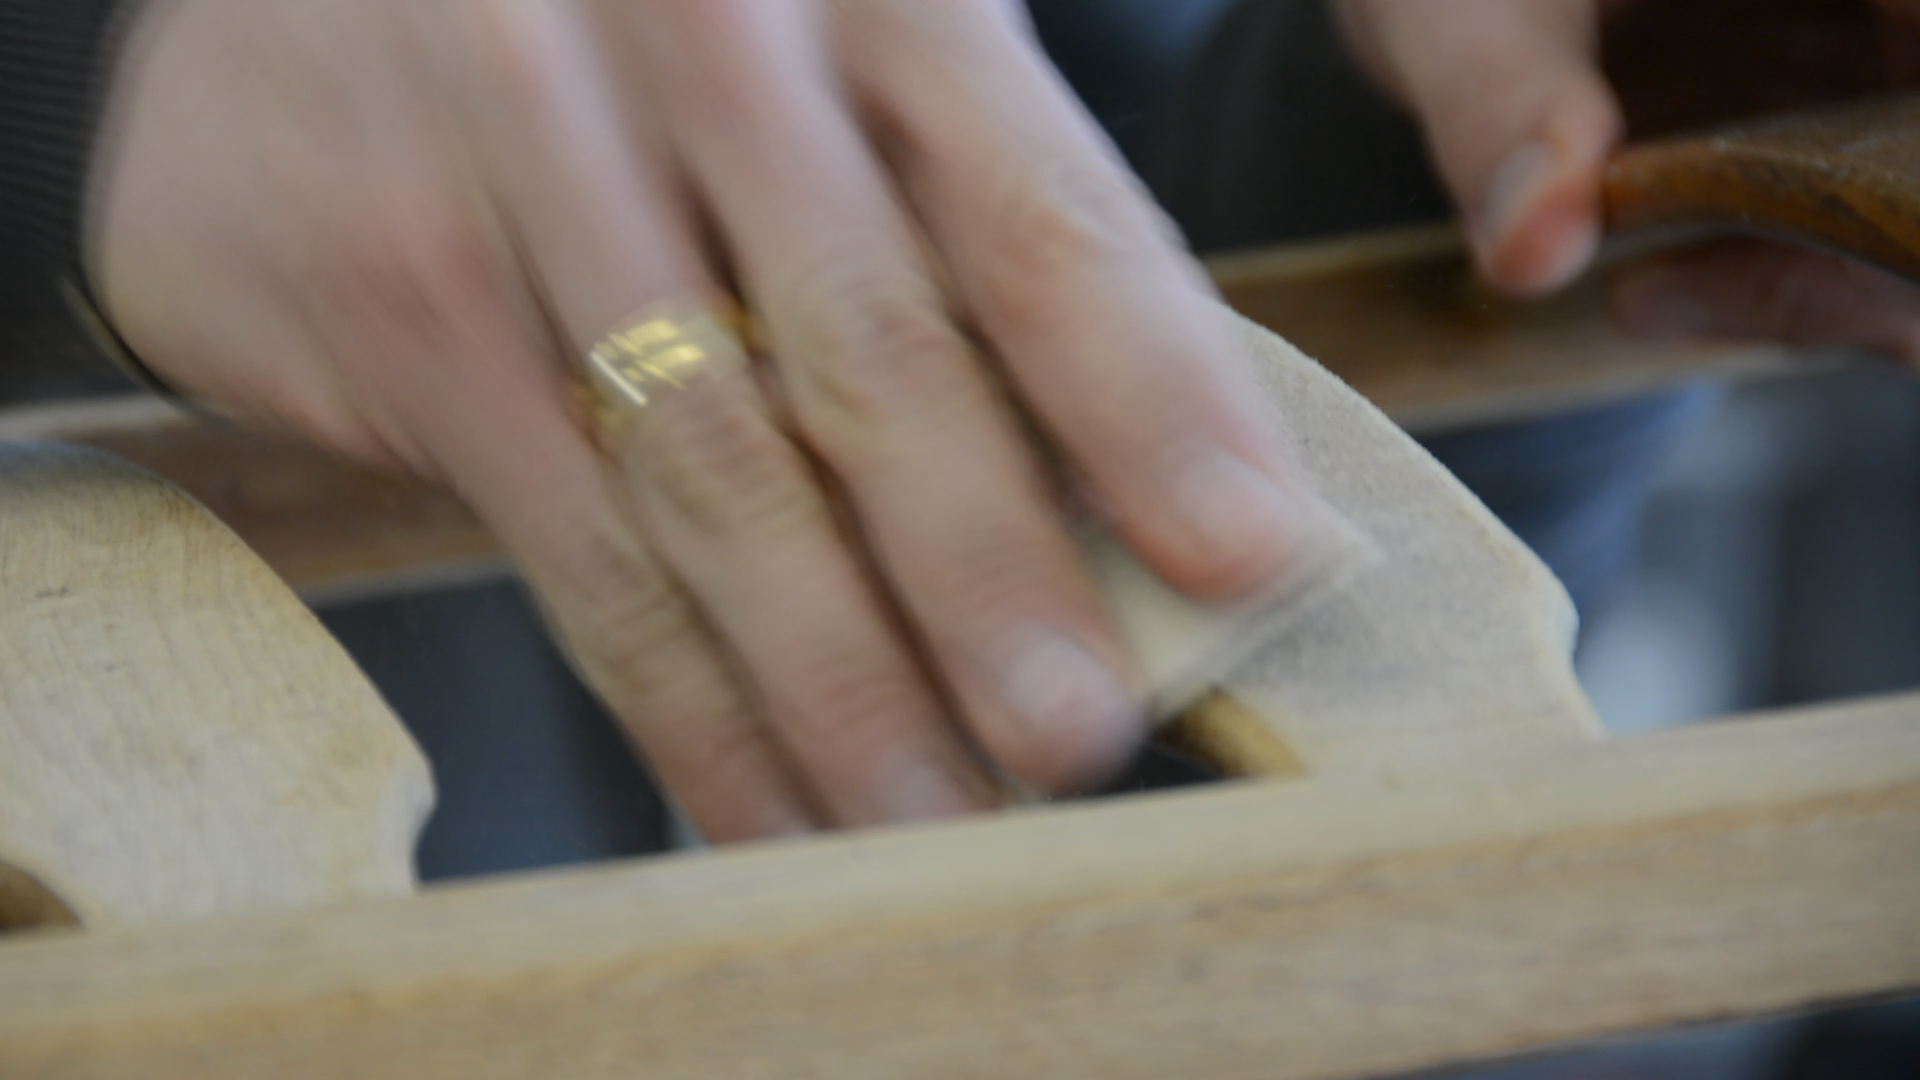
To remove the varnish from the very tight corners I use various odd-shaped blades that came with my cutter. The good news is that the coating is very thin and can be removed without and chemical strippers.

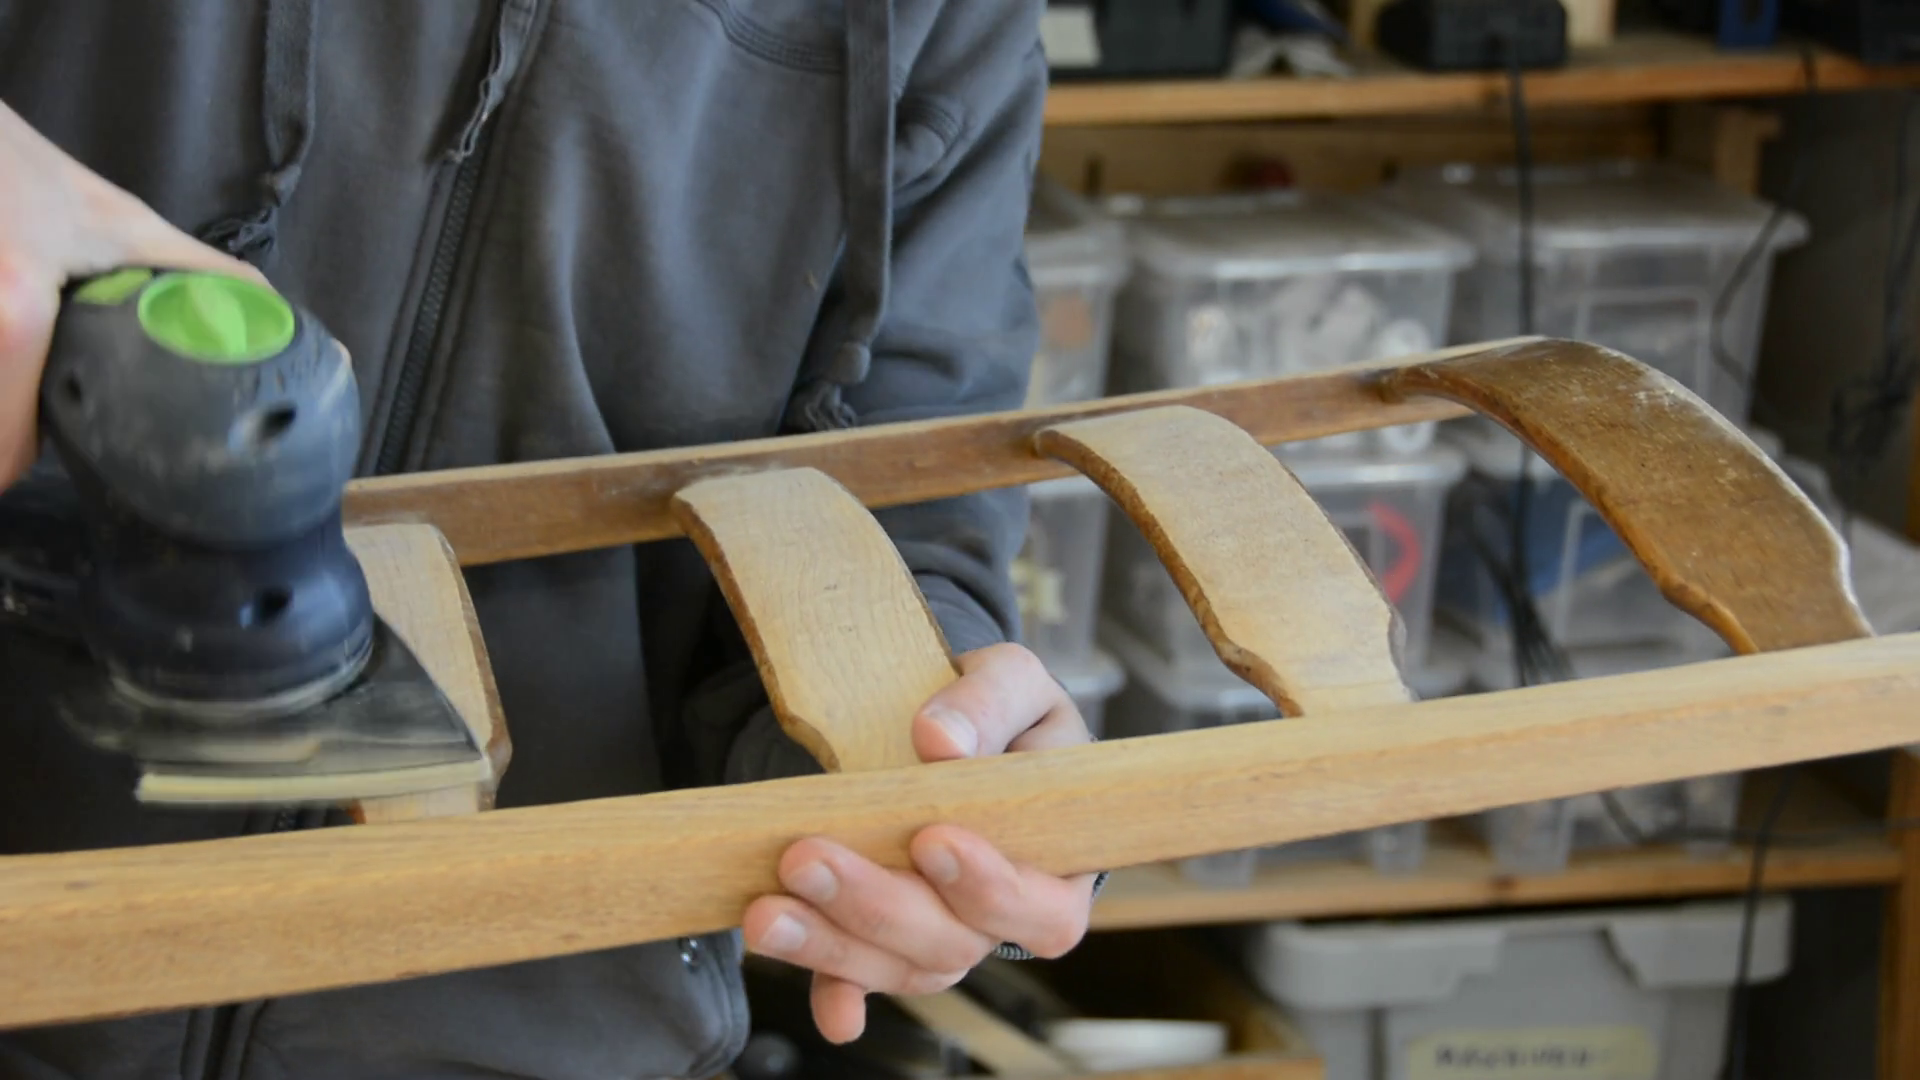
It’s a lot of sanding with a random orbit sander and hand sanding first with 80, then with 120, 180 and finally with 240 grid.
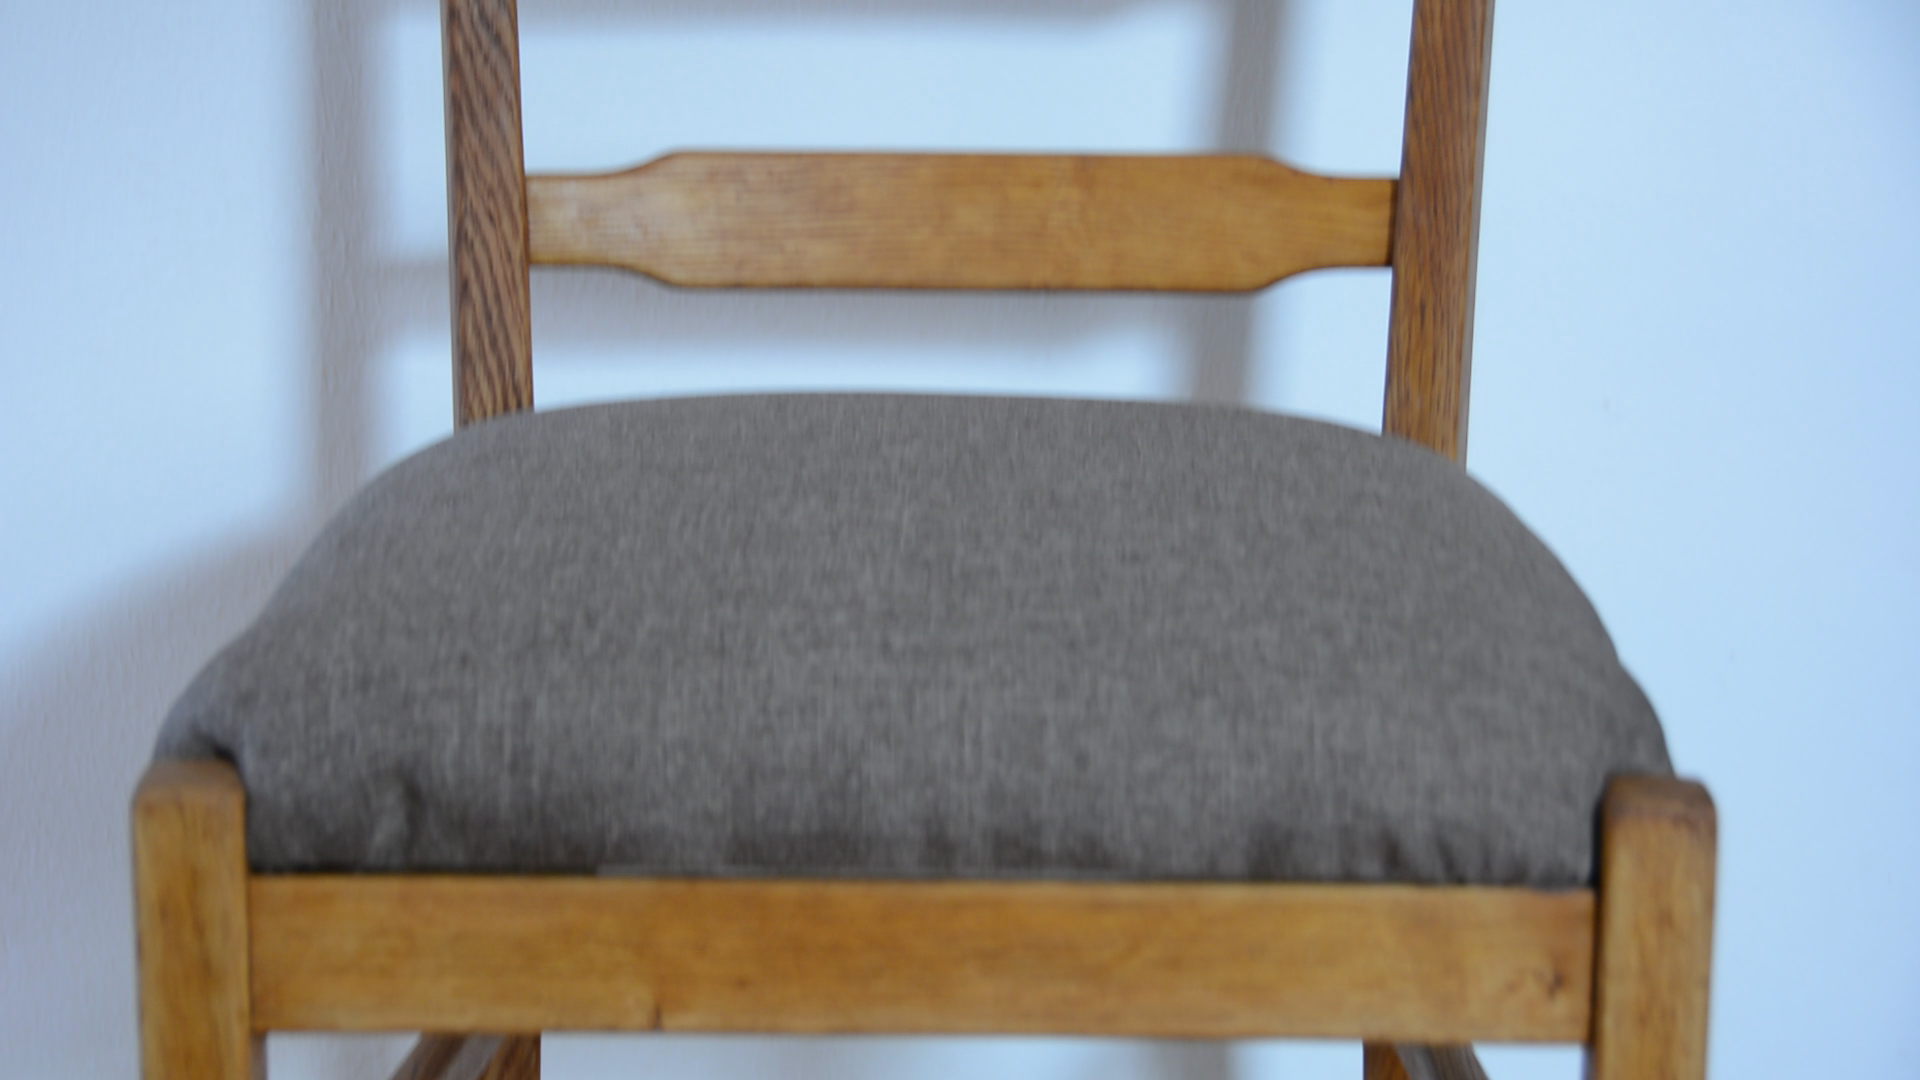
Reupholstery
Before finishing the wood let’s have a look at the upholstery part. I never did any upholstery before so if you have a good tip please leave a comment. I got 60 mm foam from Amazon. If you want to get the same material I have links at then of the article.

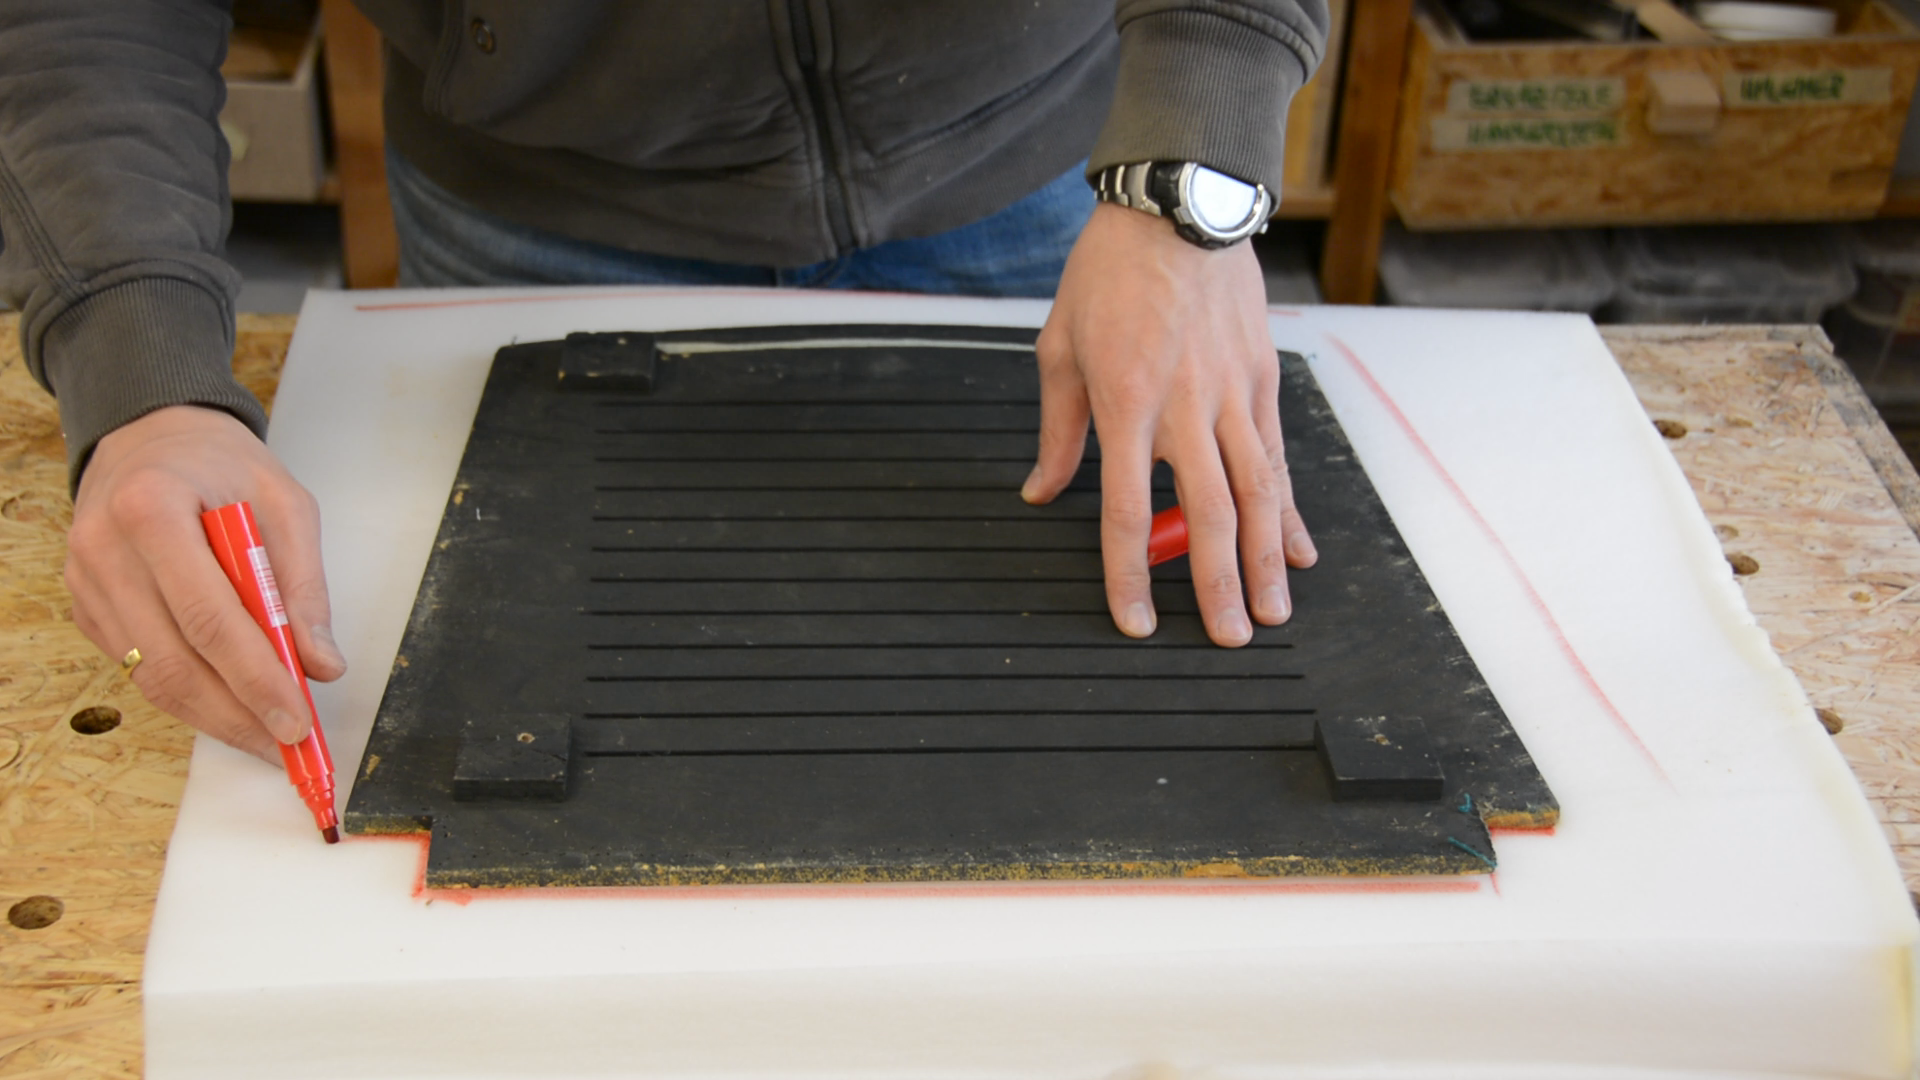
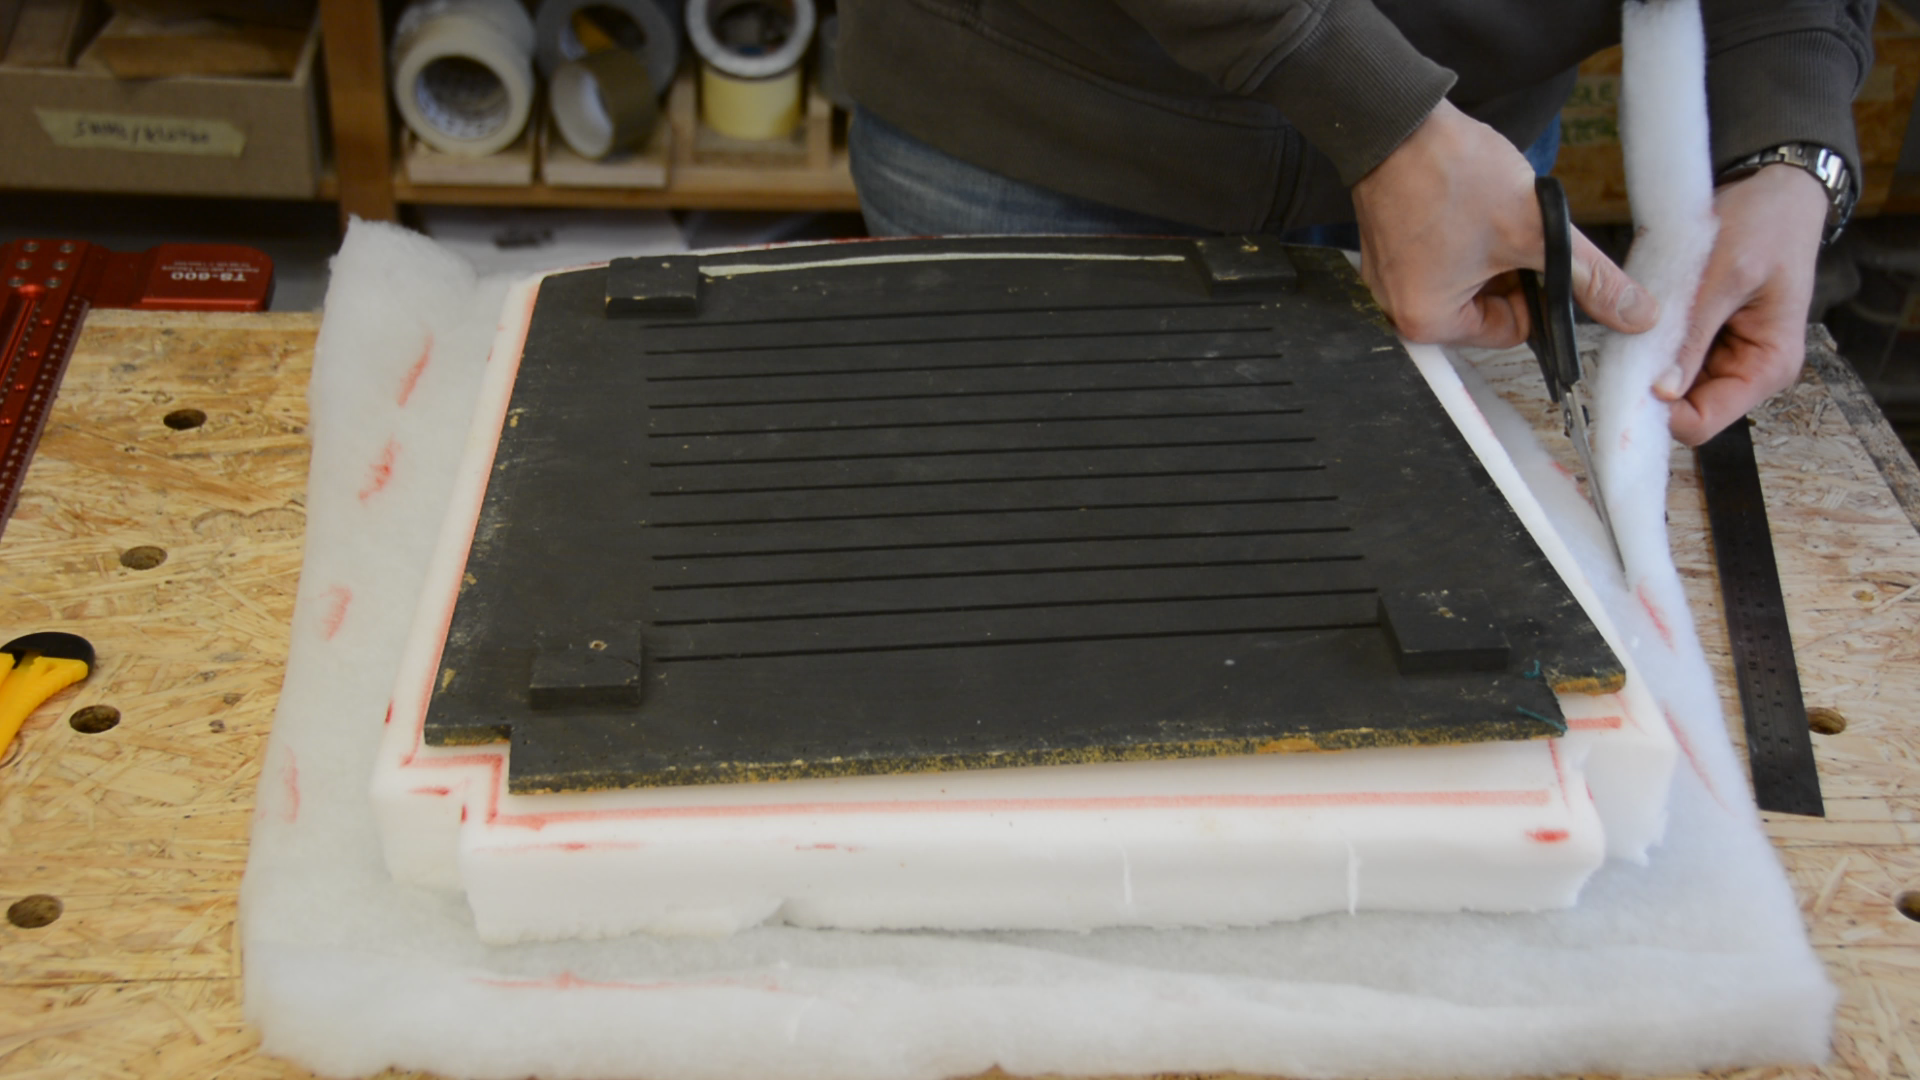
The foam is cut to the shape of the seat with a centimeter or a quarter of an inch overhang on each side.

Over the foam I put this batting. The batting ensures that the fabric is not rubbing against and thereby destroying the foam. I pull the batting to the seat, pull it to the seat, mark a line and cut off the excess.
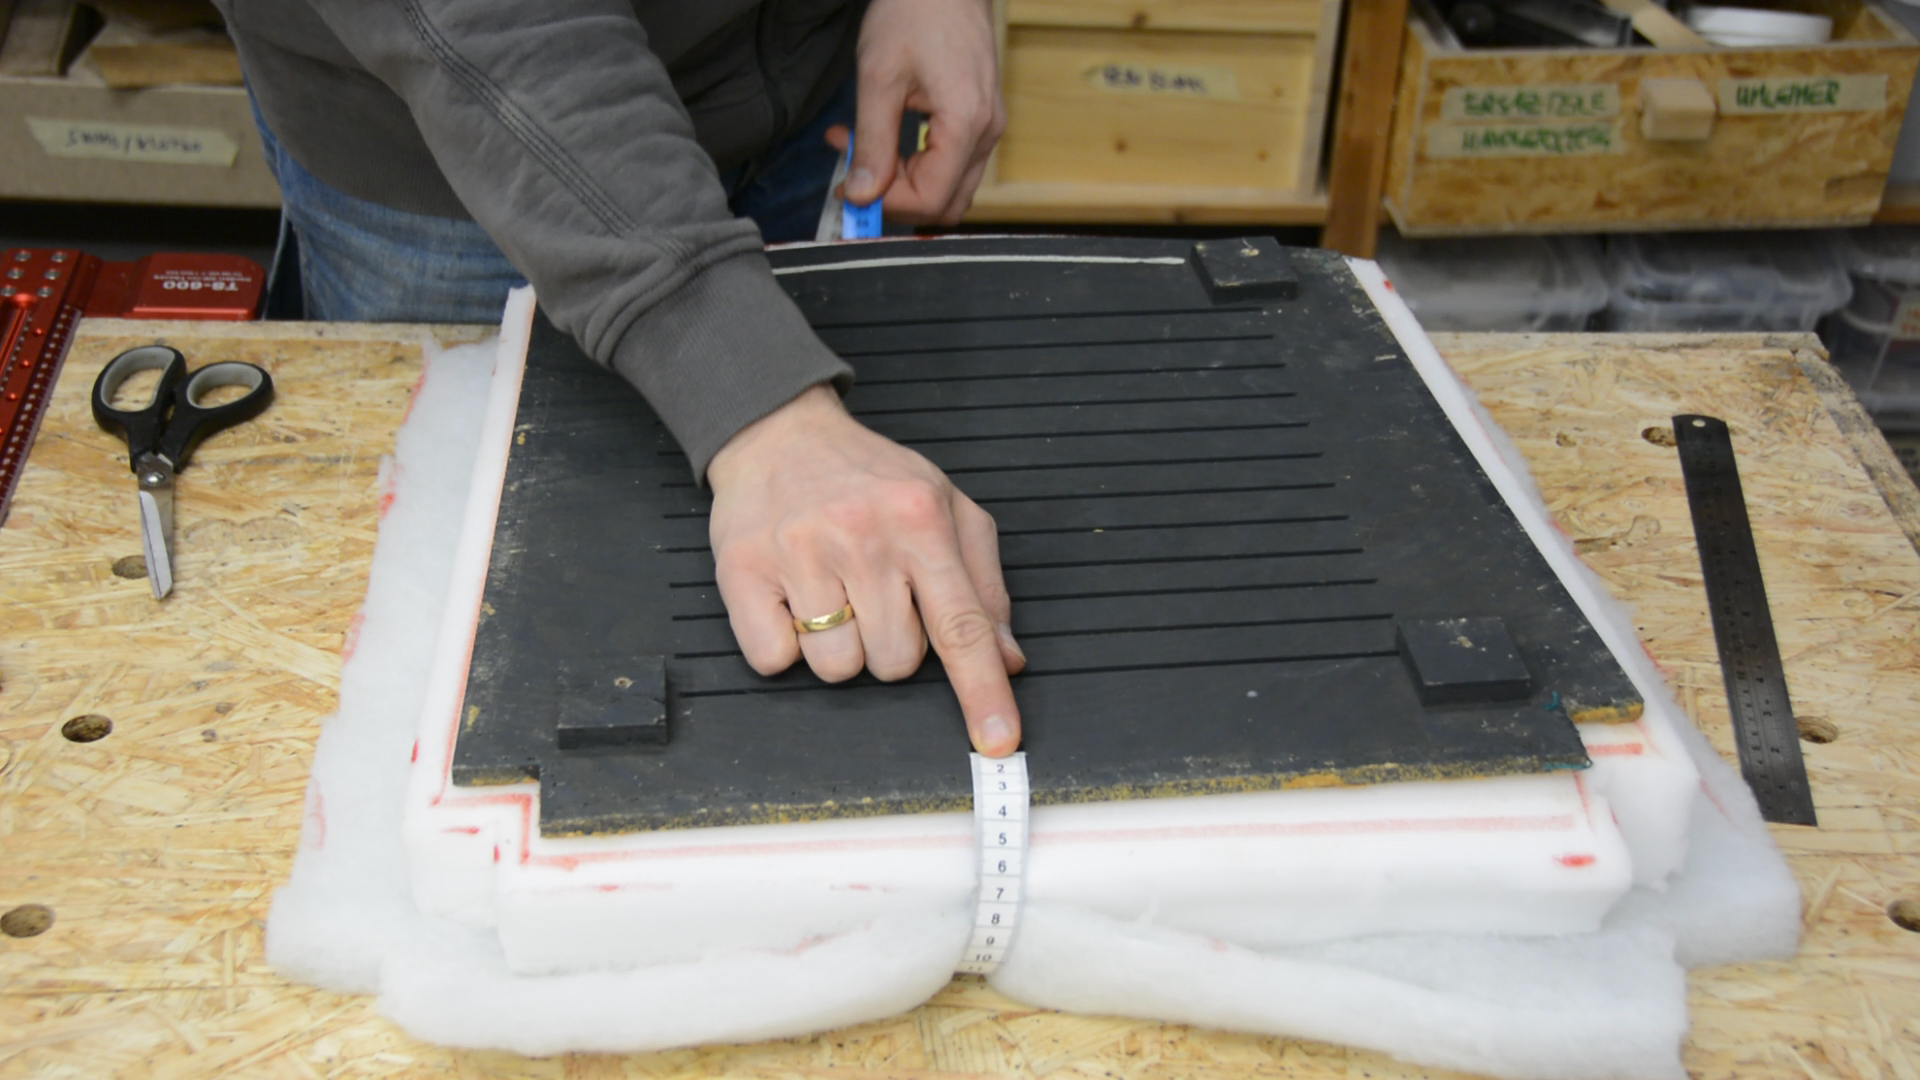

With a flexible measuring tape I measure the length of the fabric I need and cut the fabric that I also got from Amazon to size. Next I put everything upside-down on my bench.

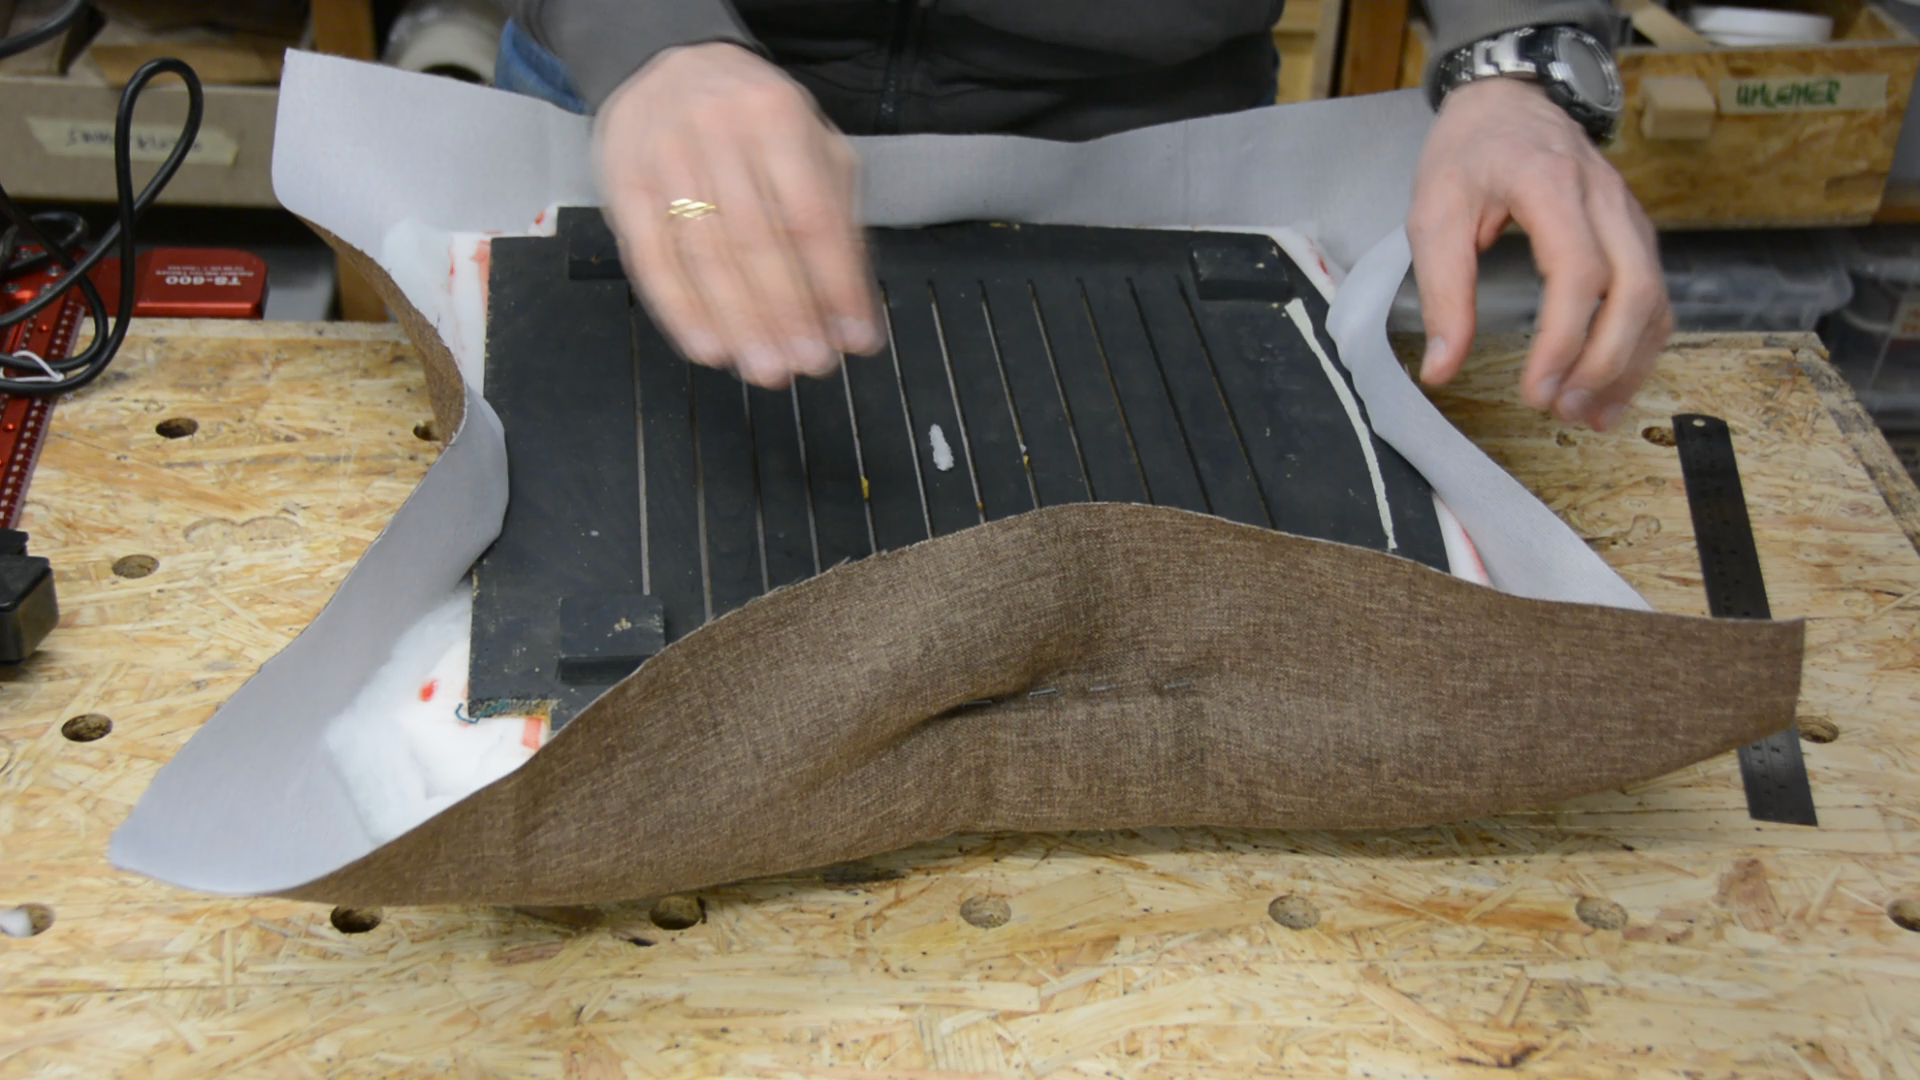
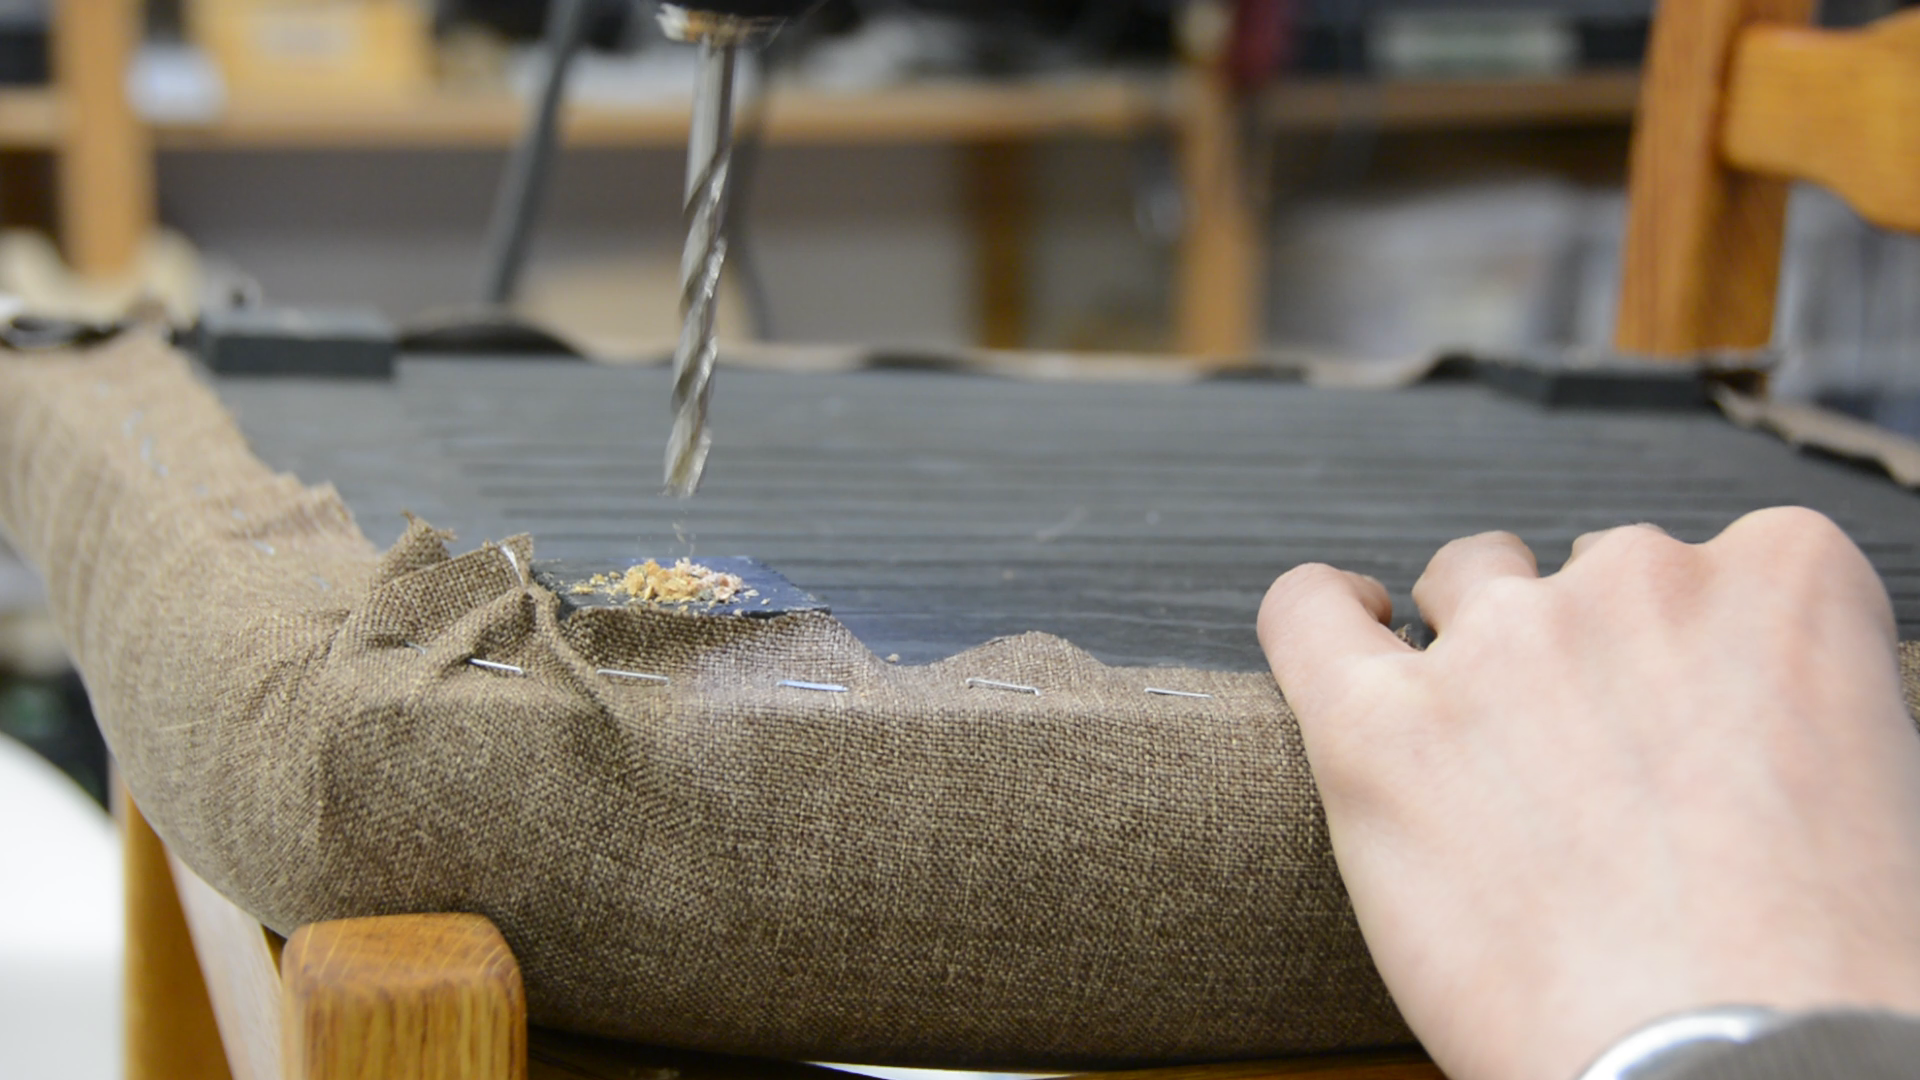
In order to create a nice fit I start pulling the fabric tight to the wood in the middle of each side and secure it with a staple.
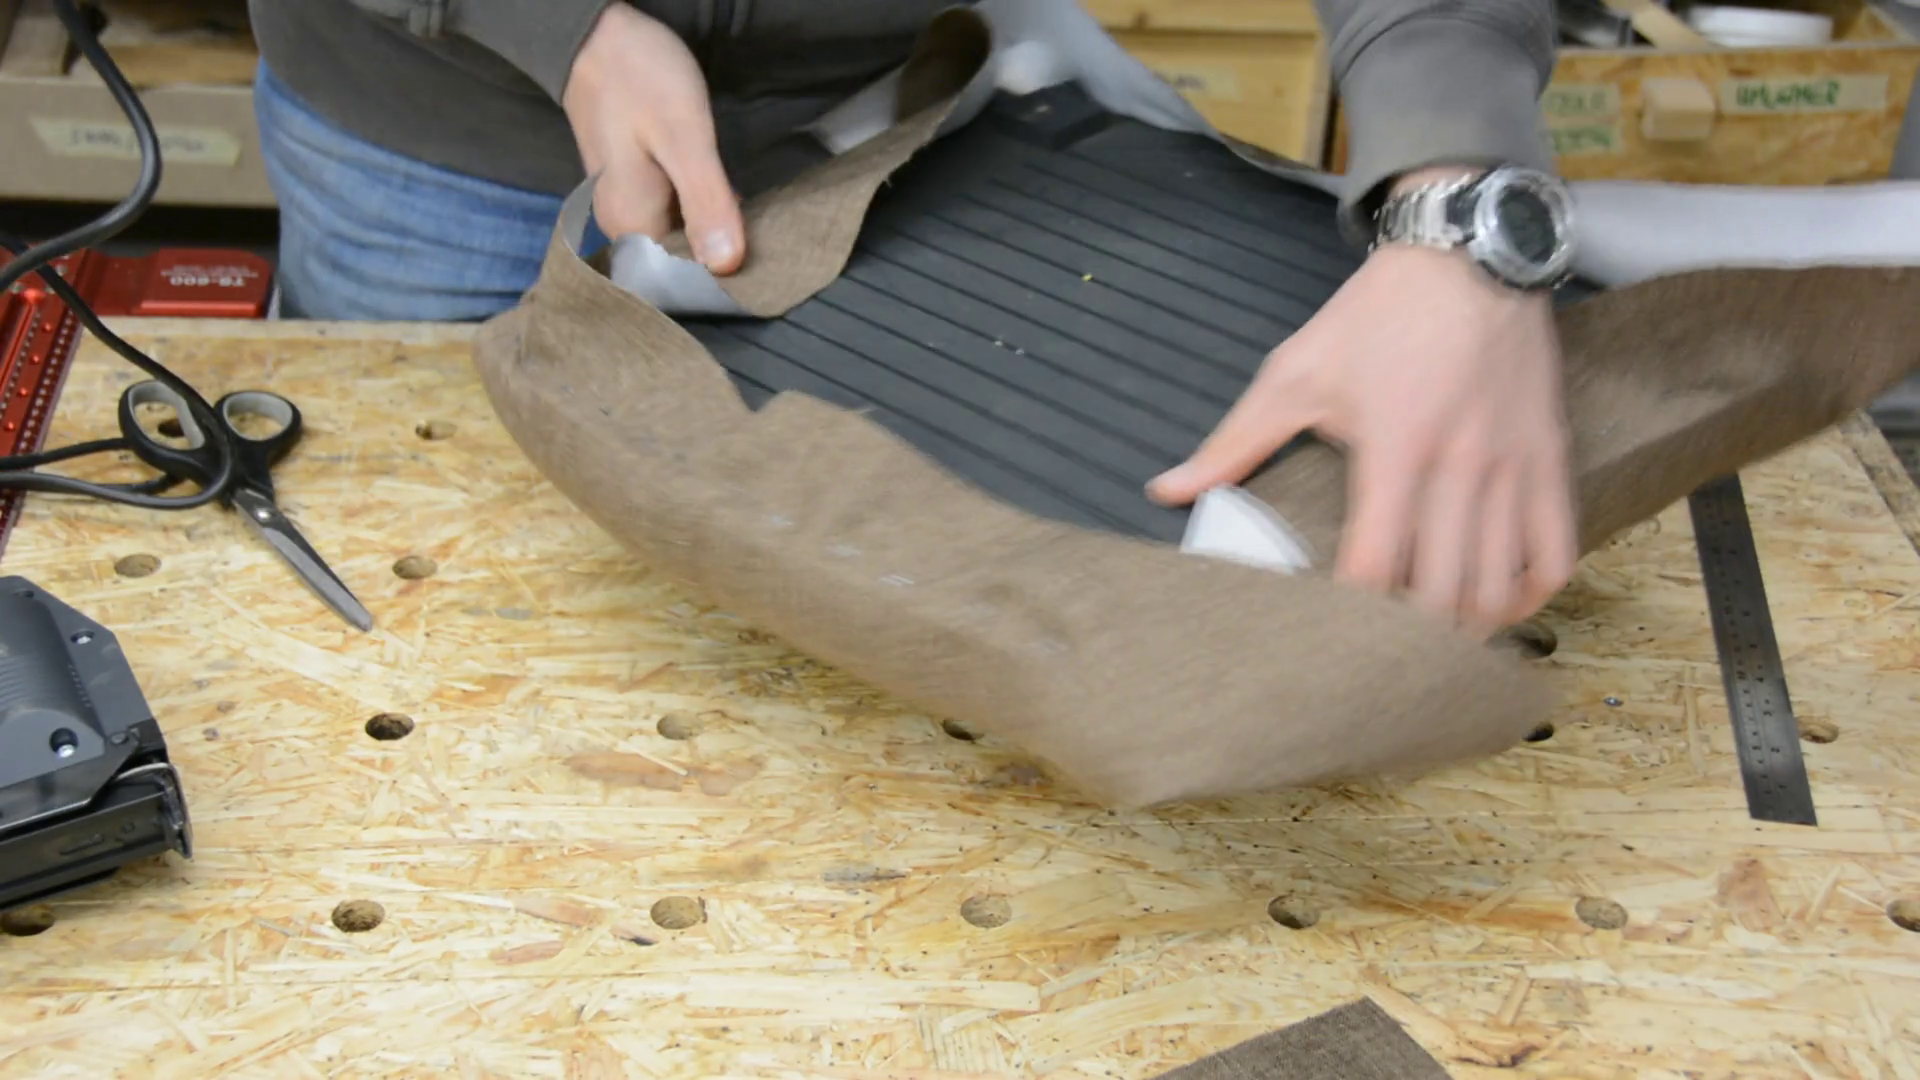
I then work my way from the middle towards the corners – always securing the fabric with staples. For the corners I remove some of the fabric before securing it again to the underside. Lastly I remove the excess of the fabric and call it done. The borders of my seat are a bit wavy – but I got better with each additional chair from the set of four.
Finishing
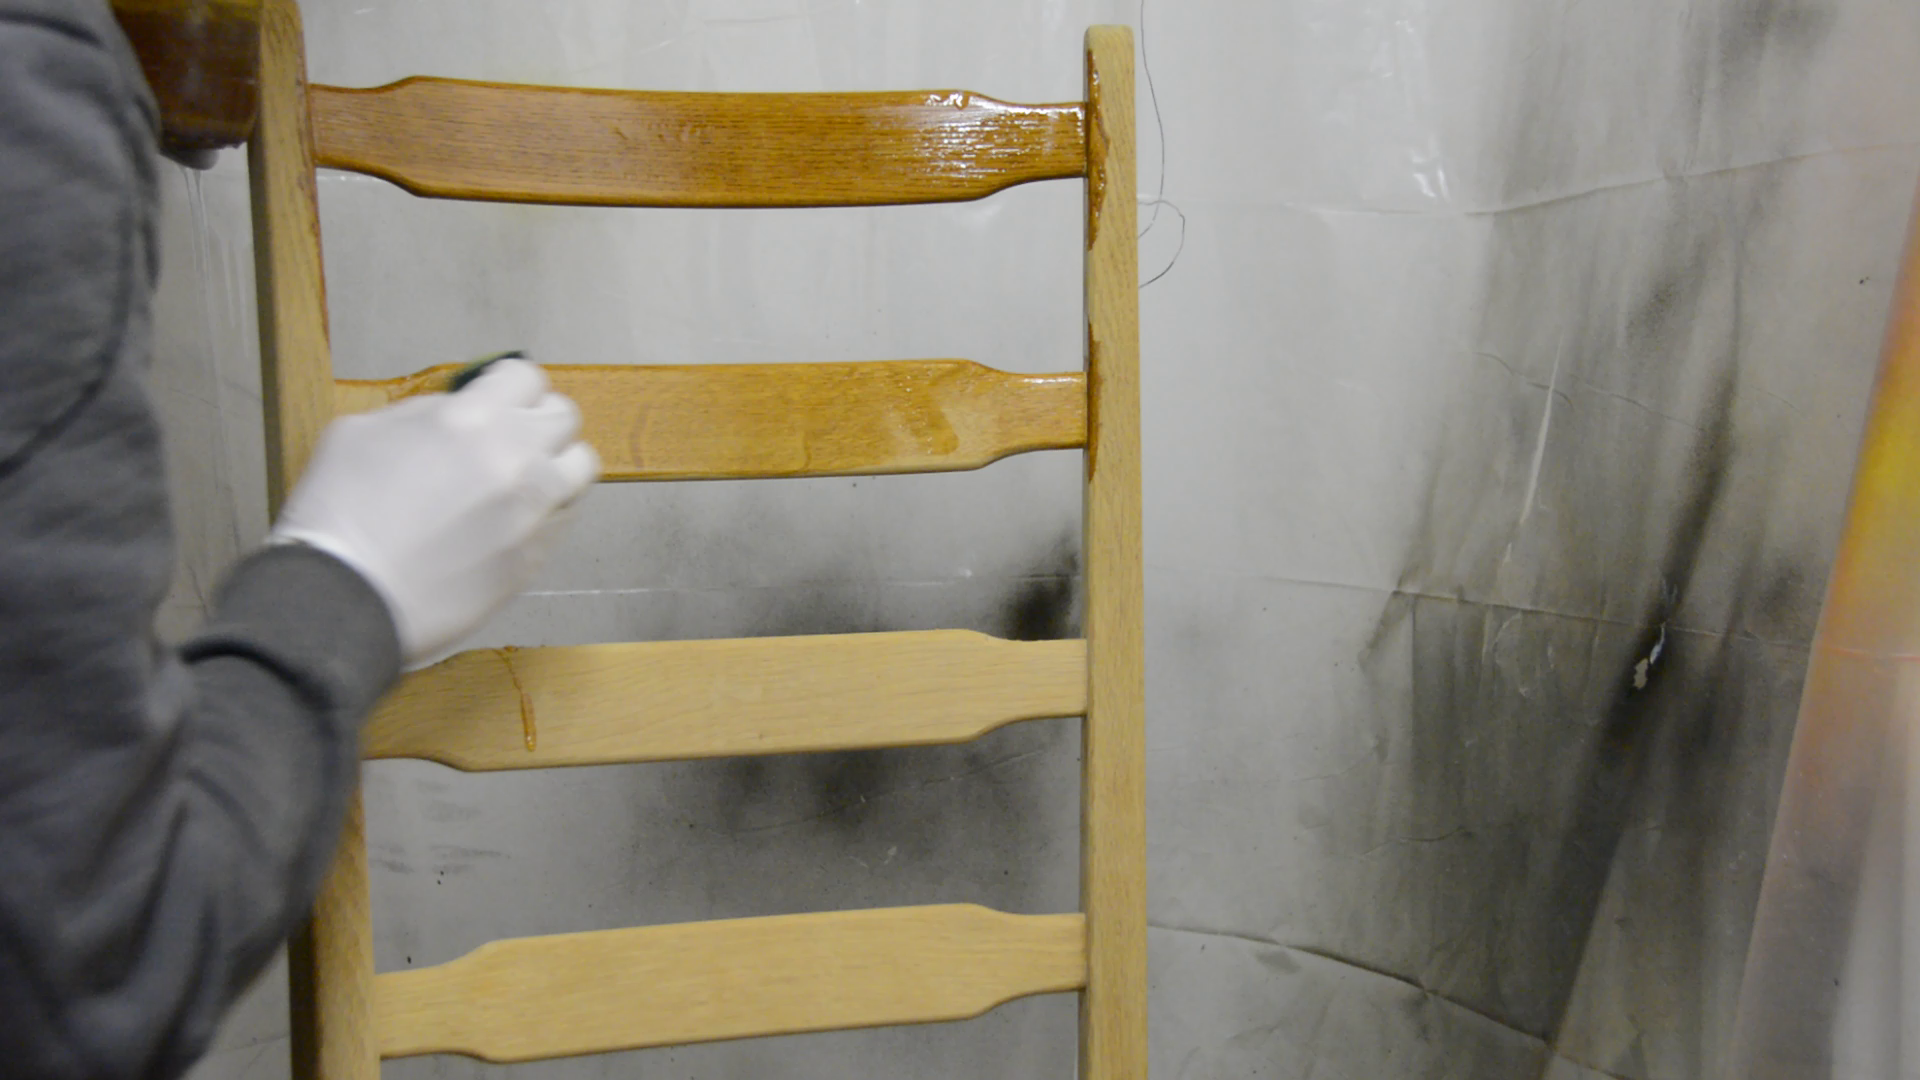
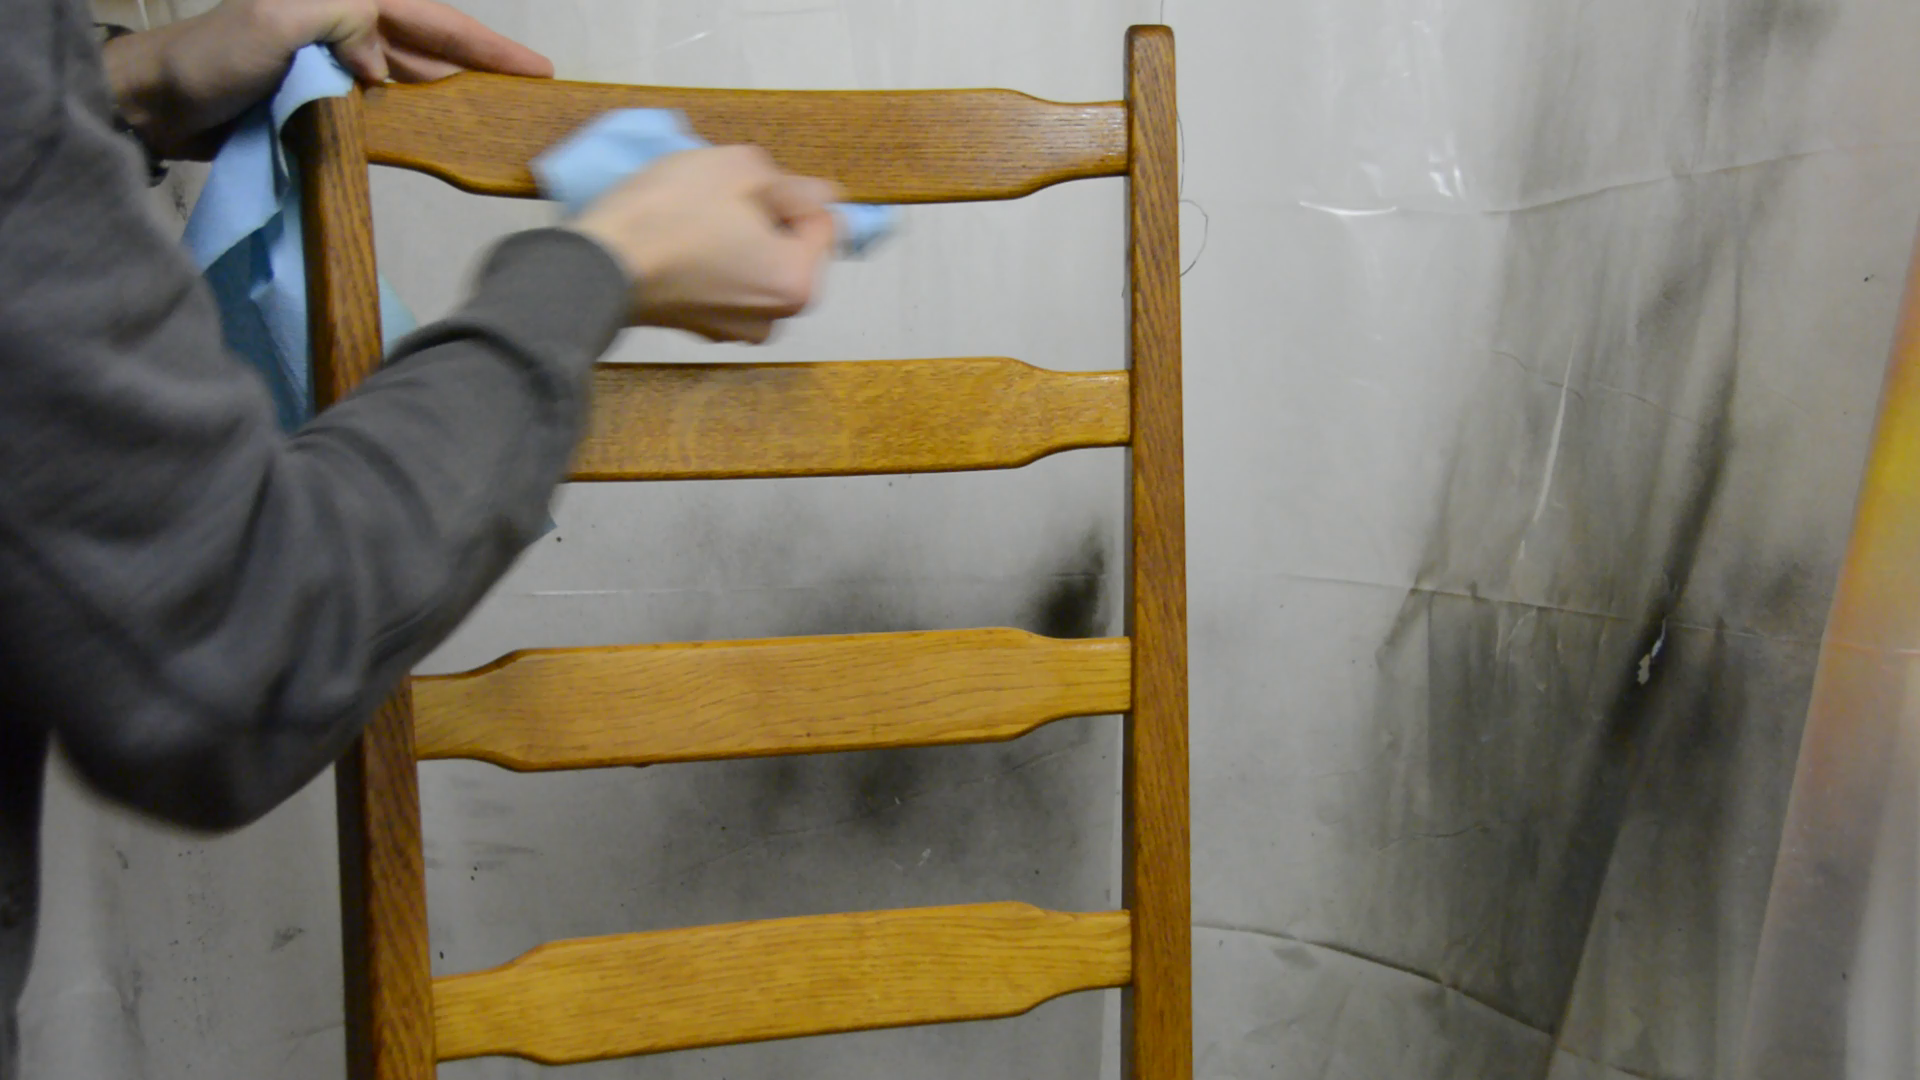
The last step is to apply a new finish to the wooden part. I think every woodworker should have a default finish that you are able to apply even when someone wakes you up in the middle of the night. For me that’s a simple hard oil finish. The main advantage is that if there is a dent or scratch I can sand one area down and refinish it without stripping the entire piece and it is very easy to apply.
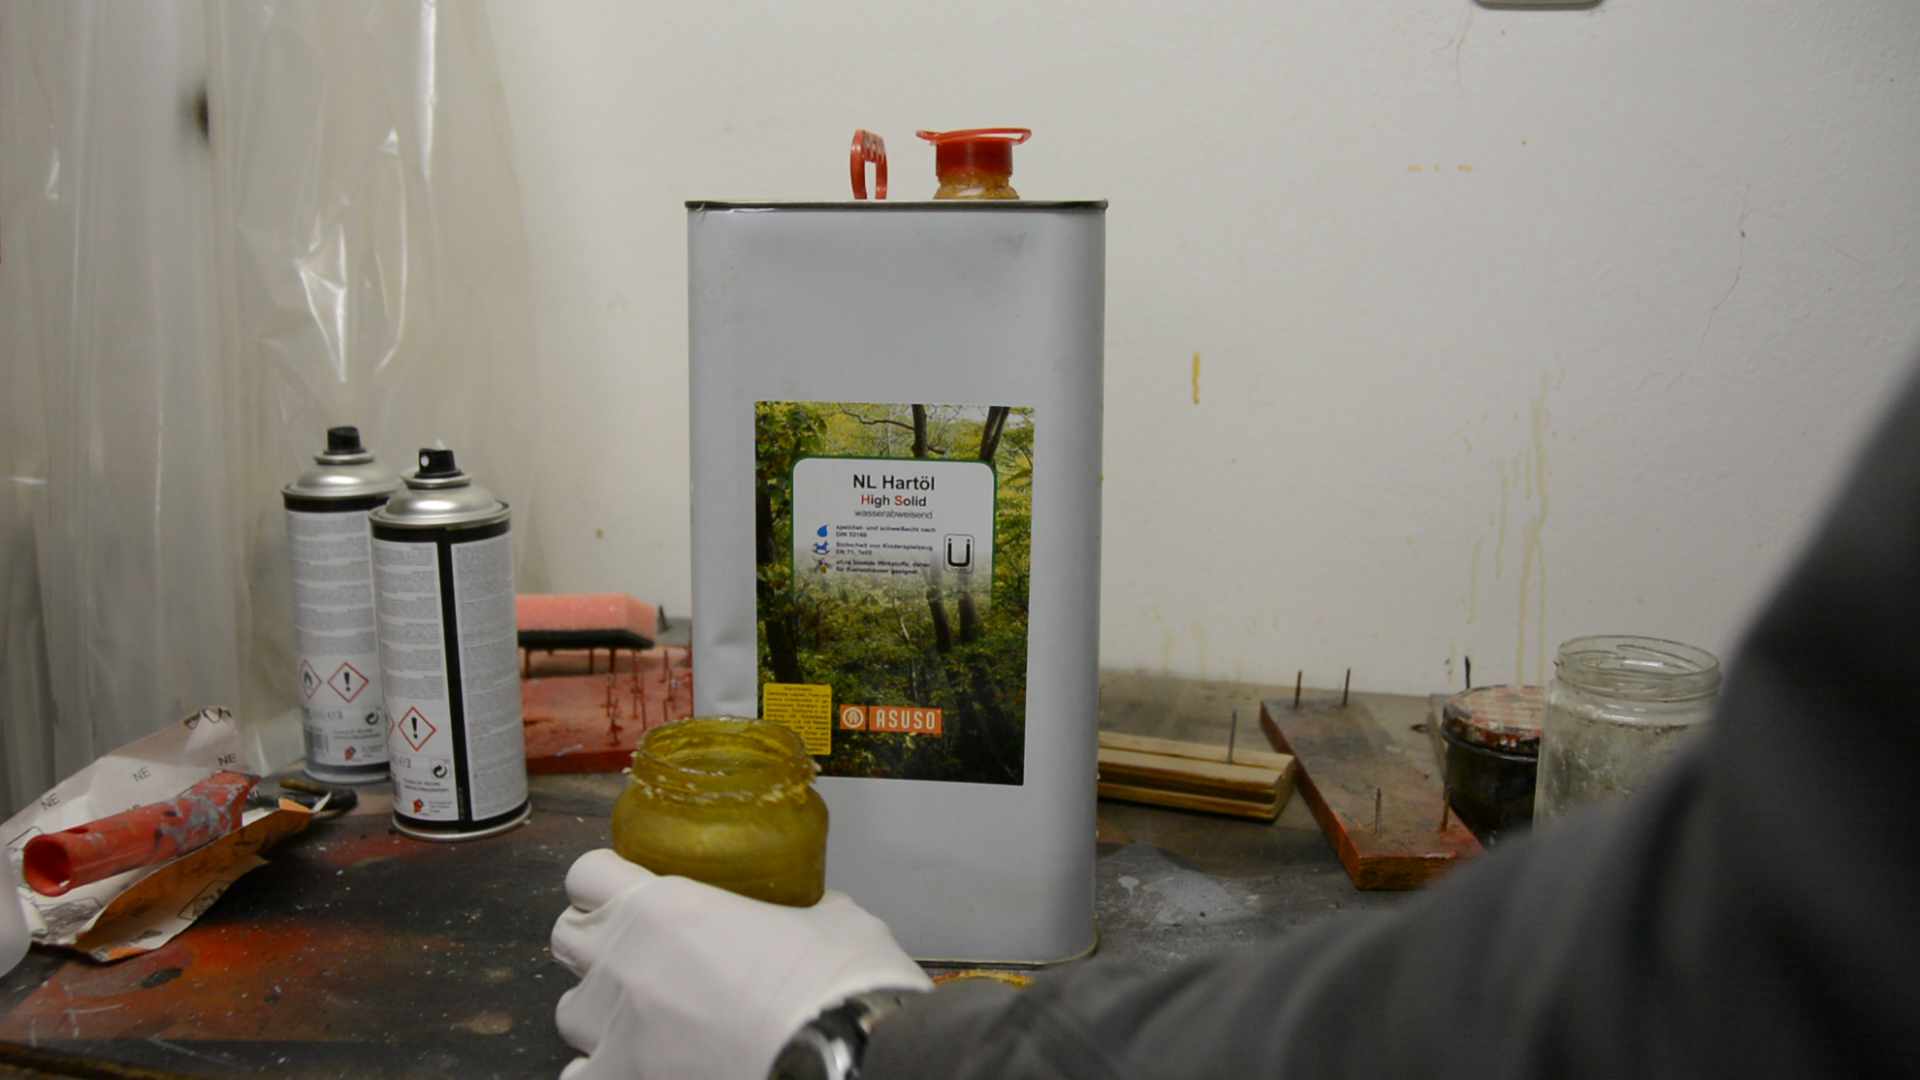
When you apply it it really pops the grain but in contrast to poly or lacquer you can still feel the wooden texture. The application is very simple – just use a kitchen sponge to put a generous amount of oil on the surface and let it soak in for 30 minutes. You then come back and remove the excess with a paper towel. Just make sure that the rags are spread on the table and can dry out – otherwise they might catch fire. The next day I repeat the process.


Repairing worn screw holes
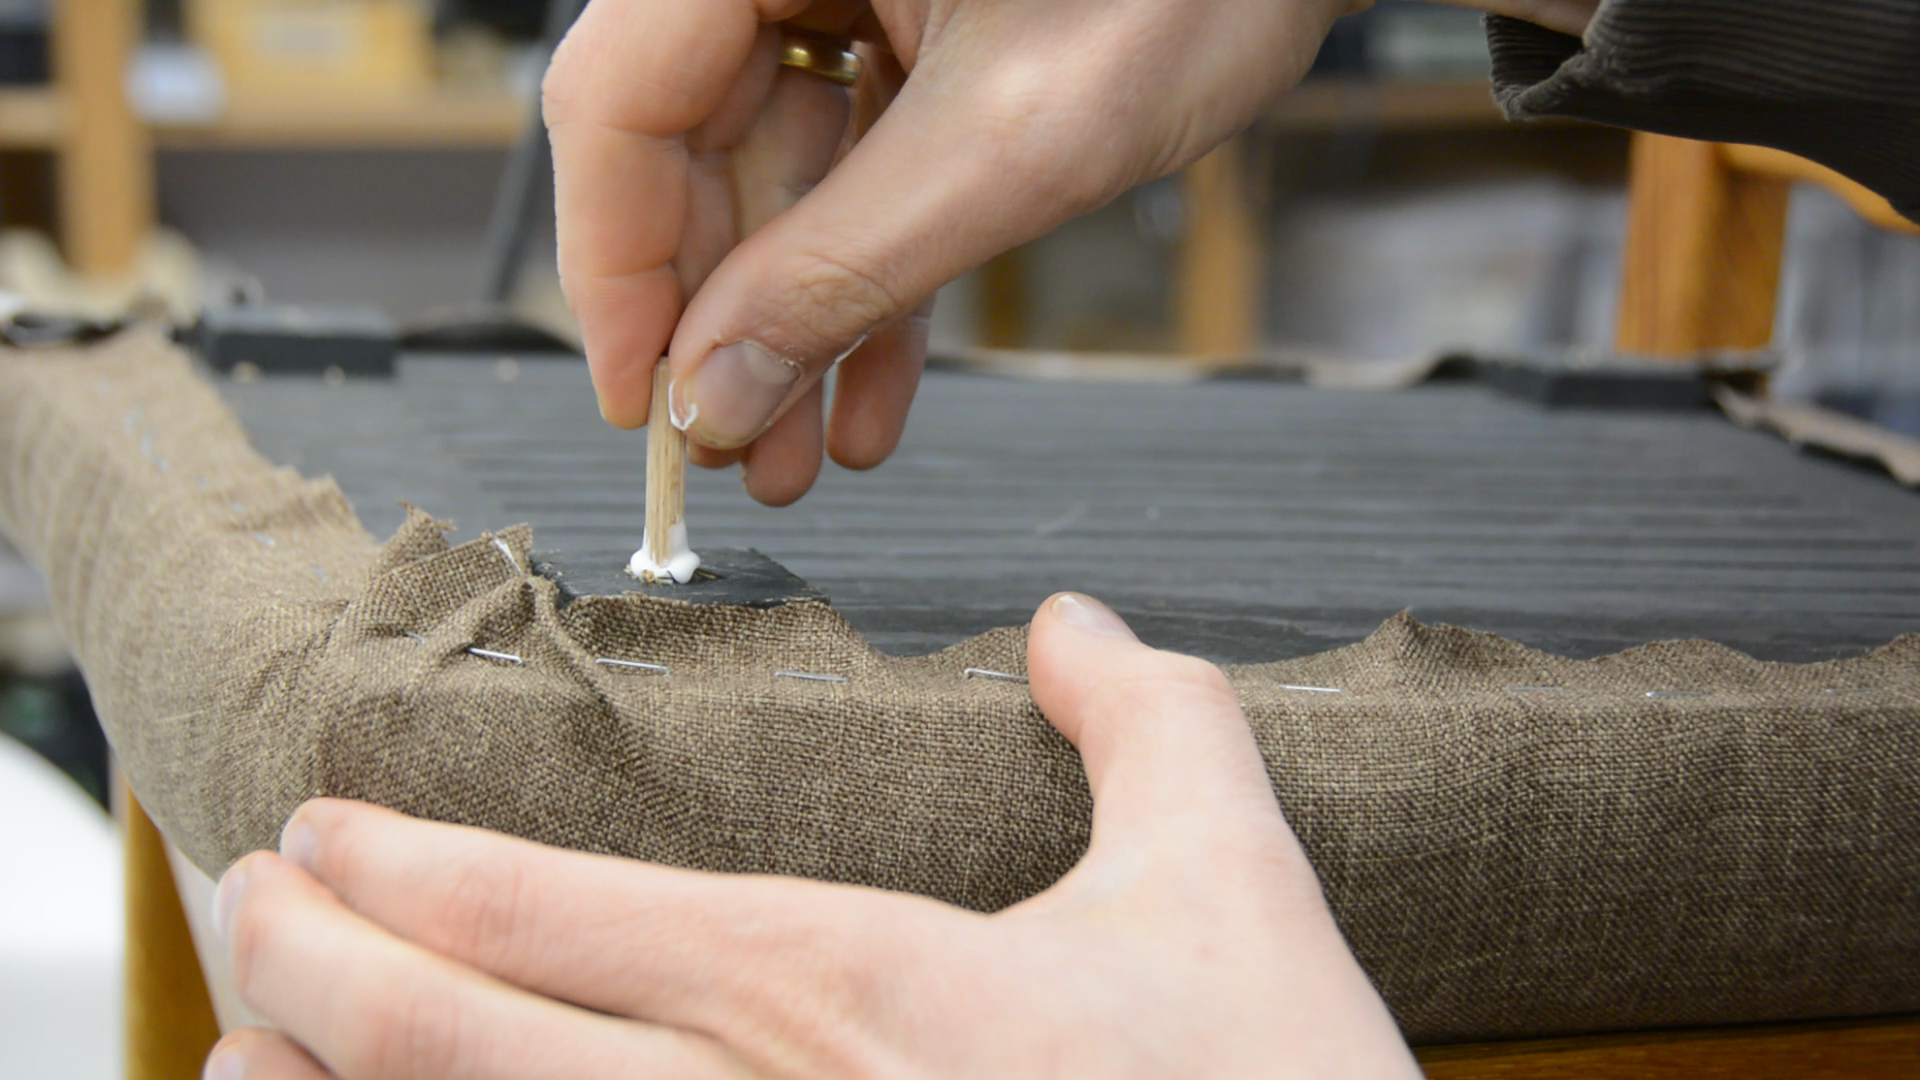
When I tried to reattach the seat I quickly realized that the screw holes are worn out. So I drill them out to 6 mm and glue in some dowels. This way the screws can securely hold the seat in place.

First chair restoration done … three more to go
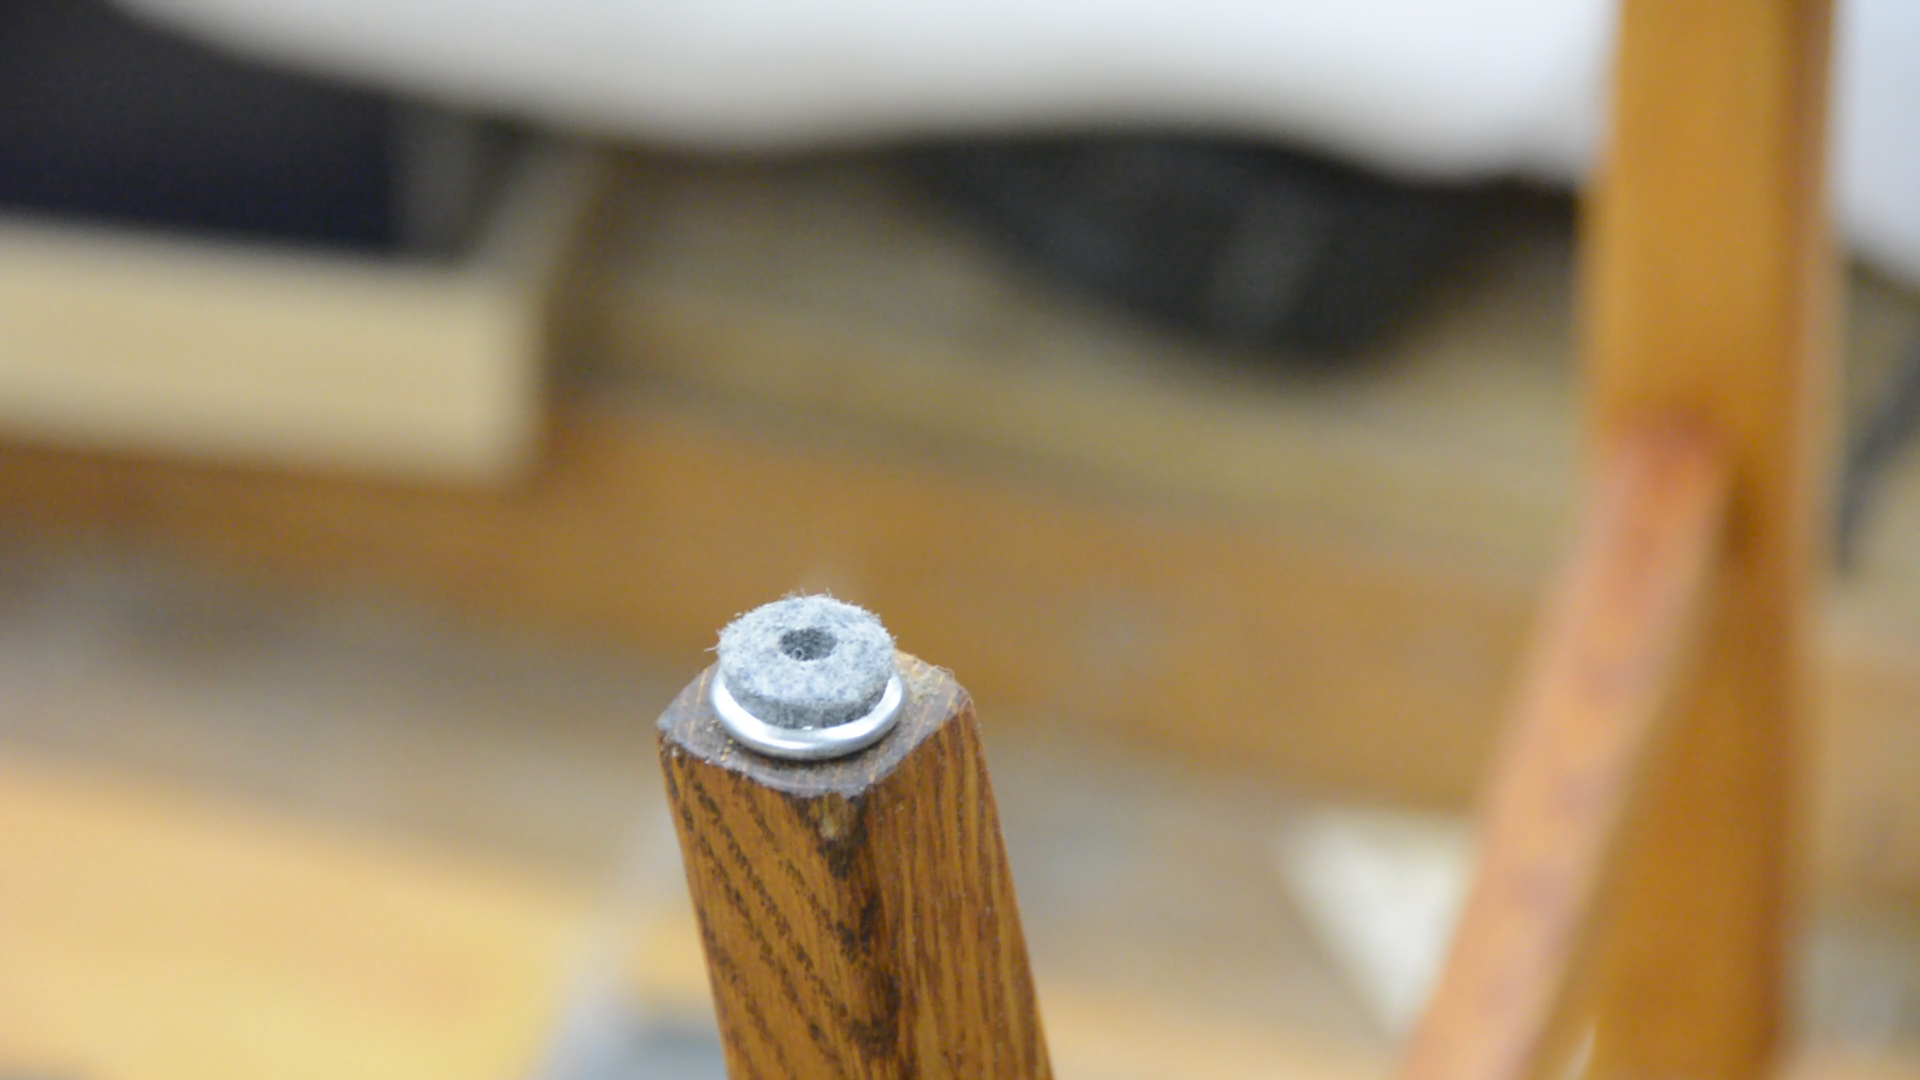
With a few felt bumpers screwed to the feet and a few screws to connect the seat with the chair and and this chair is done.
I‘m very happy with how the chairs turned out. The joints are stable, the new finish looks much better and the new upholstery is very comfortable.
Tools and Materials (affiliate)
- Festool Rotex 150 on amazon.de or amazon.com
- Festool Rotex 90 on amazon.de or amazon.com
- Card scraper set on amazon.de or amazon.com
- Clou Hard oil on amazon.de
- 60mm foam on amazon.de
- Upholstery Batting 300g/m2 on amazon.de
- Brown fabric on amazon.de
- Screw-on felt gliders on amazon.de or amazon.com
That makes sense that the screw holes could be a bit worn out after all that time. I have some old furniture that I think would be nice to have fixed up so it is going to last longer. I should consider having someone do things like redrill the holes for me since I don’t have the equipment to do that.
Buying a cheap drill might be less expensive than getting someone to drill the holes.
Reupholstering and refinishing chairs can seem like a daunting task for someone who is not familiar with the process. But with a few simple steps, you can easily transform an old, outdated chair into something that looks like it just came from the store. The first step is to remove the old fabric from the chair. This can be done by carefully cutting away the fabric with a pair of scissors, being careful not to damage the foam and other materials underneath. Once the fabric is removed, it is time to assess the condition of the chair and make any necessary repairs. This could involve replacing the foam, re-webbing the springs, or gluing on new armrests or legs.