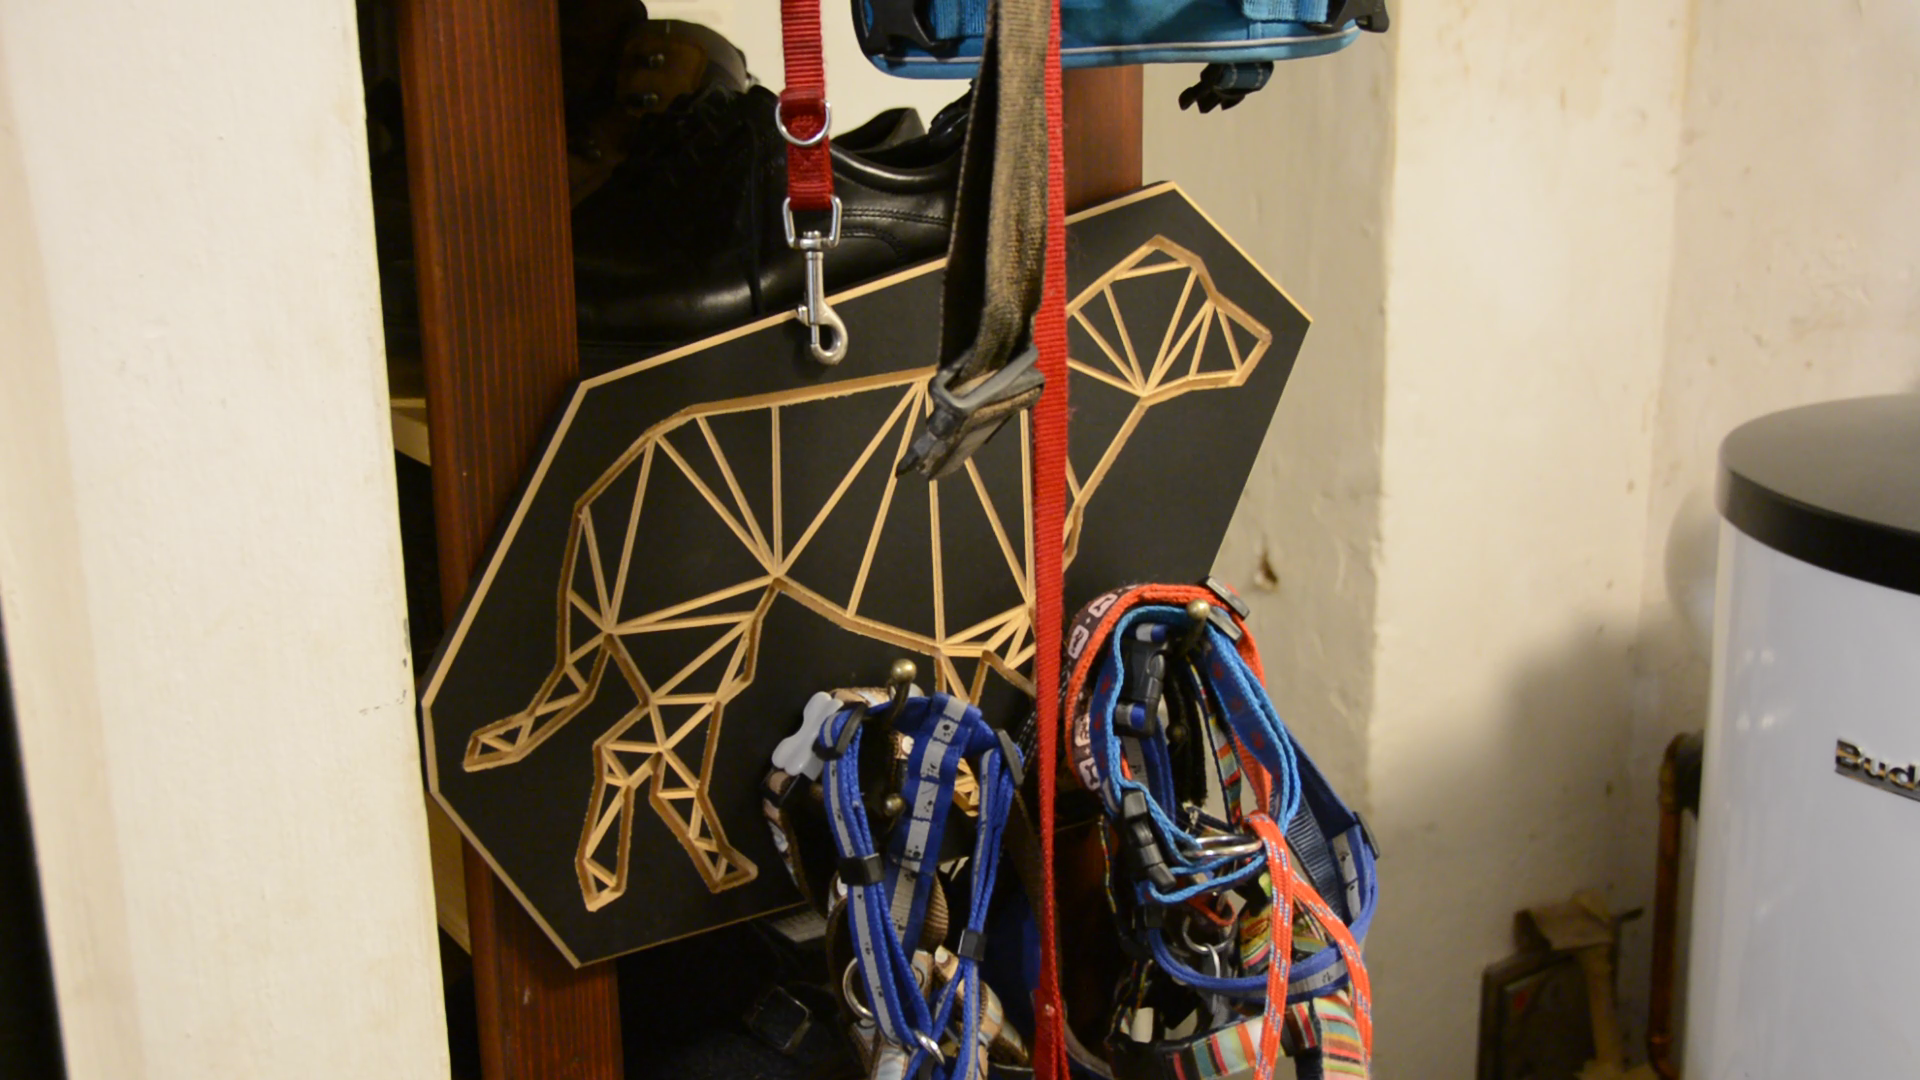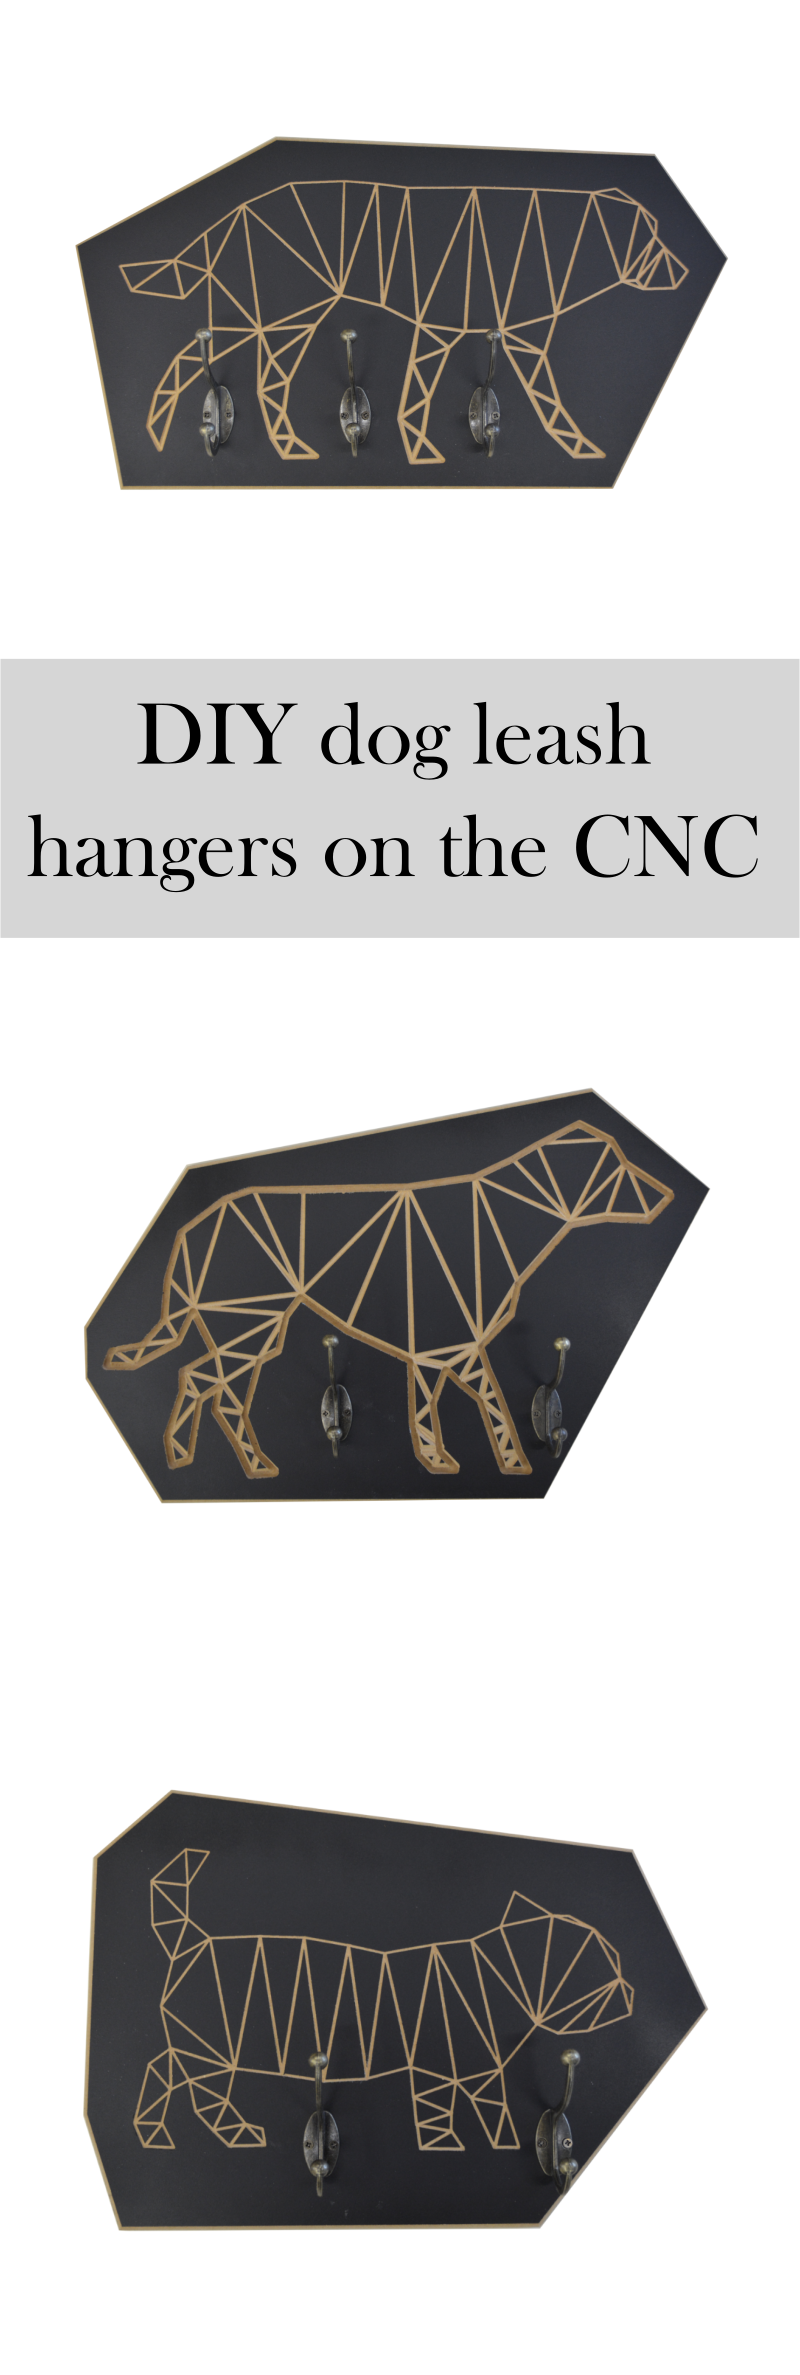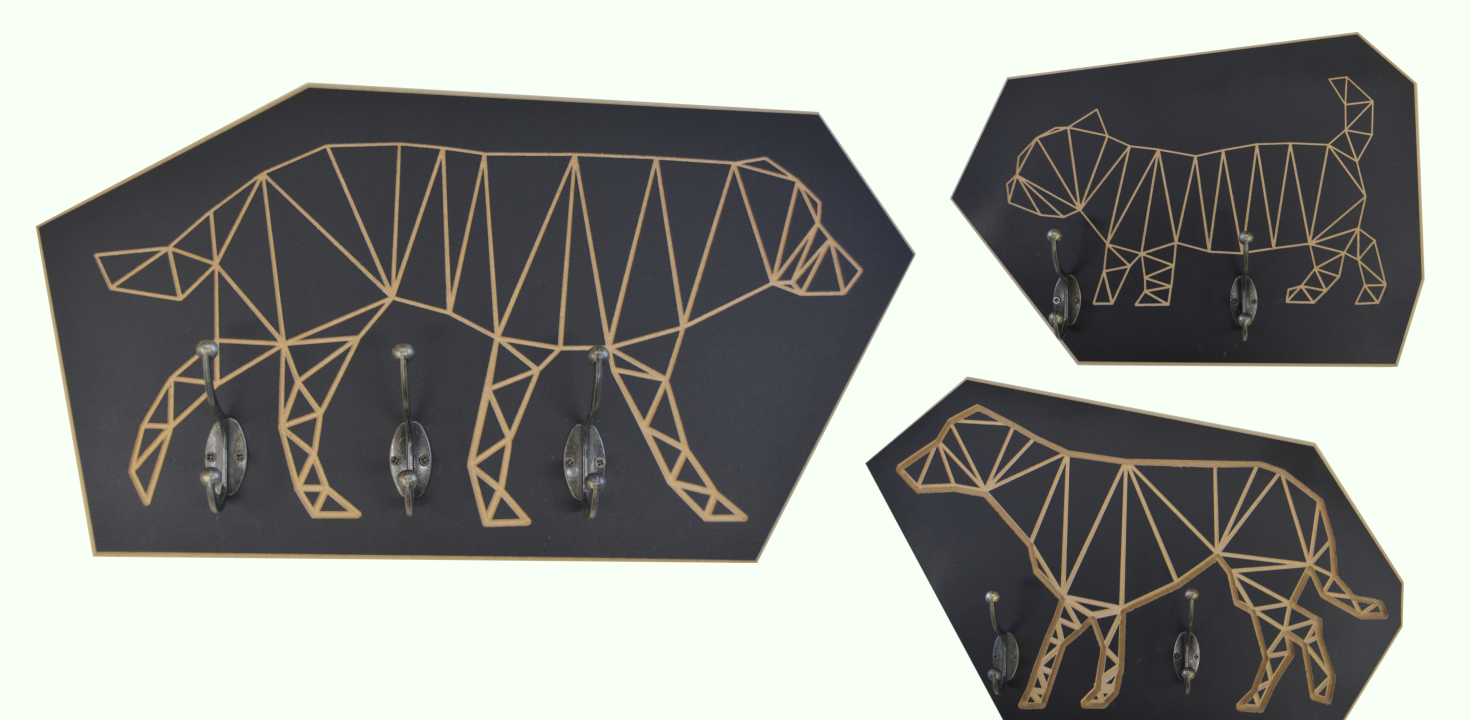
In this article we will build 3 coat hooks or dog leash hangers that display our 3 dogs and organize their stuff.
As a close family member passed away we recently got two additional dogs. In total we have now three dogs which leads to clutter and chaos with all the dog leashes, collars and other stuff. My idea was to design three small hangers with an abstract picture of each of the three dogs. So the first challenge was to take a picture from each dog. It took me some time and help from the kids in order to get a decent shot from each dog from the side.
Creating the pattern
I bring these pictures into Inkscape which is a free alternative to Illustrator. Here I place the image on its own layer and disable editing so that I can’t move the original bitmap.

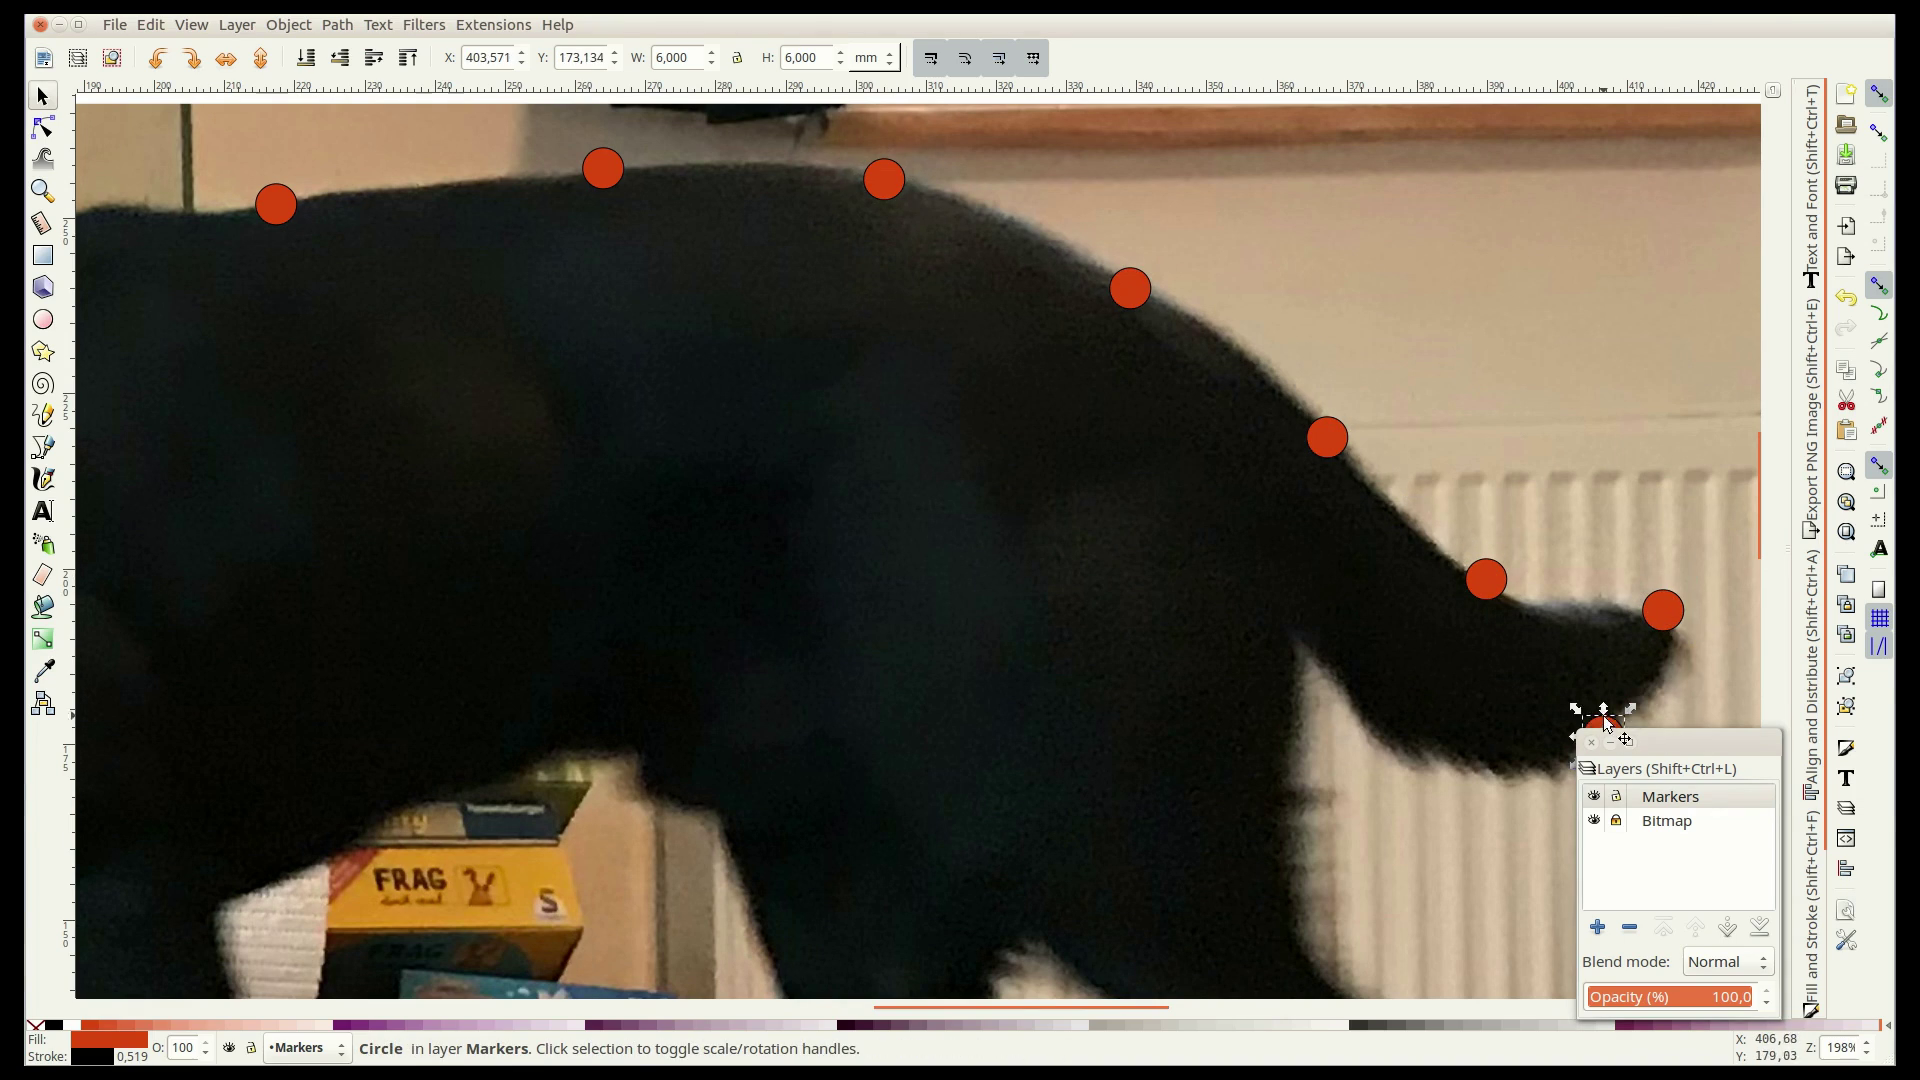
On a second layer I place dots around the outline of the dog. I just make sure to put a dot on each corner and put some more dots in the areas with a lot of detail such as the head.
On another layer I trace the outline by connecting the centers of the circles. This step is only necessary if you want to cut the outline. As we will see later in my case I could have skipped this step.
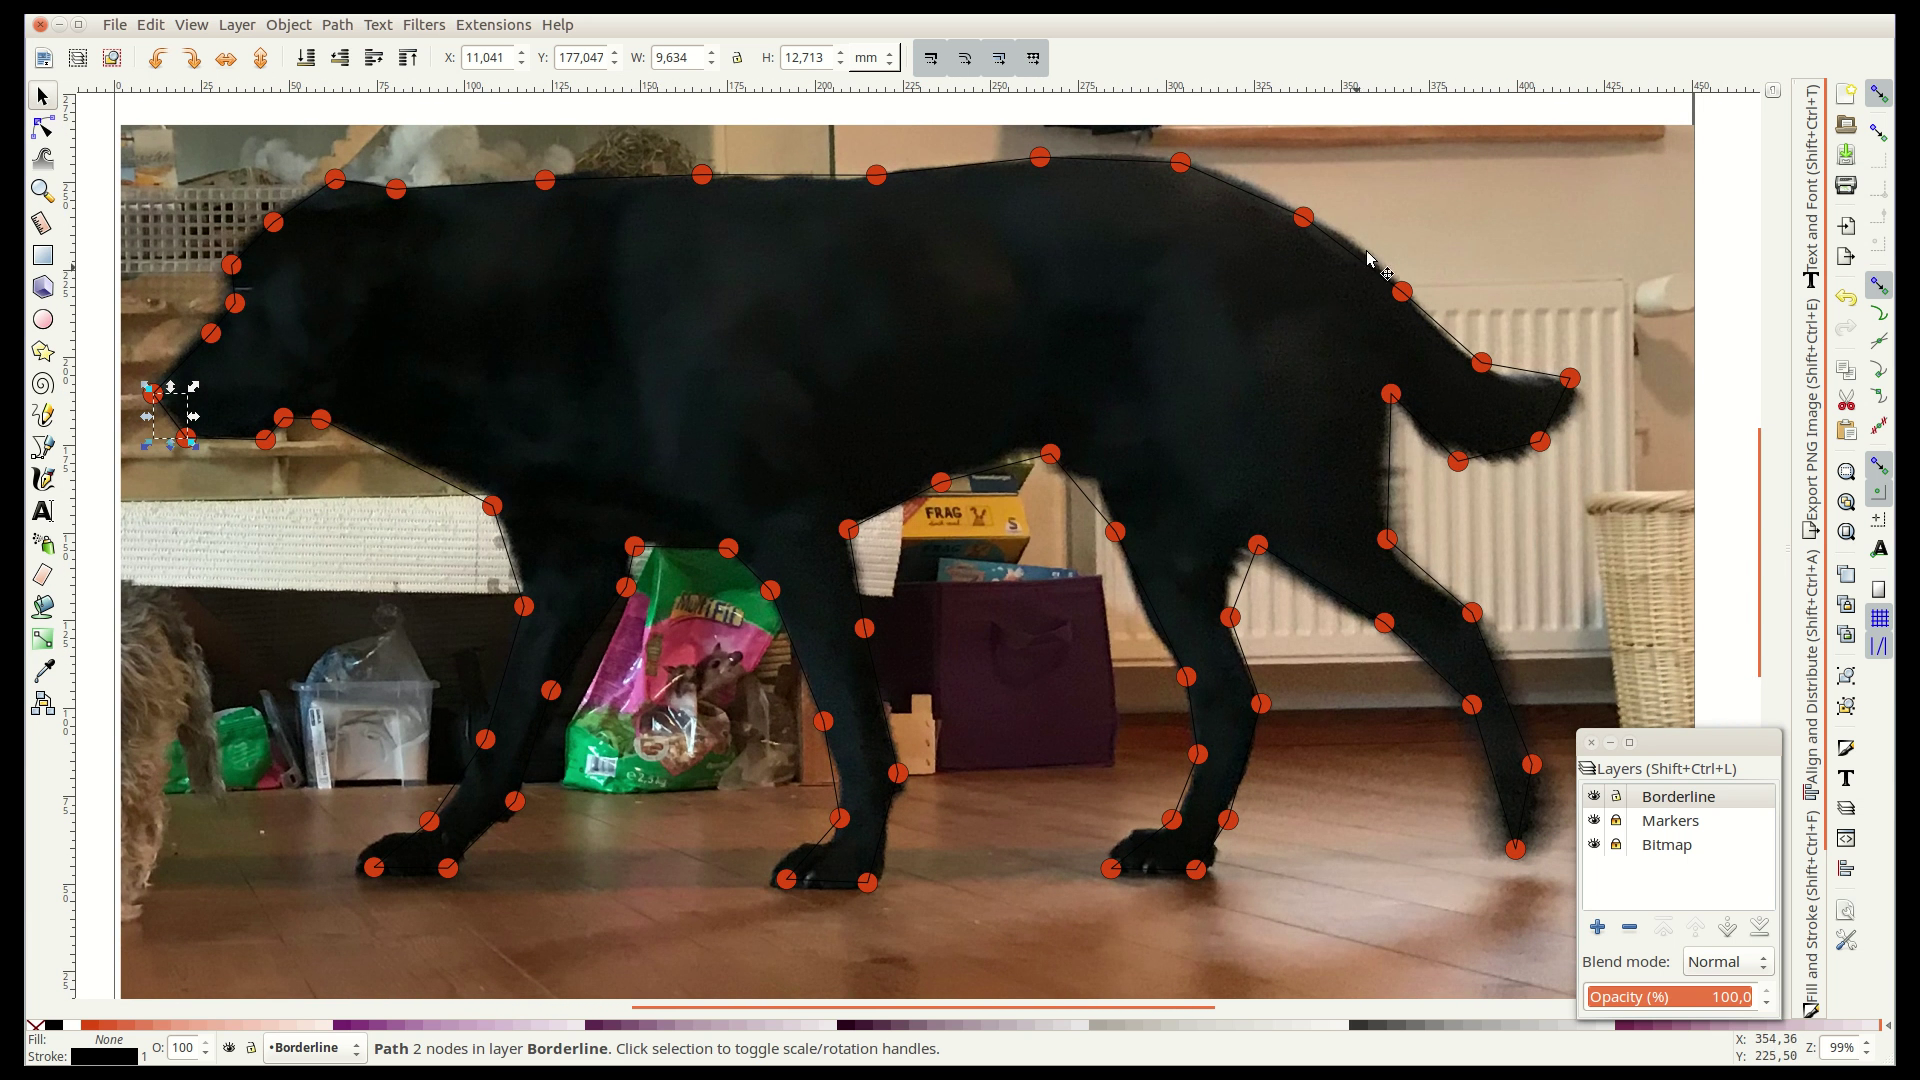
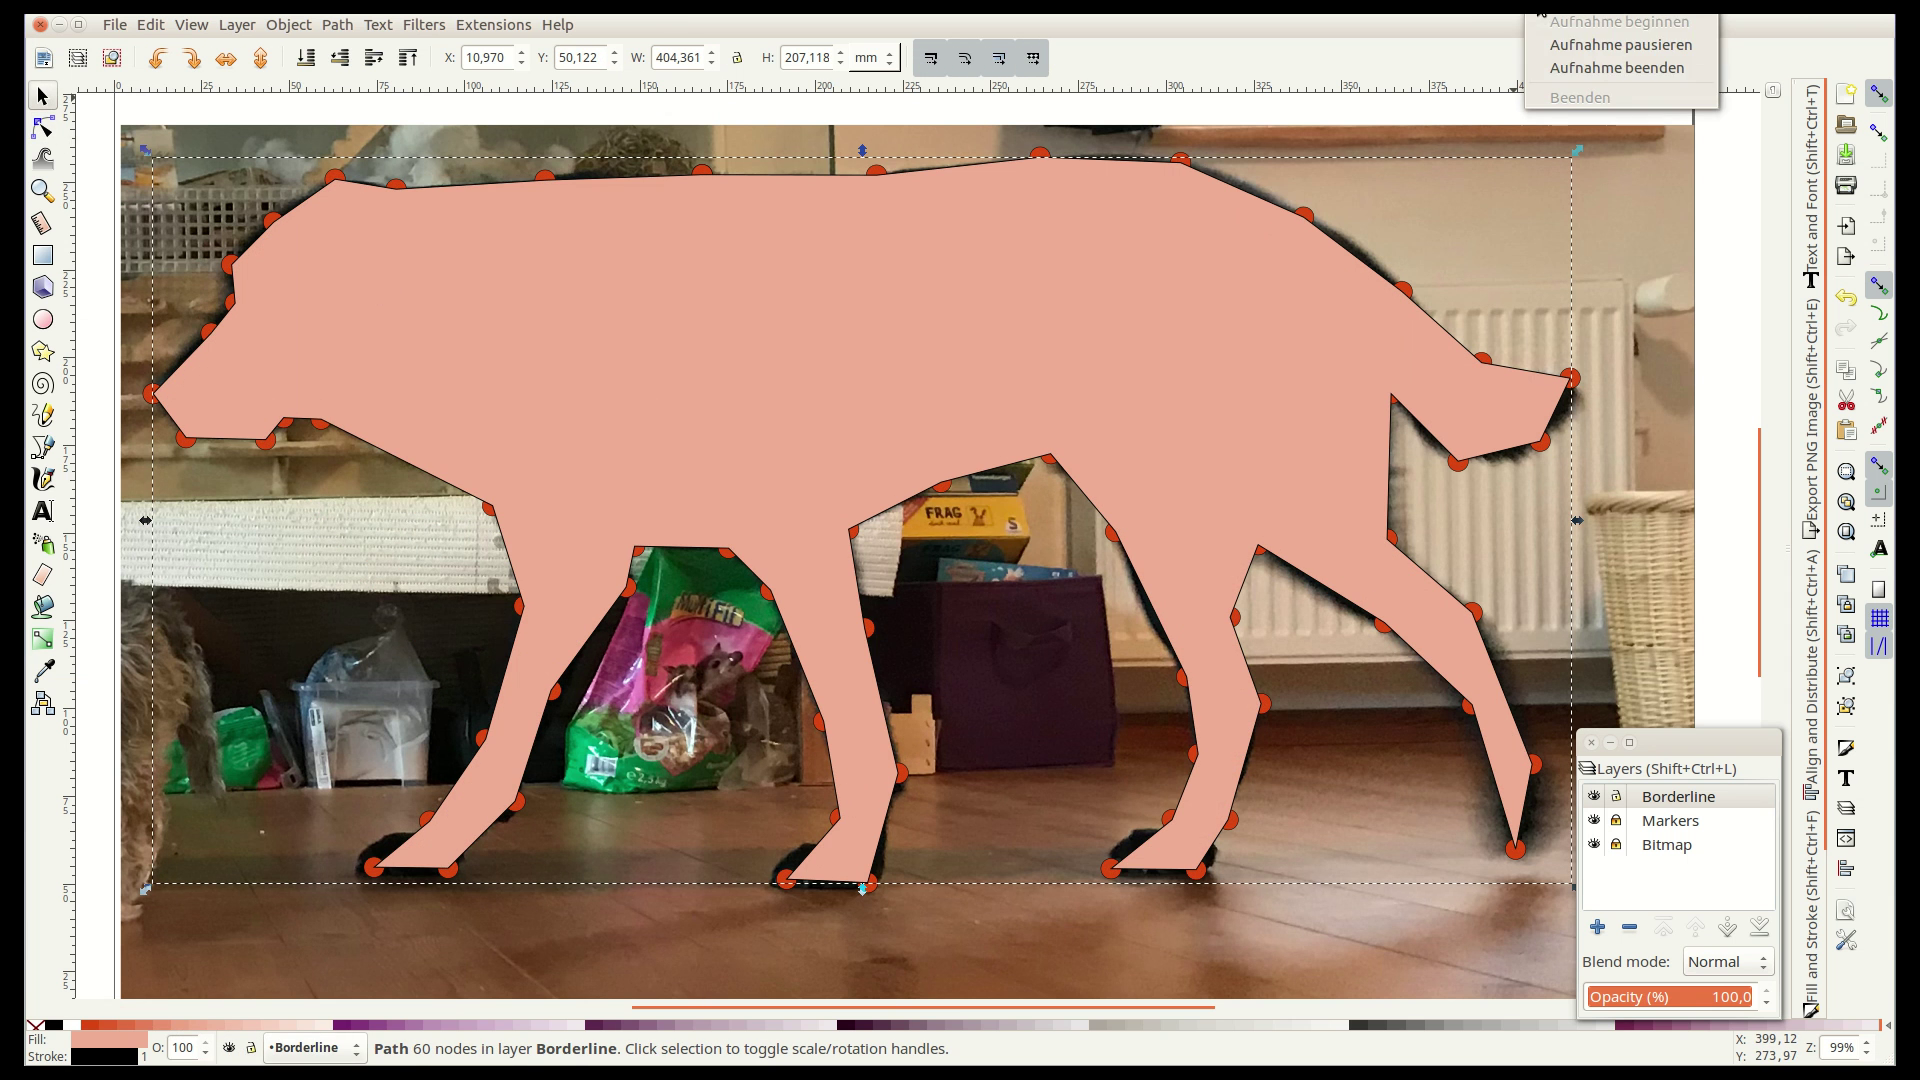
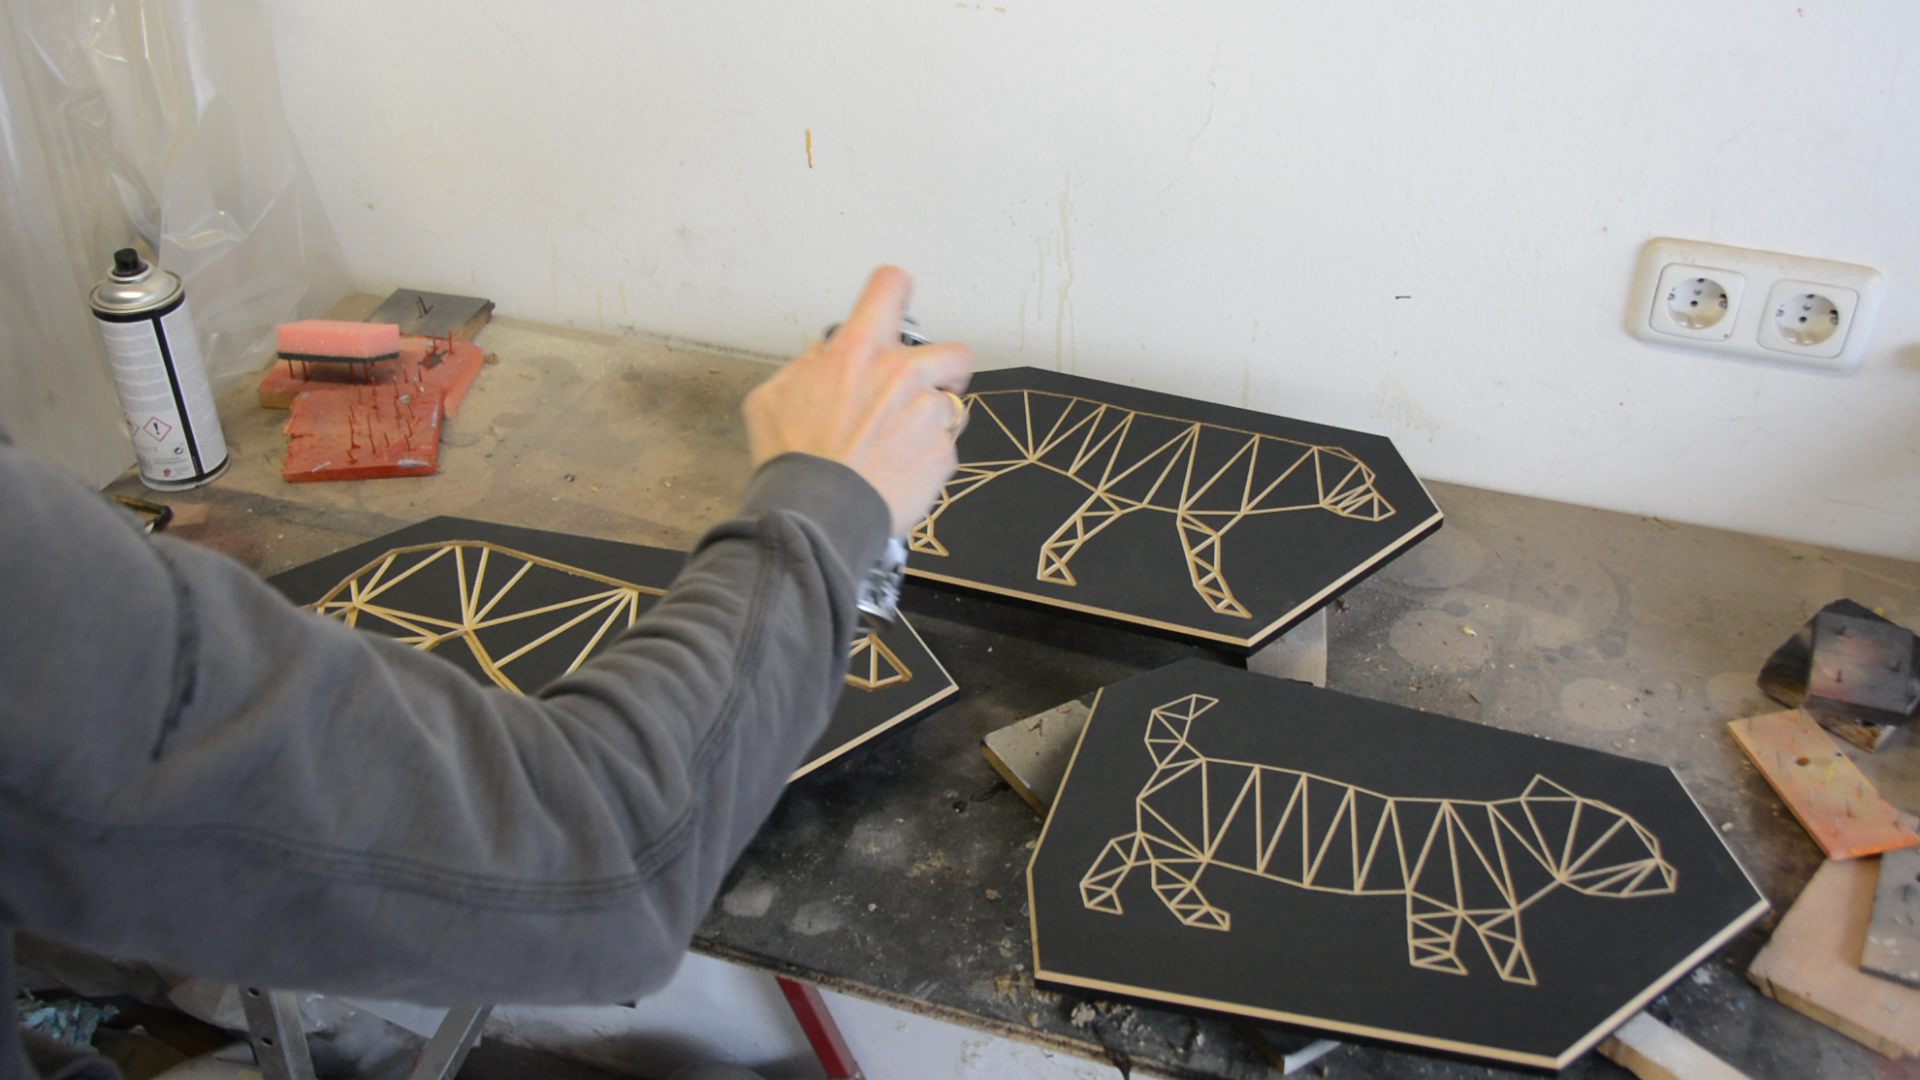
With the Voroni Diagram tool from the extensions menu I create a Delauny triangulation resulting in low poly triangle shape between the dots. I create these one section at a time and remove the excess. Most likely there is a more efficient way to create this grid. If you know how please let me know in the comments.

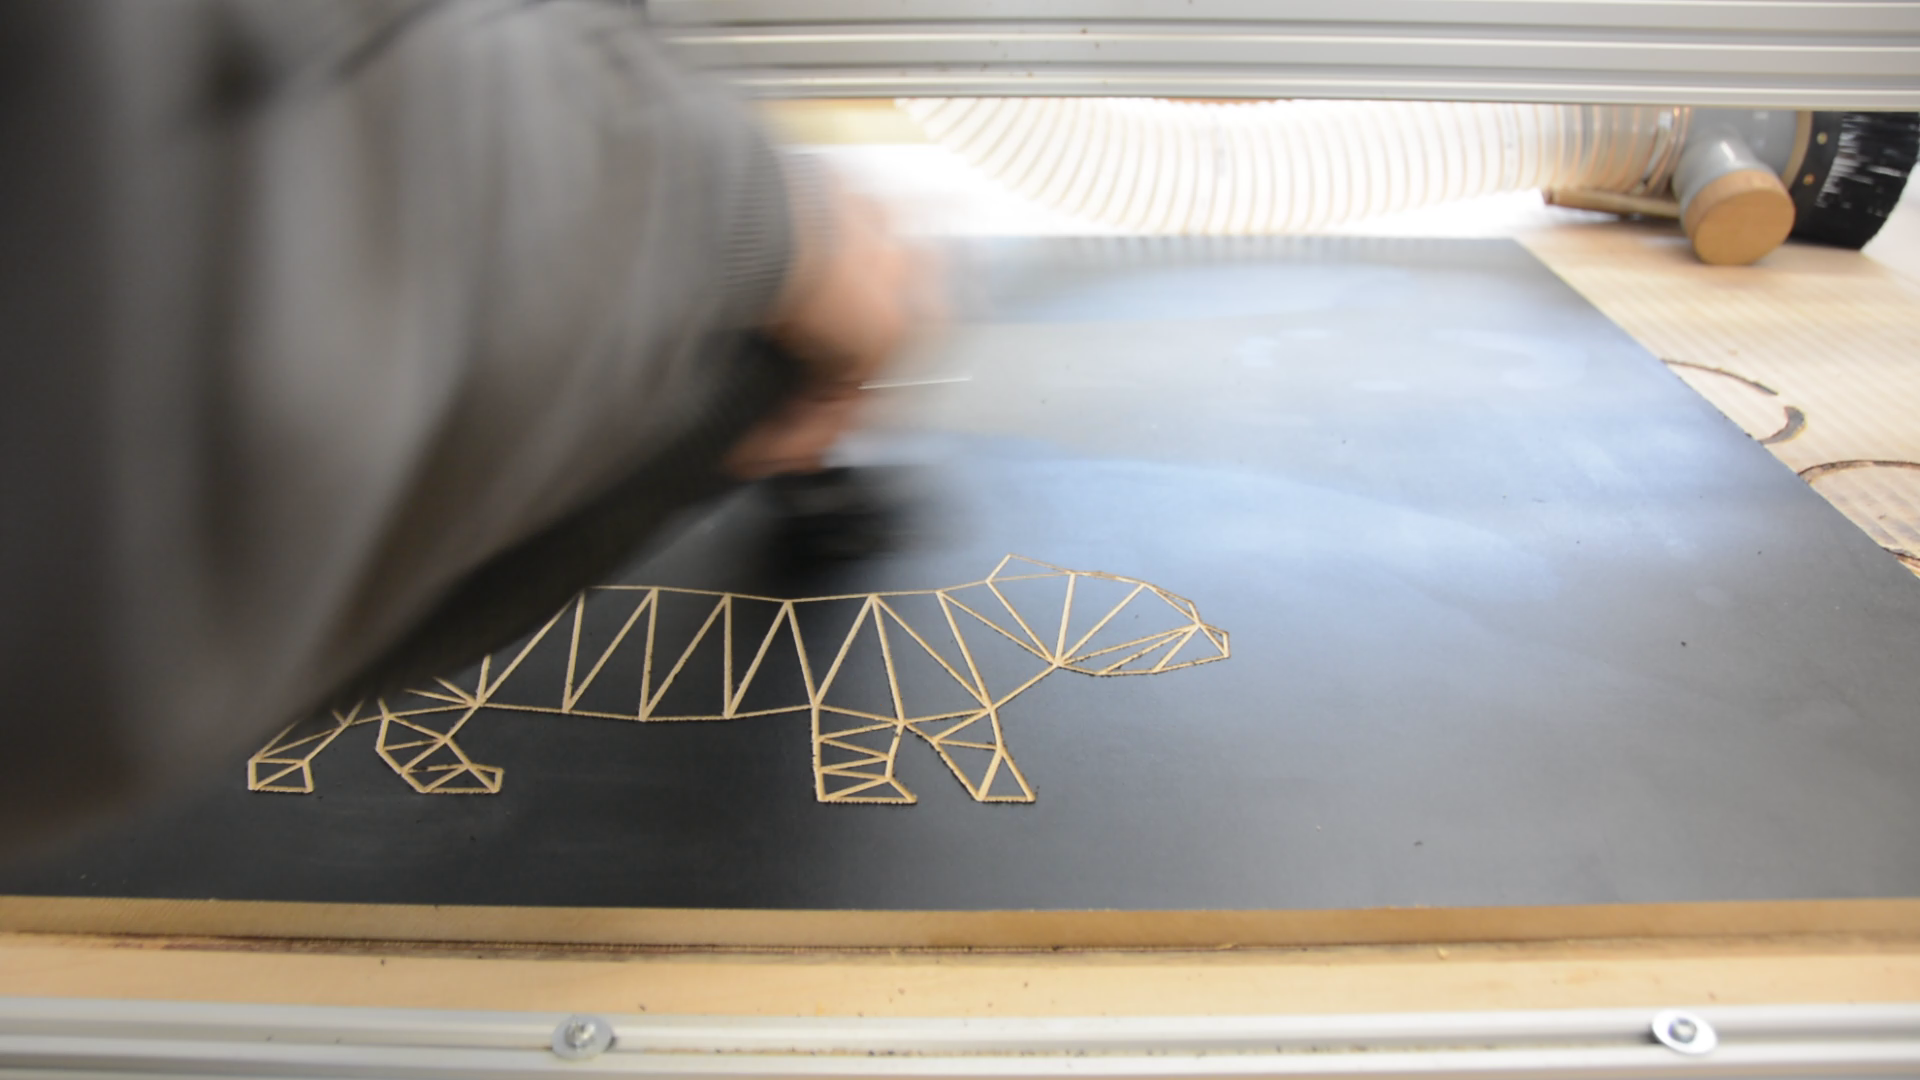
Engraving on the CNC
Using the build-in CNC addon from Inkscape I export the shape directly to a gcode file. Before routing the pattern in a MDF piece I first apply two coats of black paint to the MDF, and let the paint fully dry.

On the CNC I follow the triangular pattern with a V-Bit. For the first dog I started cutting the outline with a straight bit. However given how thin the legs I was worried that they might break, changed my design, and stopped cutting the outline.
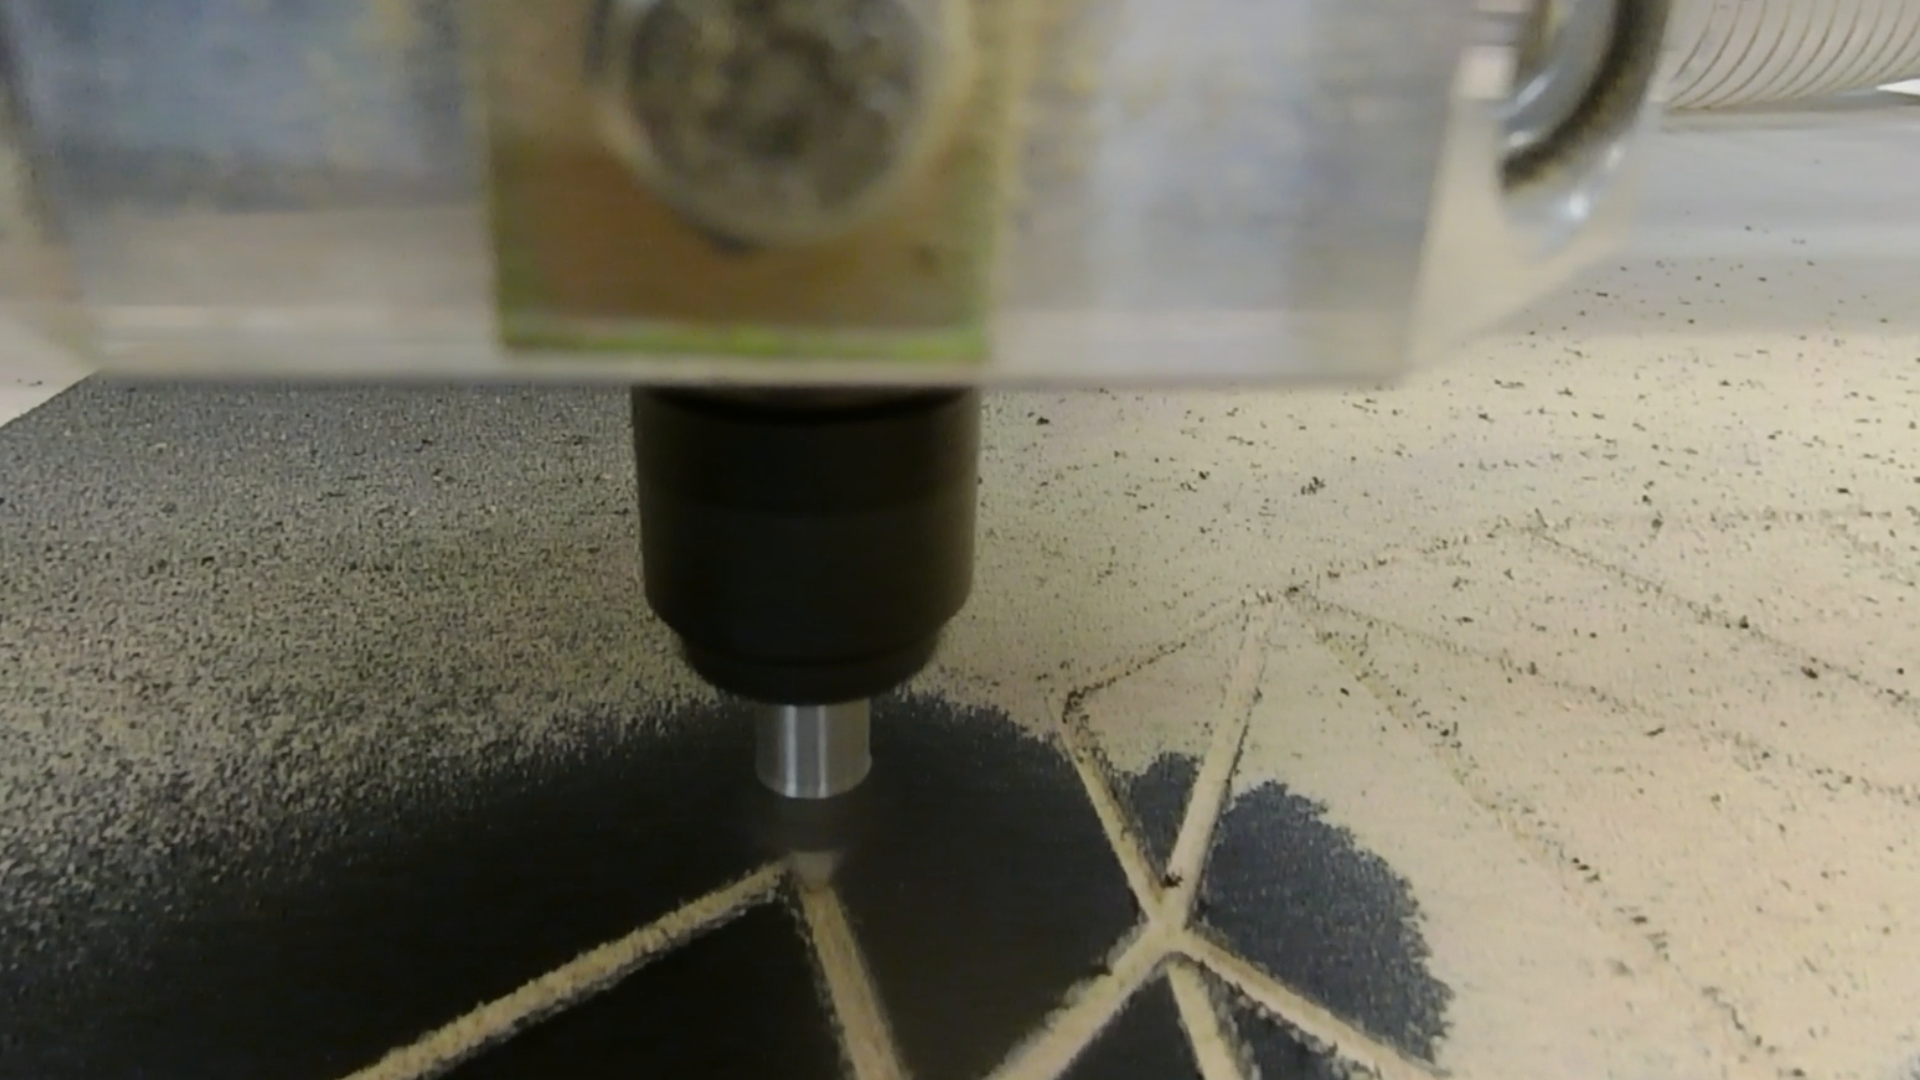

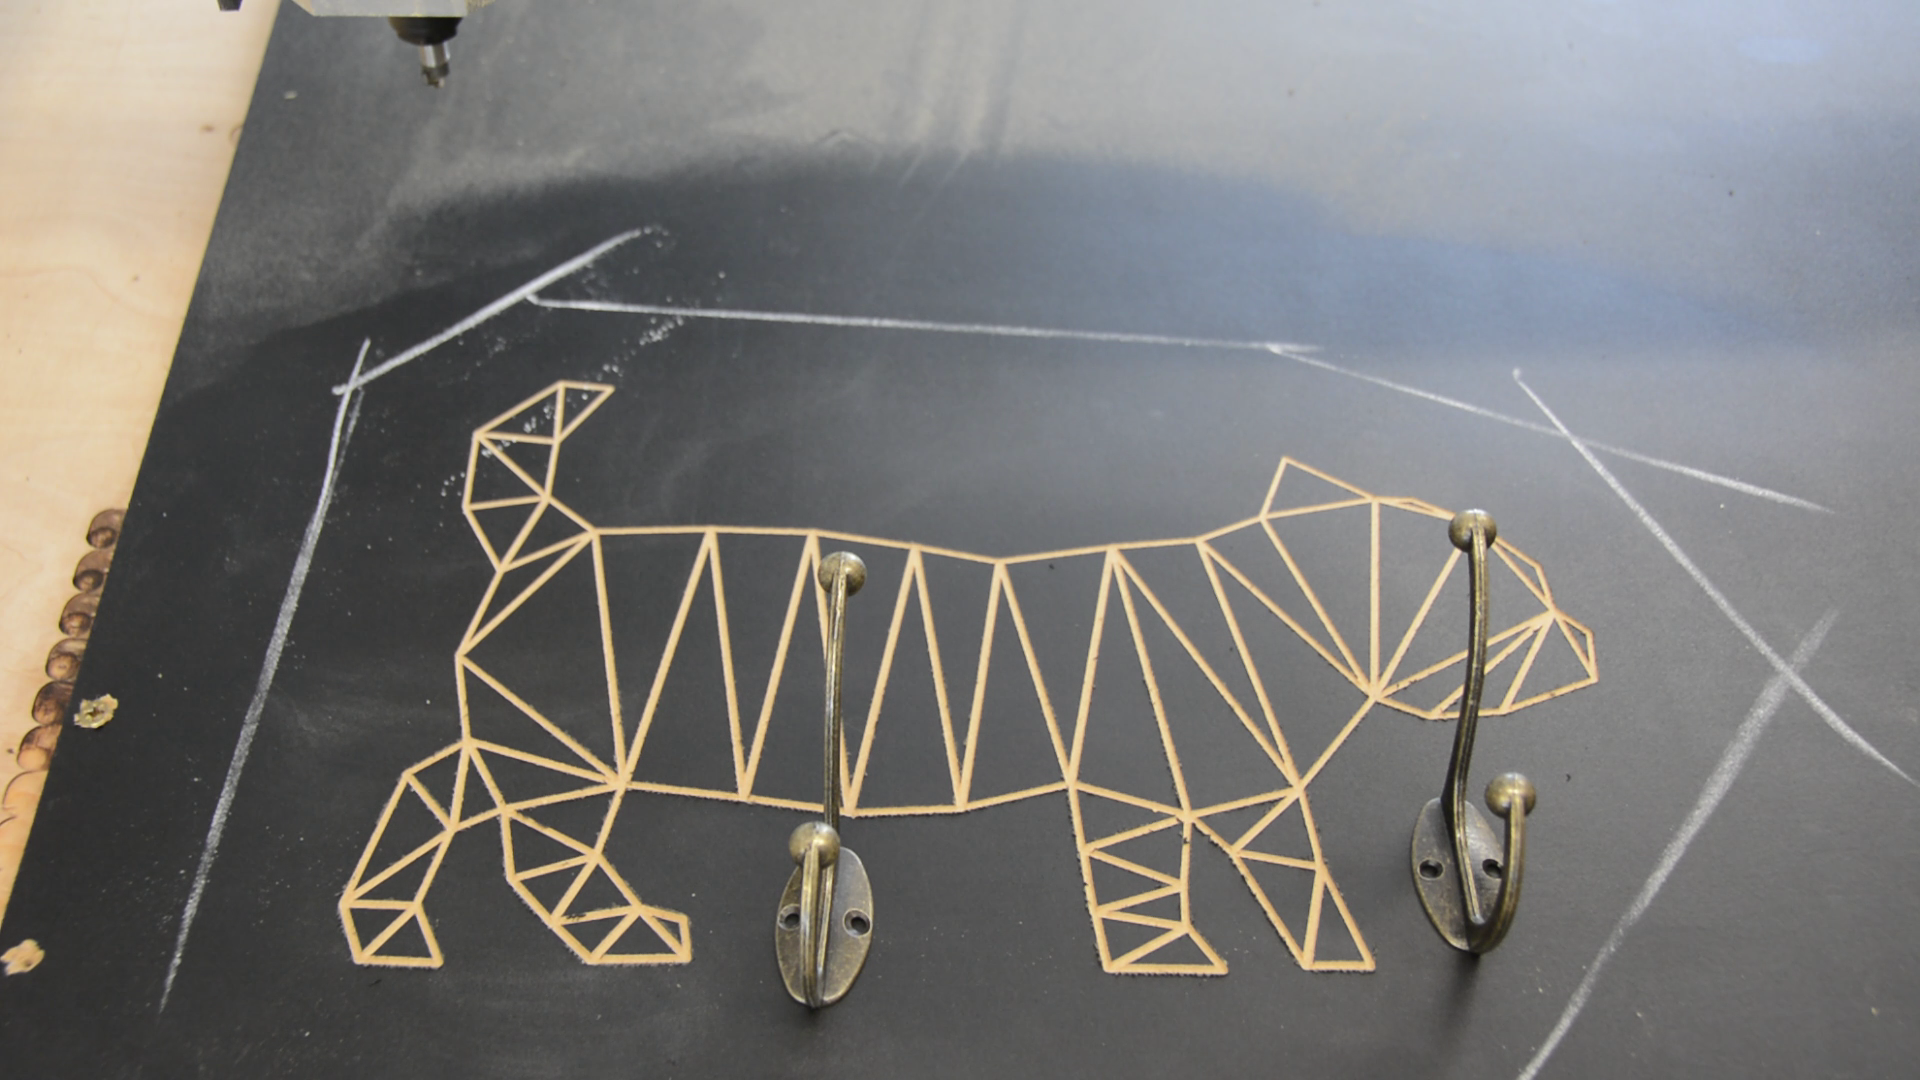
For the other two dogs I only engraved the pattern and ignored the outline. You can clearly see that my CNC bed is not perfectly level as the thickness of the lines is changing quite a bit but in this case this really doesn’t matter.

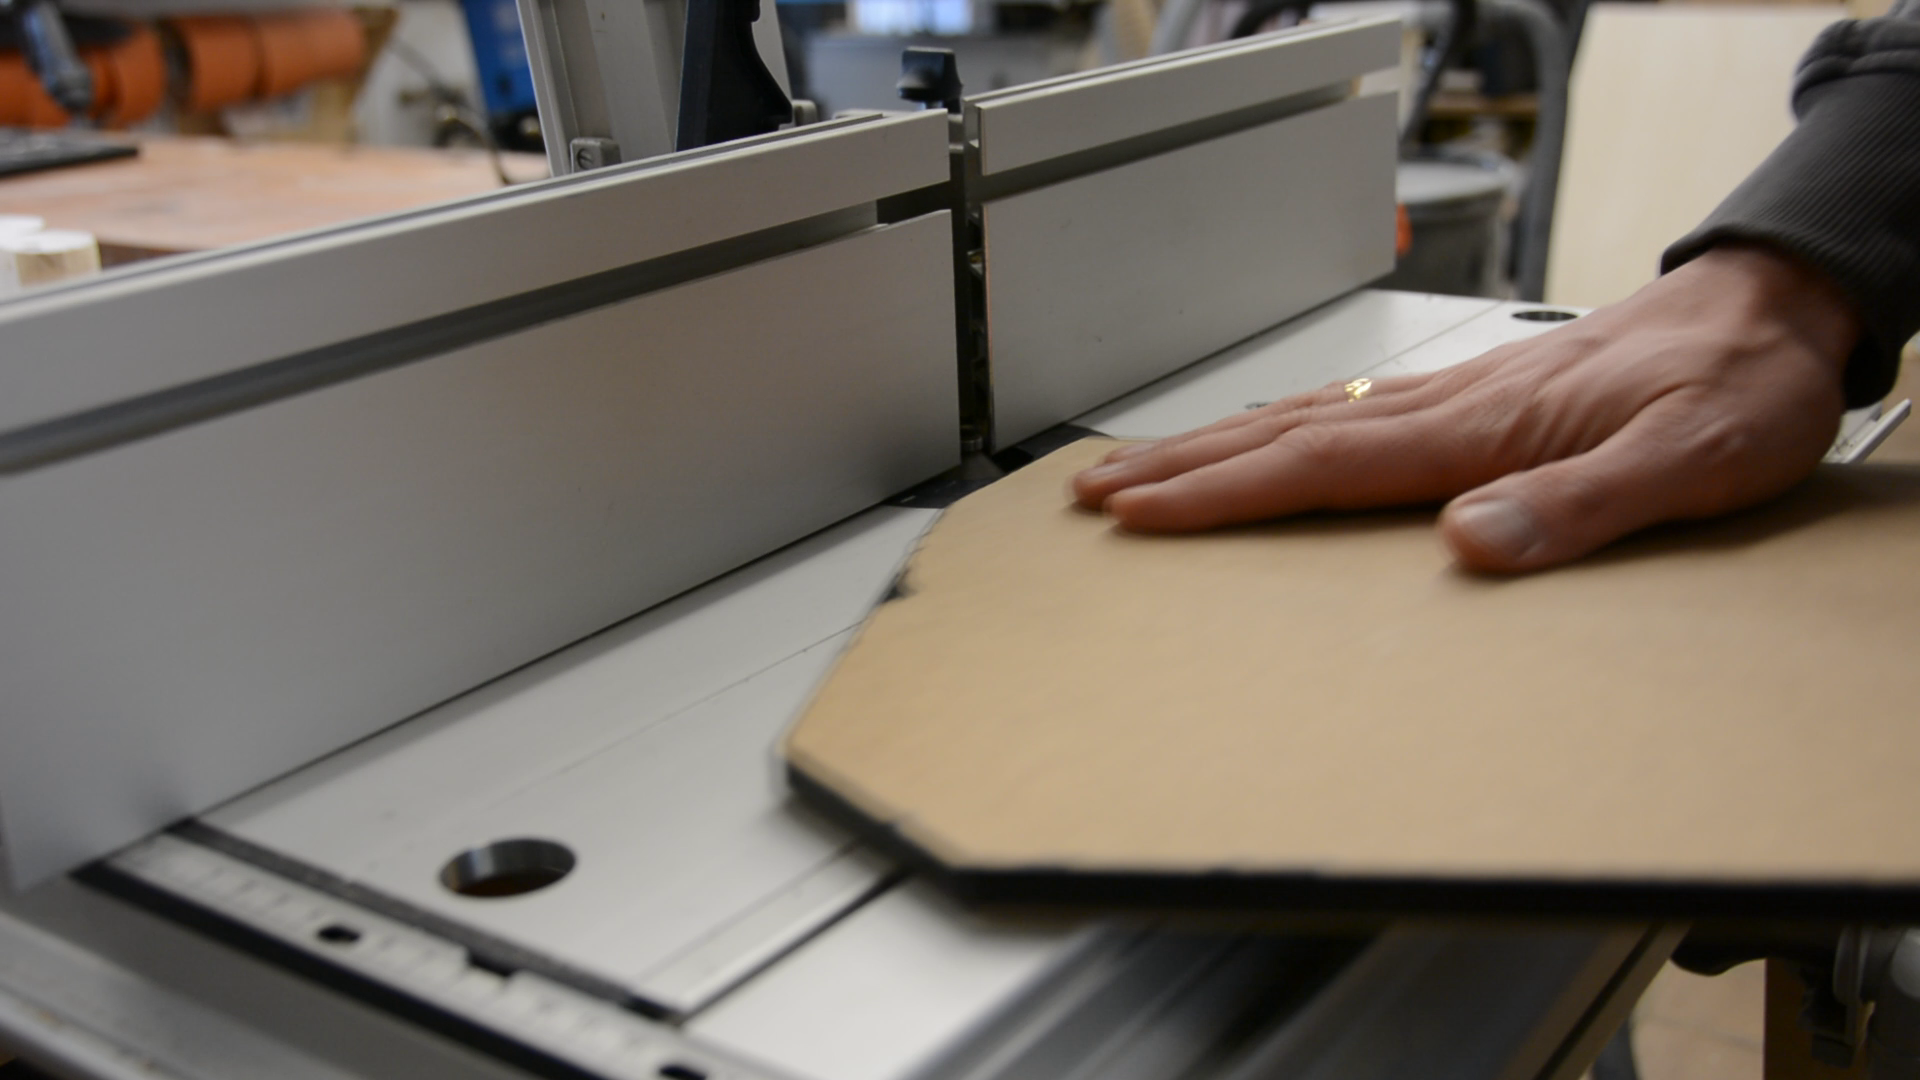
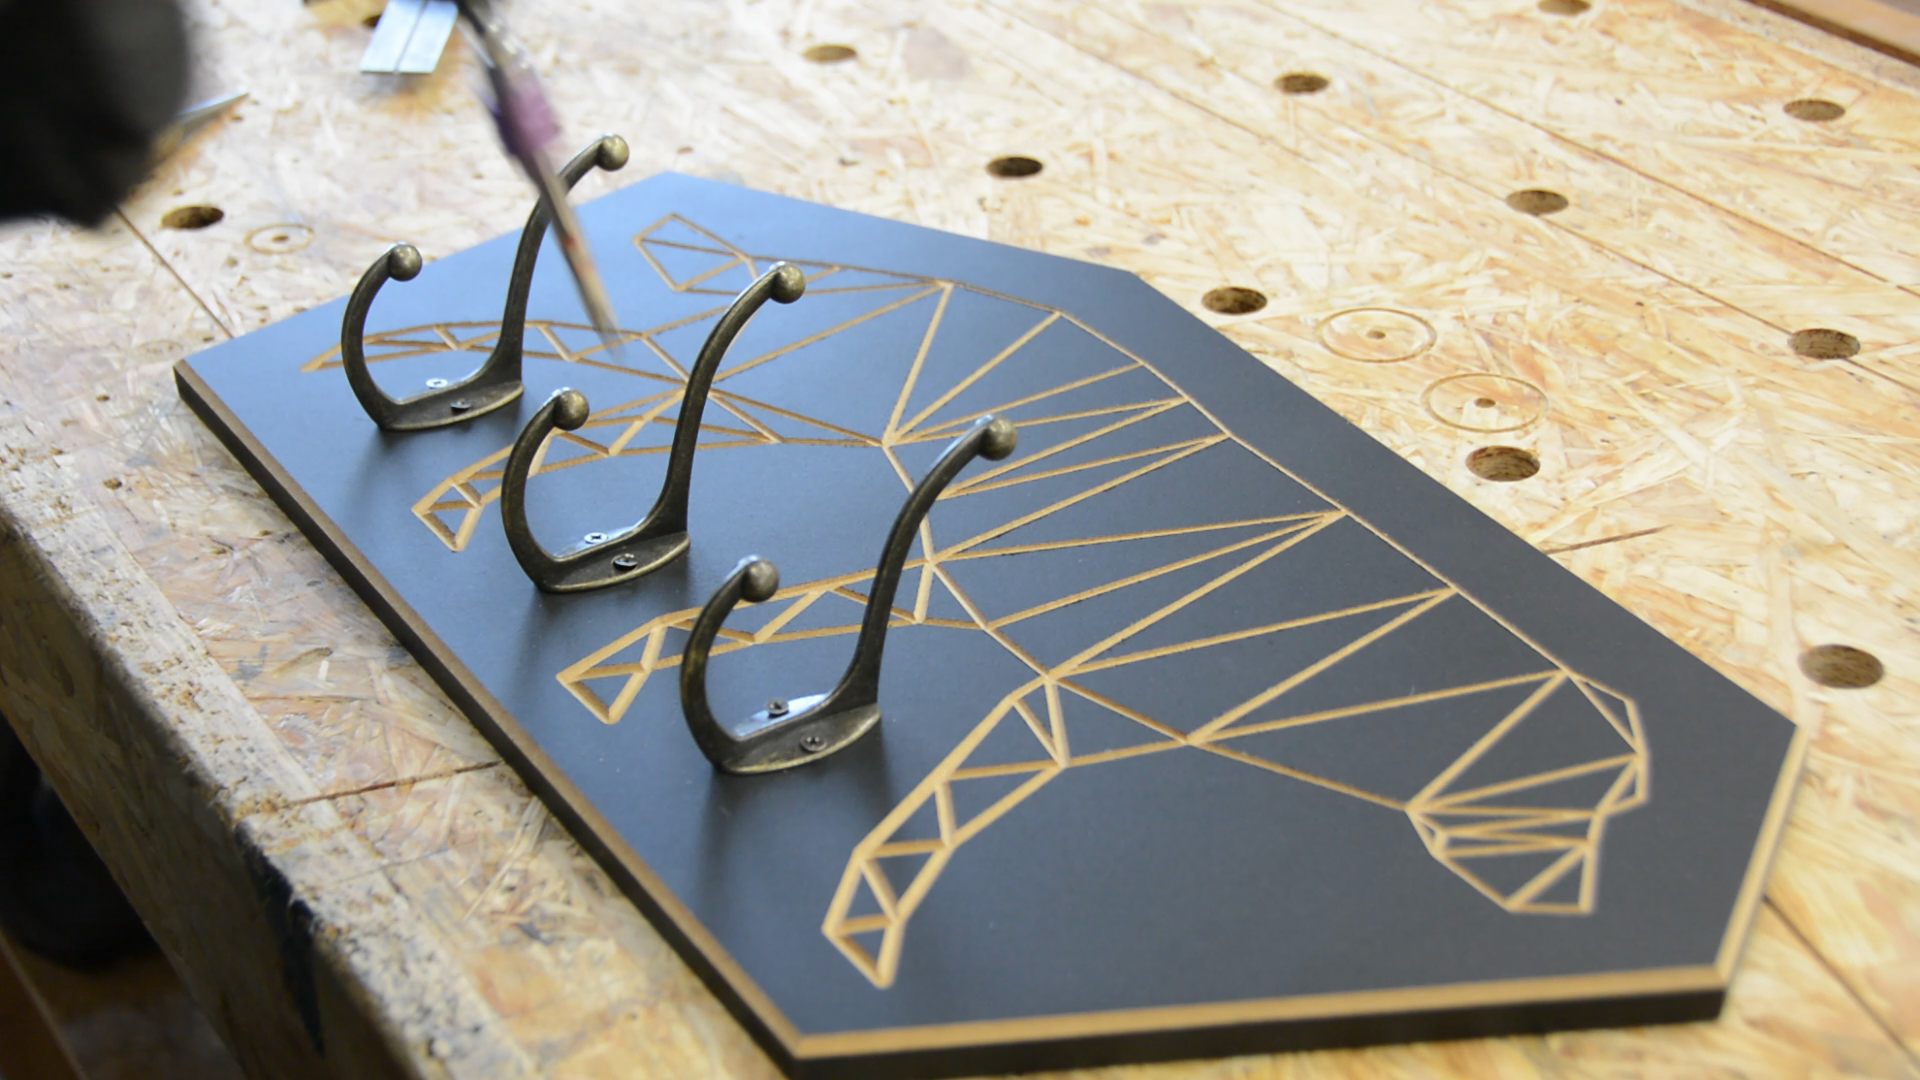
To give the MDF a more interesting shape I temporarily placed the hooks for the wardrobe on the dog. With ruler I draw a polygon around the engraved dog always keeping a certain distance from the dog shape. I use my table saw and the mitre saw to cut the polygon following my chalk lines.
Finishing and installation
The MDF outline is now sanded and get two coats of black paint. Once the black paint is dry to the touch I use a chamfer bit to give the outline a look similar to the carving.

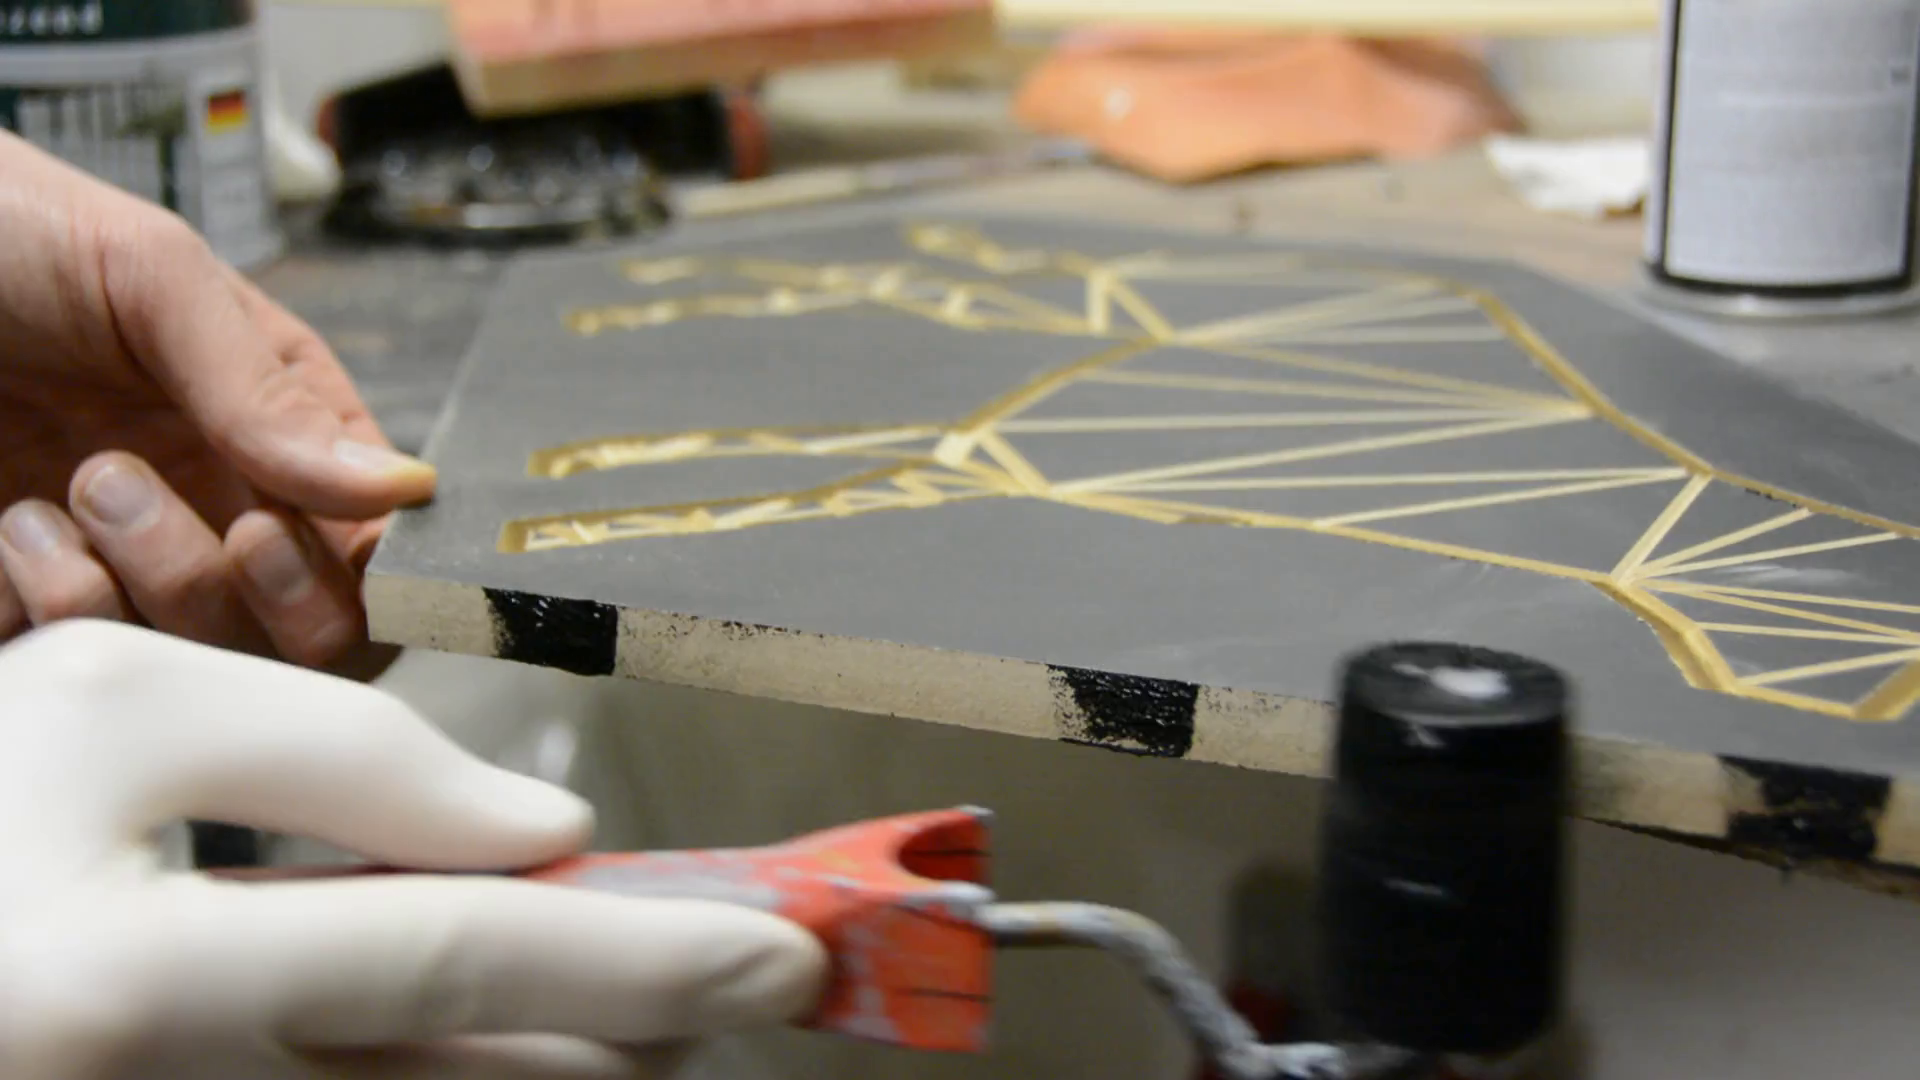
After thoroughly removing all the dust I apply a few coats of clear varnish, and attach the hooks.
These dogs go on the side of the storage shelf I’ve describe in another article.